


On This Page: [hide]
Most of the hosting providers, offer a plan named “Shared Hosting“. This hosting plan offers a server, which is used by multiple users to host their websites. It is usually very affordable and preferred by many users. You can install WordPress on shared hosting in multiple ways, such as:
- Installing WordPress from cPanel
- Installing WordPress with the Softaculous App
- QuickInstall
- Fantastico
- And last but not least with FTP.
Let us guide you through the different methods that you can use to install your WordPress website on Shared Hosting.
Installing WordPress on Shared Hosting With Softaculous
Softaculous is a very popular auto-installer, that is used for installing popular applications such as WordPress. It is offered by famous hosting companies such as InMotion Hosting and Siteground, and you can install WordPress with it very easily.
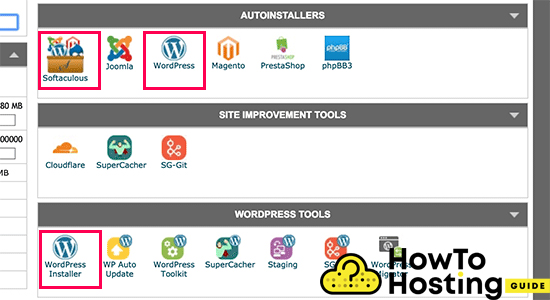
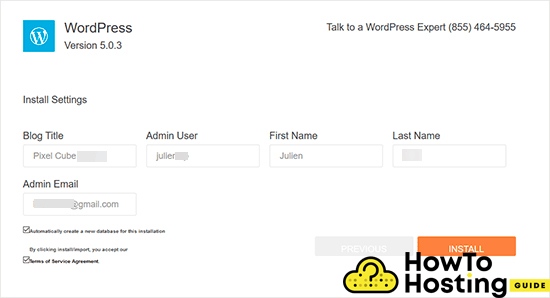
All you have to do is to log in your cPanel account. Find the Softaculous app or the WordPress installer Icon. Click on the icon, and launch the Softaculous auto-installer for WordPress. You will see an overview of WordPress and you will be asked for some details such as Site name, Site description, Admin account, and Password.
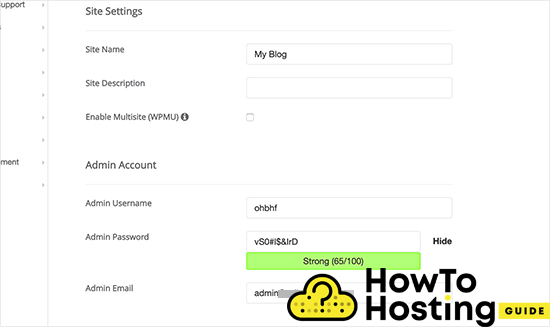
Once you are ready click on the Install button on the bottom of the page. When the progress bar hits 100% you will see a success message and you can log into YourDomain.com/wp-admin and start building your WordPress website.
Installing WordPress With Quickinstall
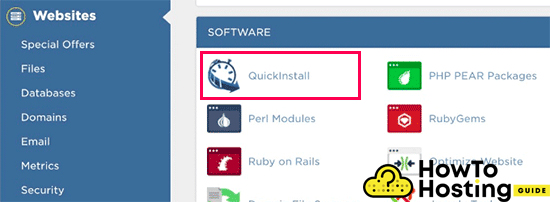
QuickInstall is yet another very popular auto-installer that is used and offered by many hosting companies. For the purpose of our tutorial, we are using the QuickInstall option of Hostgator’s cPanel. But it is the same with every other hosting provider.
The first thing that you have to do is to log into your cPanel and scroll down until you find the Sofware section and click on the QuickInstall icon.
This will take you to another page, where you will see one-click installers, where you can spot the WordPress icon. Just click on that icon and then click the “Install WordPress” button.
You will be asked for some information regarding your blog title and admin details, fill them and click on the Install button.
Once the installation is completed you will see a success message and you can click on the “Login button” to log into your website.
Installing WordPress using Fantastico
Fantastico is another auto-installer that is used by some WordPress hosting providers, it is very similar to the other installers and it also offers an easy way to install WordPress.
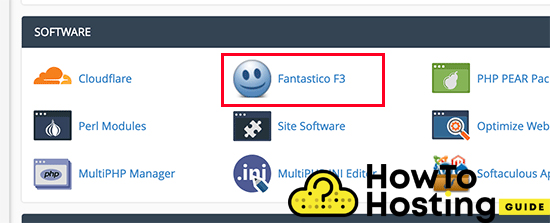
You should first login to your cPanel dashboard and from the Software, section find and click on the Fantastico icon.
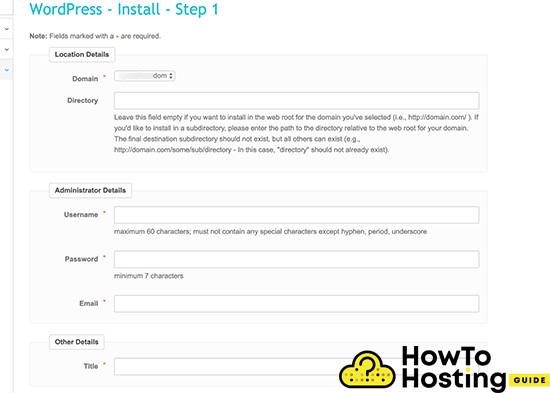
Then scroll down among all of the applications that you will see, find the WordPress, and click on the “Install Button“.
It will again ask you for some details such as username, password, email, site title, and subdirectory.
If you want to install your WordPress in your mail domain directory, for example, yoursite.com leave it blank, but if you want to have a separate directory for your installation, enter it and then hit the submit button to continue.
The Fantastico app will now install WordPress for you and once it finishes you will see a success message. Afterward, you can log into your website with the admin details that you’ve already specified.
Installing WordPress With FTP
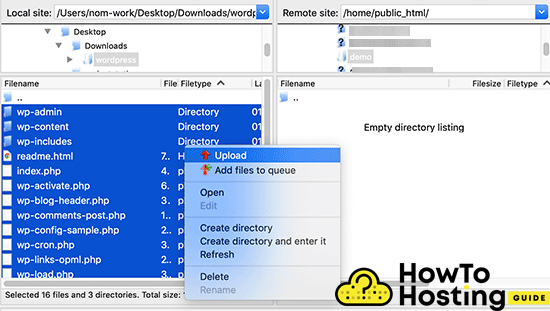
WordPress can be installed via FTP as well. It is pretty easy too. The first thing that you need to do is to install an FTP software, such as FileZilla for example, (or any other it does not really matter). Then, go to the official WordPress website and download the last release. Then, unzip your archive in your folders, log into your FTP account with the FTP software that you use and select all of the WordPress files and upload them straight to the public_html folder. (this is your root folder)
If you do that, your WordPress installation will be accessible, when someone types the URL of your domain.
If you want your WordPress installation to be in another folder for some reason, create a folder for example /test/ in your public_html and extract the files there. Then it will be accessible by yourdomain.com/test/.
Once you are done with uploading your files you will have to create your database. The shared hostings usually offer a MySQL database that you can create straight from their cPanel.
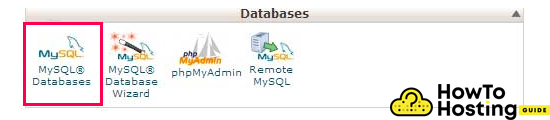
You will see a field to create a new database, enter your database name, and click “create“.
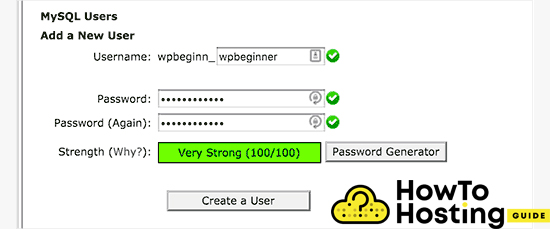
On the MySQL database page, scroll down until you see the users section. Simply create your user by typing username and a password and click on the create user button.
Then, scroll down until you find the “Add a user to a Database” and select your user and your database.

Select “All Privileges” to allow all of the privileges to the user and click on the make changes button. Then all you have to do is to type your domain and hit the enter button. You will be asked to choose the language of your WordPress site, then type your database name, username, password, and host.
Then click on the “Run the installation” button and just wait until the WordPress is installed.
Conclusion
There are different ways and methods that you can use to install WordPress on shared hosting and most of them are pretty easy and do not require much of technical knowledge to be done.
Still, if you wonder if Shared Hosting is the right choice for your WordPress website, take a look at our article Is Shared Hosting Right For My Website