


On This Page: [hide]
Shopify is a Content Management System (CMS) that has an in-built software which helps you to build a website for an online shop fast and with ease. While making this Shopify Guide, we at HTH.guide have gathered that in the eCommerce world, Shopify is quite popular and fabled to be one of the best platforms for creating a website for an online store.
Shopify features everything needed to design an online store, such as displaying products, customize orders, manage sales, track inventory, configure payment gateways (to receive money), calculate tax and shipping costs, get data reports, etc.
The entire application is customizable, and you also get free official themes to choose from within the platform. Shopify will not ship your products or provide you with such. You have to get the product yourself and find a way to ship it by using an outside fulfilment service.
Sign-Up and Create a Website with Shopify
Before we start, know that Shopify has a 14-day free trial that you should try out. On the signup page, you should carefully choose your password. The password should be strong and long. Here is a screenshot of the signup page:
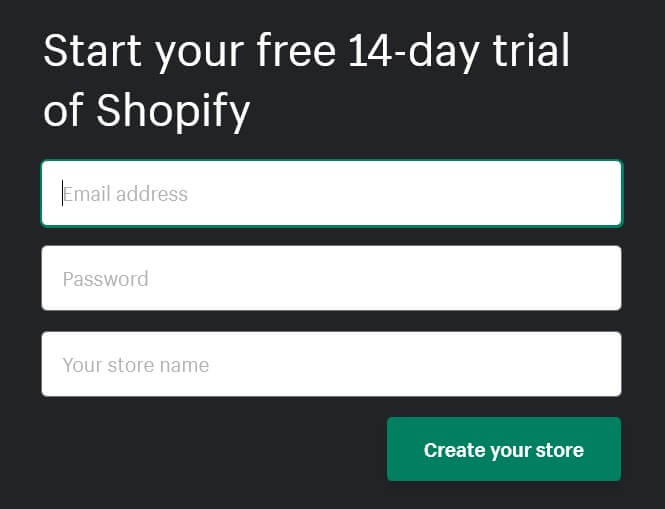
After you start your trial, you have to enter the name of your shop, which will instantly become your default URL such as (it will have myshopify in the name). You cannot change it during the trial, but later you can buy a custom domain (MyAwesomeShop dot com for example), so for now just test things out.
Later, the questions page will appear, asking if you have products, but you can answer that you are playing around. Then you will be redirected to your very own Shopify profile and management account.
Plan Your Next Steps
Prepare the things listed on the following checklist before you begin and what you need to create your website for an online store:
- Have an idea about your business (what things would you sell and how to make it stand out)
- Name of your business (Shopify has a free domain name generator to help you come up with one)
- A Product (What is your Product? Physical, Digital, a Service? Shopify has sourcing apps that can help)
- Photos and other media (People like professional photographs or clean images. Simple is good)
- Branding and related pictures (Creating professional looking media attracts clients faster)
That is the general gist of it all. Below you will find a step-by-step tutorial to create your own website on Shopify and start making money. Know that it might take you around an hour to familiarize yourself with the steps and basic settings.
Select a Theme and Layout Design
Shopify has its own Theme repository which offers over 100 Free Themes. You should check them out and preview and research the ones that you like at first sight, before selecting the one you think is best. Know that each design hosted by Shopify is optimized to be viewed on all mass platforms, such as desktop, tablet and mobile. The Shopify Theme Store is big, but you should check out the Trending category:
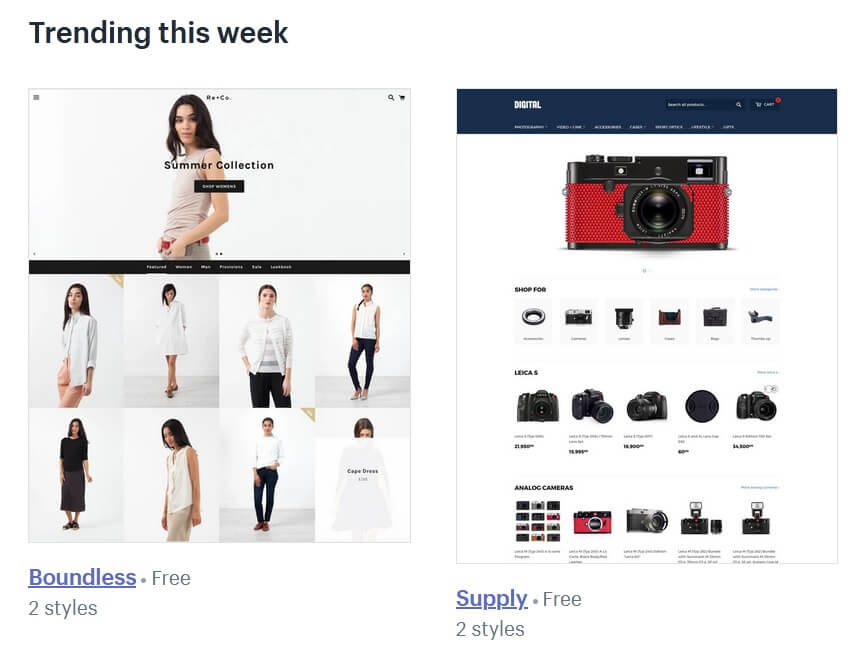
Themes there are Free and for them to be trending, know that a lot of people are using them and they are probably well-optimized and highly-functional. Know that products showcased inside Theme demos are just for example purposes and themes are not bound only to those products you see shown in the pictures. You should take a closer look at the Top 10 Best Shopify Themes and choose the one you want.
Why Selecting a Top Theme is Key
Selecting a theme and doing this step first is important due to a few factors. The main one is that you want your site and respectively your shop to look good to get more sales. A second factor is ranking higher in search results like Google, where a highly optimized and fast-performing theme will help with that.
Another reason for carefully selecting a theme is that some themes lack functionality (certain settings cannot be set). The last thing that is also of big importance is how you like the theme and if the theme is actually appropriate for the products that you will offer. Then all you have to do is click on the Publish theme button and your site will now have its layout based on that theme.
Add Products for Sale to Your Store
Do not worry about making changes as your website is not visible to the public yet. Now, the easiest task that you will have to get used to is adding your products to the website. On the screenshot down here you will see how your dashboard looks like:
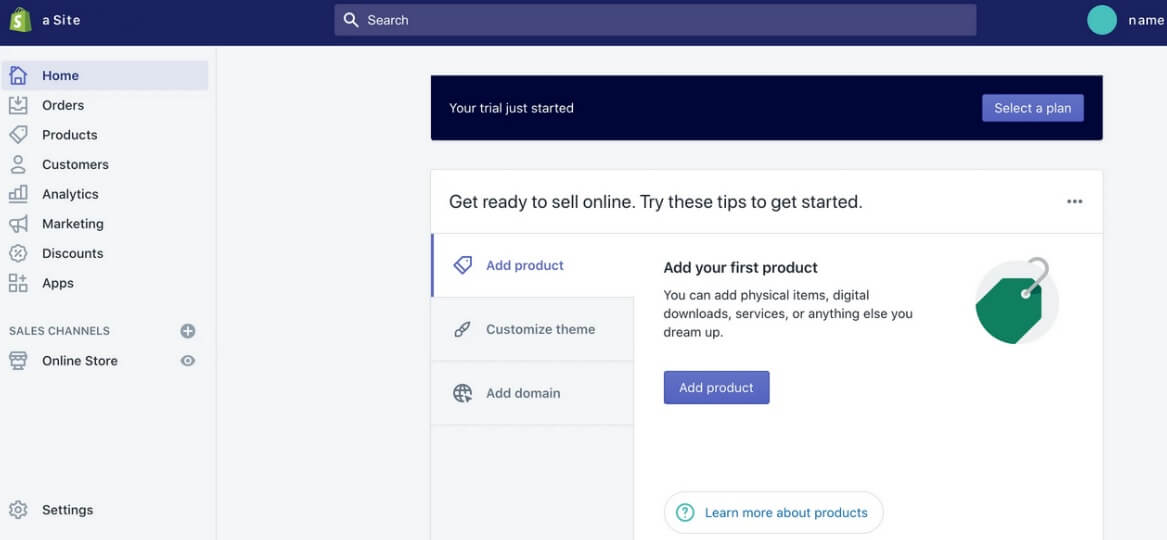
From there, Navigate to Products -> Add a Product and click on the button to add your first ever Product. You have to add a title, description and pictures into the provided fields. It is easy, but if you want to rank higher in search results and help your potential clients, try adding detailed information about every Product. Also, do not forget to set prices on your products on the appropriate fields, but know that you can edit them later.
After uploading an image or photo of your product, it will be available to be used again and you can change the order and how it appears on the website. You can upload pictures in bulk without worry.
Most websites add one photo per product, but if you want to stand out you must put in the work. Add more pictures, especially if your Product has unique features or there is something specific about it that you feel should be known. Click on Save Product to keep your progress on every item listed.
Put Products into Collections
Collections are products grouped together which have common features that clients might specifically search for when browsing your website. The page for adding a collection is the same as adding a product.
However, a collection will aid you to get things more professional and organized. A brand can have many products, but have a collection on products made for men, women or children – target audiences. More to it, the collection might be based on a season, a sale, an event or be a limited in number.
One product can be part of multiple collections. You should add more products before setting up collections and categorizing them. Another thing to bear in mind, Collections can be selected manually (you pick a product and add it individually) or automatically (create selection conditions to automatically include products meeting the criteria).
Change Crucial Settings
Shopify has good stock settings by default, but you would want to tweak them in your favor and the best experience for your online store. To change your defaults, navigate to your home dashboard and click on Settings in the bottom left corner.
That will redirect you to a window in which you can modify all Settings of your shop. See the screenshot posted here and descriptions below for a quick reference:
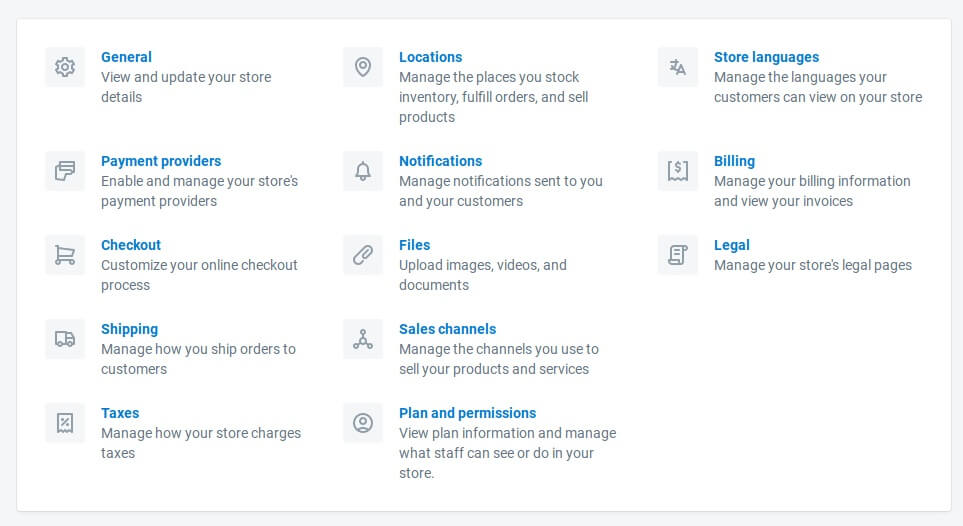
Here is a quick run through the most essential things that you want to set and modify. These settings will best help your business and keep you out of trouble:
- General – The name of the store name, contact information, and currencies can be edited
- Payment Providers – Setup and manage all your payment providers
- Checkout – Set the way you want the whole checkout process to function
- Legal – Obligatory pages go here – one for Privacy, Terms of Service, Refund, Shipping
- Sales Channels – Integrate your shop with various sales channels, social media, eBay, etc.
- Shipping – Manage shipping rates, integration with distributors and set shipping options, print packaging slips
- Taxes – Setup the calculation and charging of sale taxes globally
For a more detailed overview of the Payment, Shipping and Taxes settings, just continue reading and check out the next section underneath.
You can also do minor things such as adding slides to the Homepage and related functionality to Product pages, choosing the number of items that appear on every line of the Collection pages and even change the fonts and color schemes.
Add Core Pages
Now is the time for you to create the core pages of your website. To create a page, first navigate to Online Store -> Pages. Then click on the button labeled as Add Page. The following screen will appear with fields to be filled out about the page you want created:
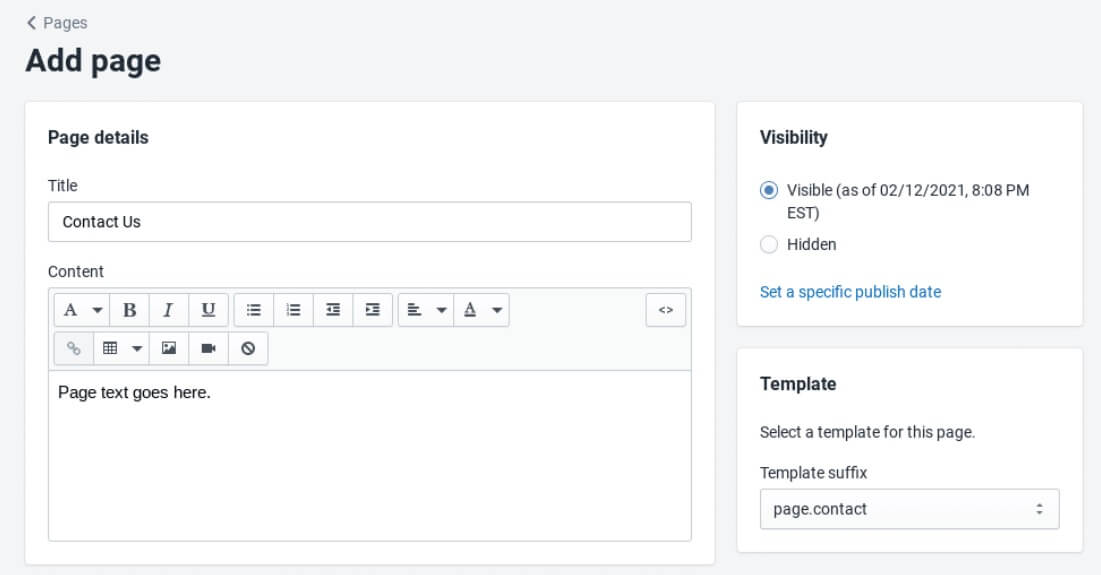
As per the screenshot above, you can start with your Contact Us page and move from there. Name your page and enter your page content on this screen. Shipping Policy and the About Us pages should be created next in order of importance.
Set Your Payment Gateway and Payouts
If you want to get paid and not lose money due to misconfiguration of your store settings, then you have to set your payment gateways, taxes and shipping. We will start with payment. A good thing to know is that Payment gateway transaction fees are added on top of the transaction fees charged by Shopify.
Some of the details you must fill in from the dashboard are:
- Your type of business – unless you registered for an LLC, corporation or partnership, you should be under Individual / Sole Proprietorship
- Estimate of your average order – you do not have to be precise
- The kind of products or services you will sell – describe them shortly
- EIN (Employer’s identification number) – in case you have it, enter it
- Business address – if you run it from home, give that address instead
- Shop name and Phone – those will show up on your customers’ credit card statements
- Routing number and Account number – found on your check book
More details will be demanded of you and you should fill them out properly provided that you want to run a legitimate and legal business.
Select Shipping Options
Shipping is one of the primary concerns of online users. You want your shipping to be fast to increase your chance of potential buyers and to give them a satisfactory service.
Shopify is equipped with various shipping options, a built-in shipping calculator estimating the shipping costs and other helpful tools. Know that you should have a fulfillment company to do the shipping as Shopify will not do the shipping for you. On the navigation bar to the left click on Shipping.
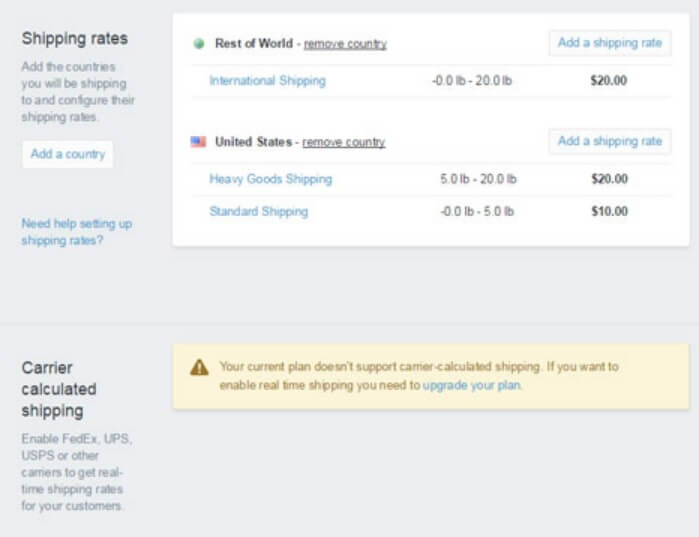
You will find some pre-made shipping rates on there. Click on Add a shipping rate under the respective location or specific country. Estimate delivery times, shipping costs and transparency around returns and cancelations should be filled out explicitly, without causing any confusion.
You should also put a disclaimer that shipping time can be delayed because of the situation the World is in right now.
Businesses that ship their own orders can print shipping labels, calculate shipping times, and costs from within the store dashboard. Shopify has pre-existing relationships with the most popular shipping providers in the world. Getting accurate shipping estimates will require filling out accurate product details such as product dimensions and weight for each thing you are selling.
Tune Up Your Tax Settings
Start with getting to know the Tax laws in your country and region. Then you need to enable the charging of taxes:
- Navigate to the Products page from your admin panel
- Click on any product that you want to be taxed
- Scroll down to the section called Variants
- Check the boxes next to Charge taxes and Requires shipping where required
Go to the Dashboard and then to Settings. Then click on Taxes and the following window will be displayed:
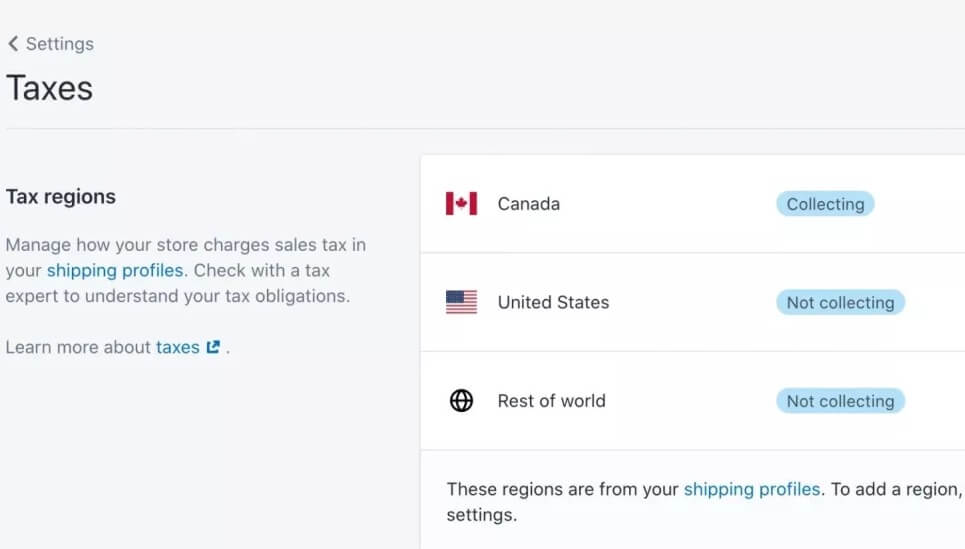
From there, you have to establish the country of residence of your business to determine your Tax region. Shopify automatically calculates Sales tax based on the current Tax rate, but to make sure you are not losing money, verify everything with an accountant.
Test Your Website and Launch It
You need to test your website and remove its password to go public. Here is the official Shopify’s Preparation Steps for Launch page.
You need to test your Order system. Simulate a transaction using Shopify’s bogus gateway system, then remove the password for your store, so visitors can actually enter your online shop.
The last step on your way to setting up your very own eCommerce store on Shopify is to make it public. To do so, go to Online Store -> Overview and click on the Unlock your Store.
Add a Custom Domain Name
Having a custom domain name is always better than having the free domain provided. If you want your website to rank higher in Internet searches and to have a better structure and branding, then you should add a custom domain name.
If you already have a domain or you decide to create a new one with the help of a hosting company it is time to link it with Shopify.
To set a new domain name, navigate to Home -> Add Domain and add it from the following field:
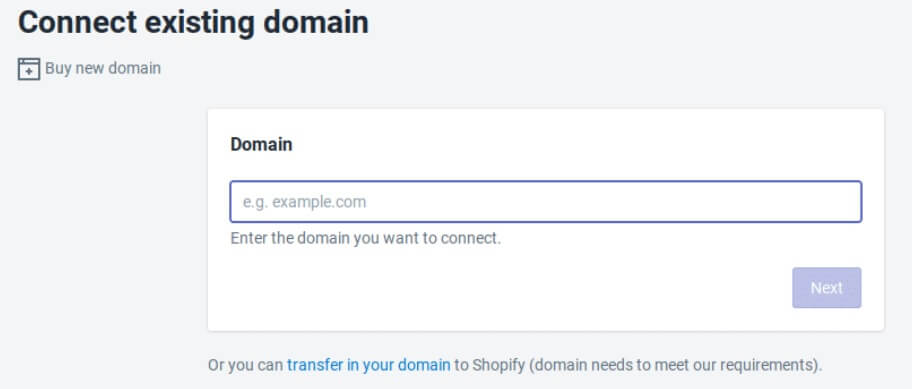
You can choose whether you want to connect an existing domain, or purchase a brand new domain through Shopify.