


On This Page: [hide]
What Is WordPress CMS?
WordPress is an open-source content management system (CMS) based on PHP and MySQL. It is the most popular blogging system on the web and allows users to create and manage websites without any technical knowledge. WordPress is used by millions of websites and blogs, and it is estimated that around 20% of all websites use WordPress. It is free to download and use, and there are thousands of free and paid plugins, themes and other add-ons available to customize its functionality.
With a market share of 60.4% and 24,808,989 at the time of writing this, WordPress is the most popular CMS (content management system) platform currently in the world. It is used by 33.5% of all websites and 318,828 of them are in the top 1 million sites in terms of traffic and ranking.
The reasons for its top positions are many. For one, it is an easy-to-use platform that is also open-source, which allows a high level of customization. Not only this, but the platform is very easy to learn and very friendly towards beginning users. The CMS has tons of plugins that allow it to serve absolutely any purpose, ranging from an online store to a sophisticated business website or a simple blog. This platform is also the reason for the development of many themes as well as tons of plugins.
What is Menu Items in WordPress?
The menu on your WordPress website is the collection of links usually visible at the top of the page. A menu provides a convenient way for your visitors to navigate to the different sections and pages of your site. Our guides will walk you through the process of creating and managing your website’s menu.
How to Become a WordPress Menu Pro? Get to Know All Menu Items
What if you are a beginner who wants to know how to quickly become a master in WordPress items? Well, do not worry, because in this article we have embarked on the mission to turn you into an expert, explaining to you what everything in this platform means, ranging from the top bar all the way to each of the menus and sub-menu items. We will also explain to you the basic layout of this CMS with only a couple of free plugins that are necessary when starting a blog.
Now we will start by taking you through the actual basics of the platform – the items list. Below you will find a very advanced guide that will explain in detail the purpose of each menu item and how you can turn them into a weapon for more traffic on your website.
Let’s go!
All WordPress Menu Items Guide

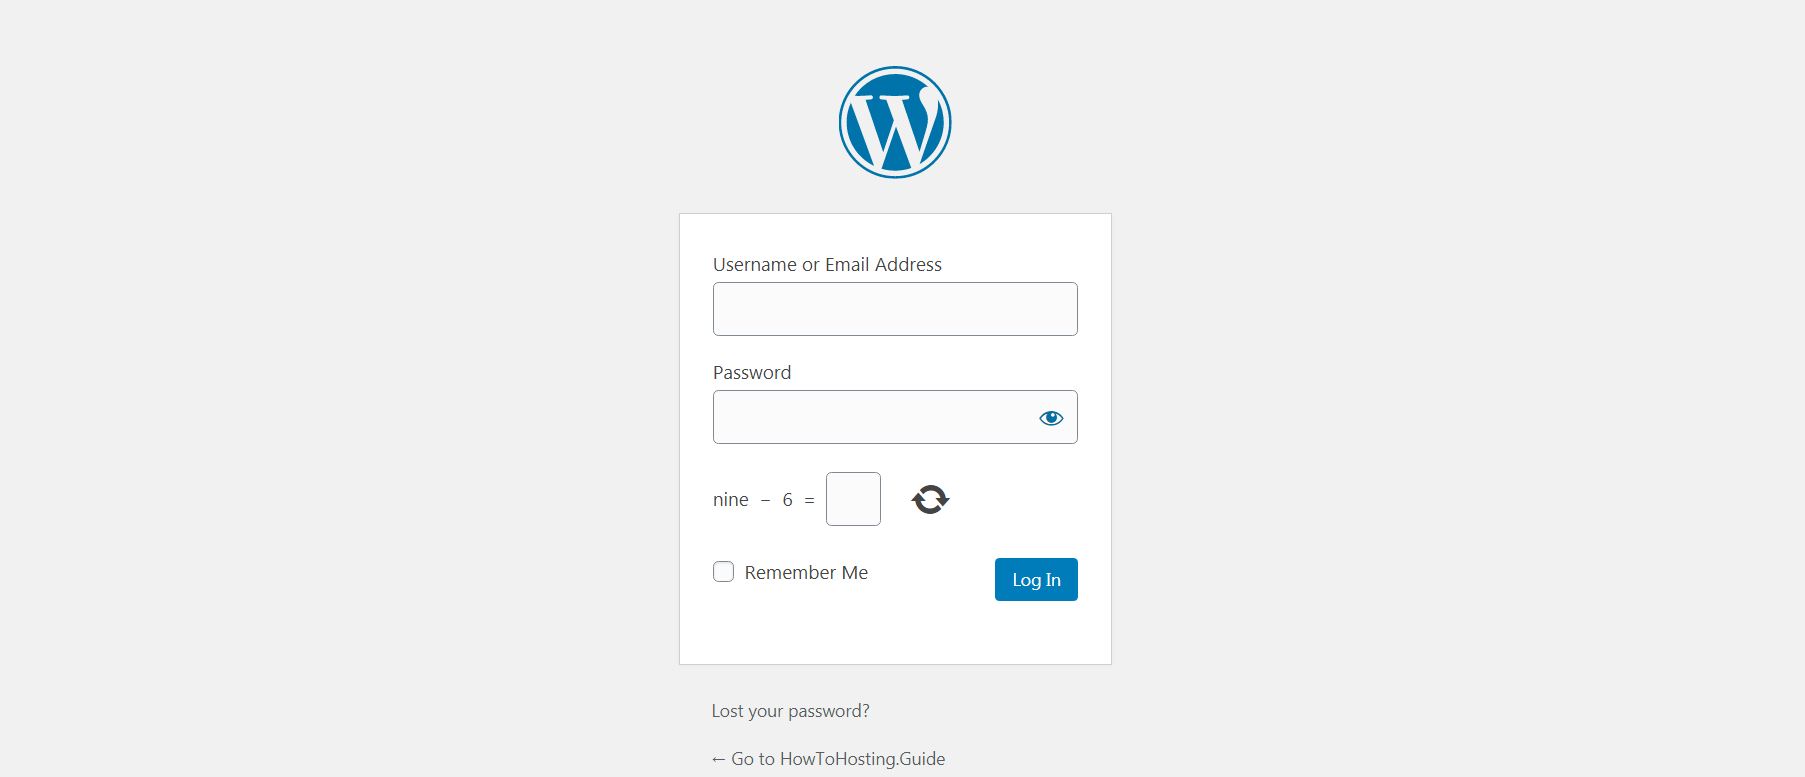
Now, the first thing you need to know about the WordPress menu is, of course, how to access its items. You can access your WordPress dashboard menu by typing the following:
yourwebsitename.com/wp-admin/
This will open the login page of your Dashboard menu, containing all the items. Simply type in your admin user name and password to log into the system and click the blue Log in button:
Once you are in the main panel, you should see the following web page, that contains all of the menu items we will be talking about:
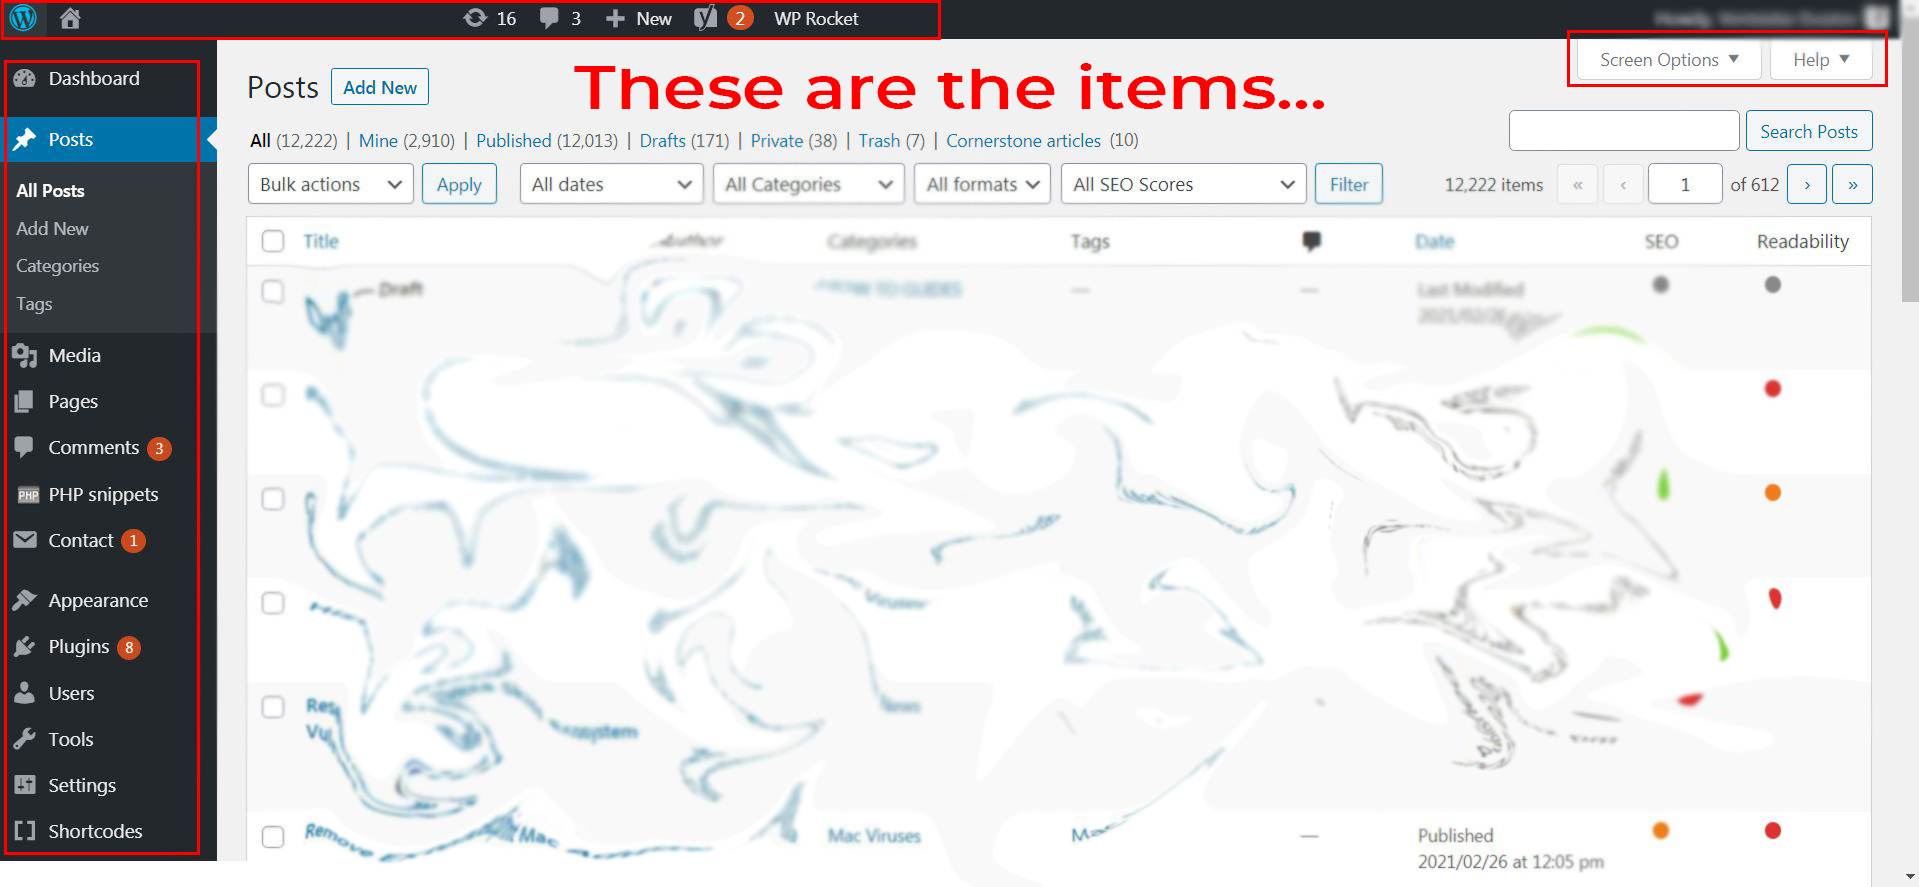
Now we will start explaining what each of these items means and how you can work with them properly, so that you can learn to use them without problems in the future. Our idea is to make you a professional quickly and efficiently, so stay with us!
What Is Screen Options in WordPress?
Screen Options is something that you will meet quite often:
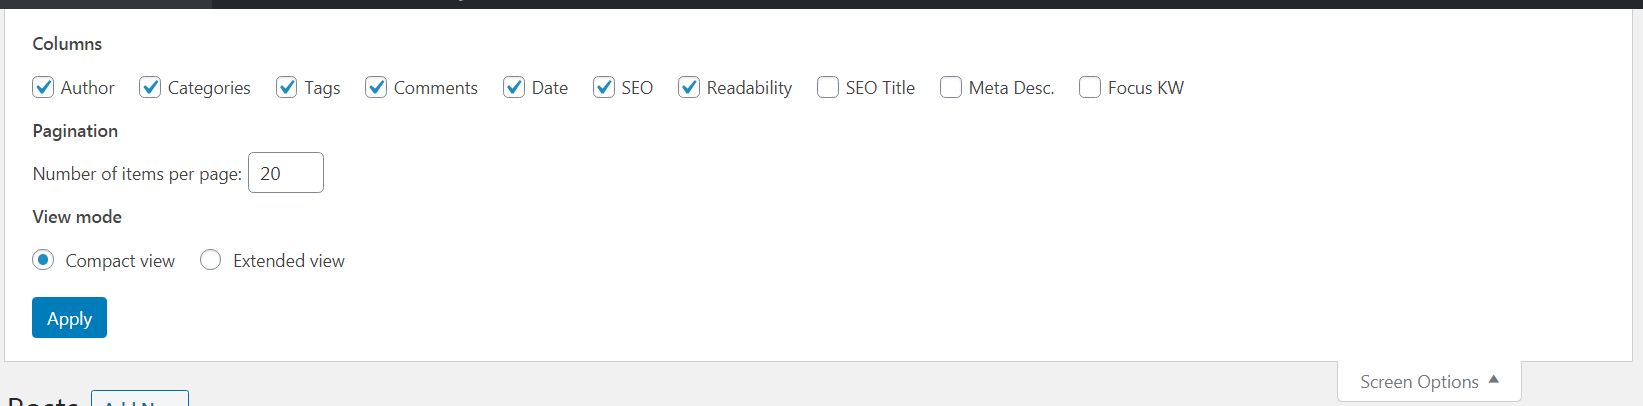
It is similar to a screen manager, which is responsible for letting you choose which options of the screen you want to be added. Here, we are in the posts tab, which explains all of the content items in your domain (we will talk about it later). As you can see, from here you can choose each of the columns you want to see on your pages. You can un-tick the information that you don’t like from “Posts” and tick the information that is important for you. We have laid out Author, Categories, Tags, Comments, Date, SEO, and Readability because we think they will help you have a good overview of how each post is laid out.
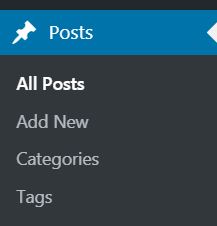
What Is Posts in WordPress?
By now you have probably figured out that this aspect of this menu talks more about your content, and for that matter the blog posts (for a blog). The menu contains management items. What you can do with this sub-menu is choose to manage a post, add a category, manage tags and see all content items.
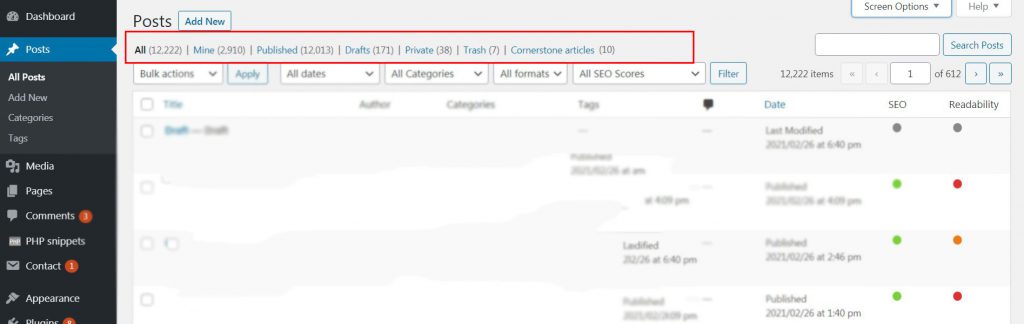
All Posts
The All Posts web page represents the whole overview of how your posted items will look like. As you can see from the image below, you have choices of different items that can help you see which article is trashed, which is a draft (not yet published) and which article is set to private (only the logged in users in the dashboard can see it). You can also select the time frame between each of the articles you want to see (for example from September 2020 to December 2020). This will help you better manage your content.
You can also read our articles How to add a post to a page and Pages vs Posts.
Add New
Here is where it gets interesting. This is probably the most important part of this guide because it shows you how to write your first blog post and create content, that is interesting. The Add New panel is responsible for publishing blog posts on your domain and these items are the main type of weapon you will have to drive traffic to your domain. Below you can see how a standard Add New post will look like:
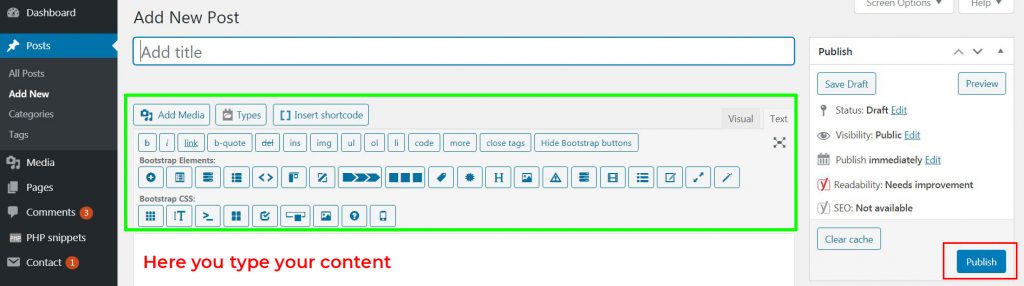
On the right side of the image, you will see the actions for the final product. You can publish the article once it’s done and you can also do other activities to it, like save it as a draft, etc. A good practice is to always click on the “Preview” button before you publish, since it will show you how your post looks before it goes live.
The menu items that are marked in green color will make your post beautiful. Below we have set up a quick guide that explains what each of the buttons in the green field does:
b – makes a word or a sentence bold when you select it.
i – makes a word or a sentence in italic font.
link – ads a link to your post.
b-quote – inserts something in a quote. Also known as a blockquote.
del – deletes something you want to see deleted with a line crossing the word.
ins – inserts or underlines an item.
img – adds an image based on a URL you set it. You can use images from other sites, but its not reccomended.
ul- a code that starts adding bulletpoints and ends them (begins and ends like this: <ul></ul>)
li – the bullet points themselves, that:
- look
- like
- this.
Code – helps you insert a code to your post.
More – this is used as a note to self. It looks like this: <ul></ul>. It is not visible on the post it is something that you will use so that only you can see it.
Close tags – used to close tags if you have any tag open, like ul, for example, and if you want to close it, it automatically ads the second part to <ul></ul>.
Bootstrap buttons – these are buttons that will add visual elements. Use them only with Visual editor, but we strongly recommend avoiding the visual editor, because it can mess up your HTML codes.
Bootstrap CSS – you can perceive this as a more complicated type of Bootstrap element.
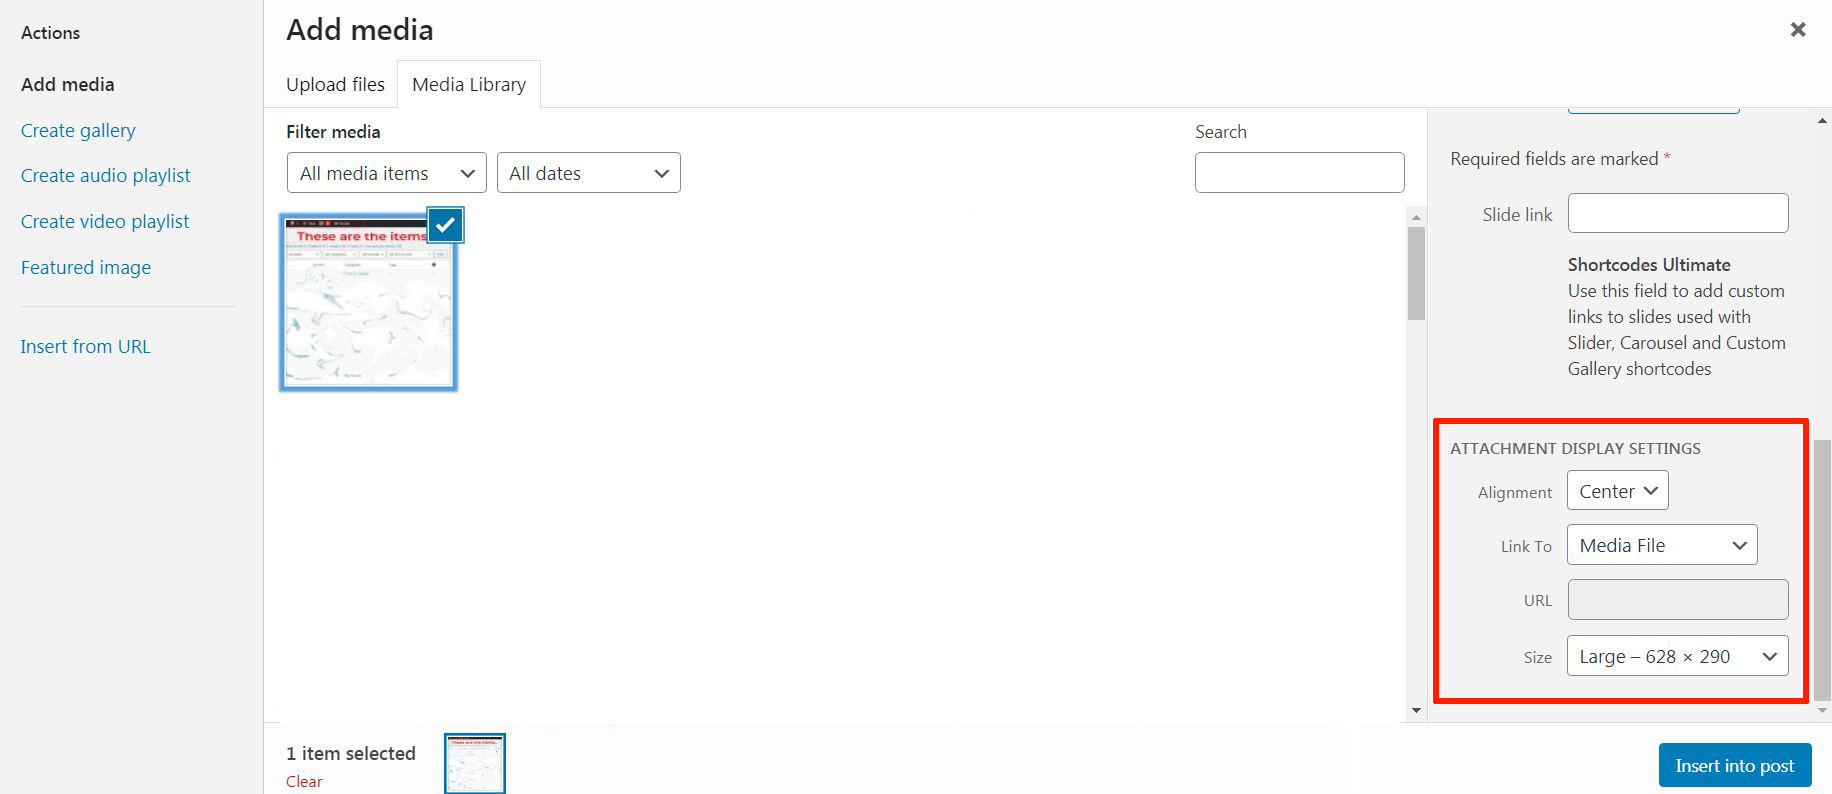
If you want to add a picture to your post, you can do it by clicking the “Add Media” button. This button will open the following screen from which you can select an image and align how you want to see it (large, small, medium or centered, left, right, etc.). One interesting thing is you can also add an alt-text (hidden text, but seen by Google) to your image that helps Google rank it better in images. You can also add a URL to your image, helping someone go to the page you want by clicking the image:
With Types, you can add custom type templates and with Insert Shortcode you can choose among the following shortcodes. Be advised that Shortcodes is a good free plugin for shortcodes that can often prove useful if you create more sophisticated posts.
You can also read our review of Vision ShortCodes WordPress plugin.
Categories
Now, let us get familiar with the Categories. Categories are very good for SEO because with their help you can start creating different types of content. For example, for a car blog, you can add categories SUV, Convertible, Limousine and others, where you can fill in each specific category with the given content of this type. This can also be generalized by choosing categories, like Car Reviews, User Opinions, Car News, and others. The choice of how you want to start is totally up to you, but be cautious, because this is how your content will begin its path. It’s very difficult to rearrange and move items from category to category, once you have gained momentum and have thousands of posts.
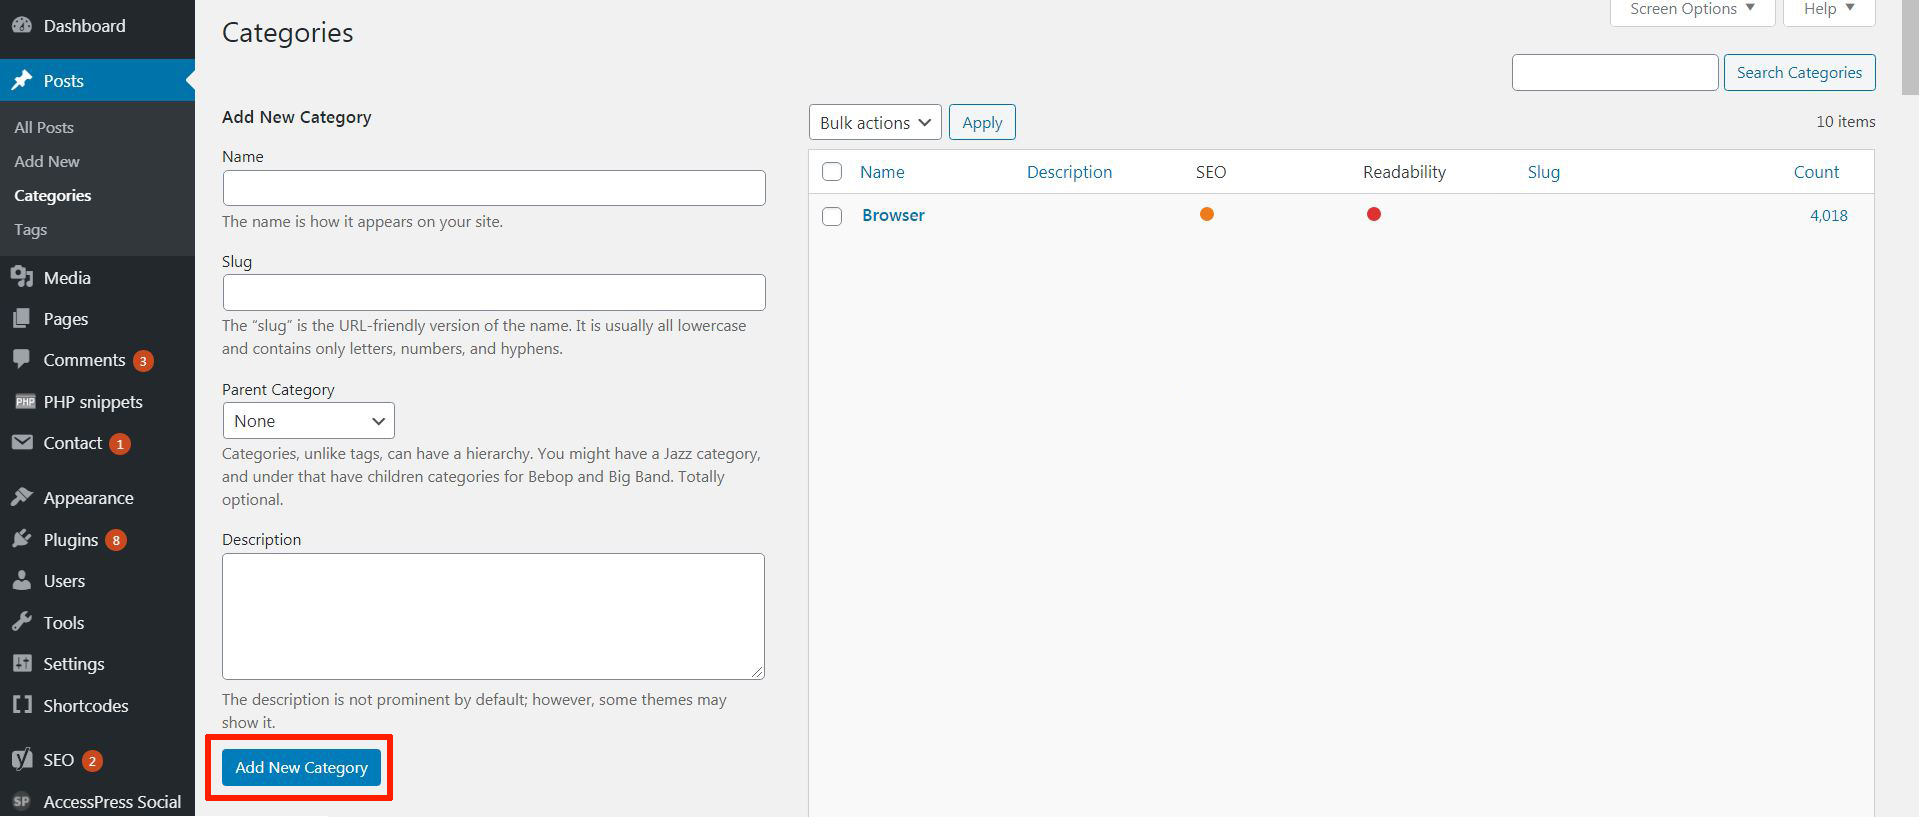
This segment is pretty simple, as it contains a management section of the categories in the same logic as posts. You can add a category by typing its description, name, and information and clicking on the blue button as shown above. You can also manage categories in Bulk, like move posted items from category to category, so you won’t have to go through each post.
Tags
The Tags sub-menu is not something that you will use often. But if you have tons of unnecessary tags and want to remove wrongly entered ones in a post (you can enter tags from the right side of the “Add New” page), you can surely do it from here. The layout is also the same as it is with categories and posts, which makes it easy to operate:
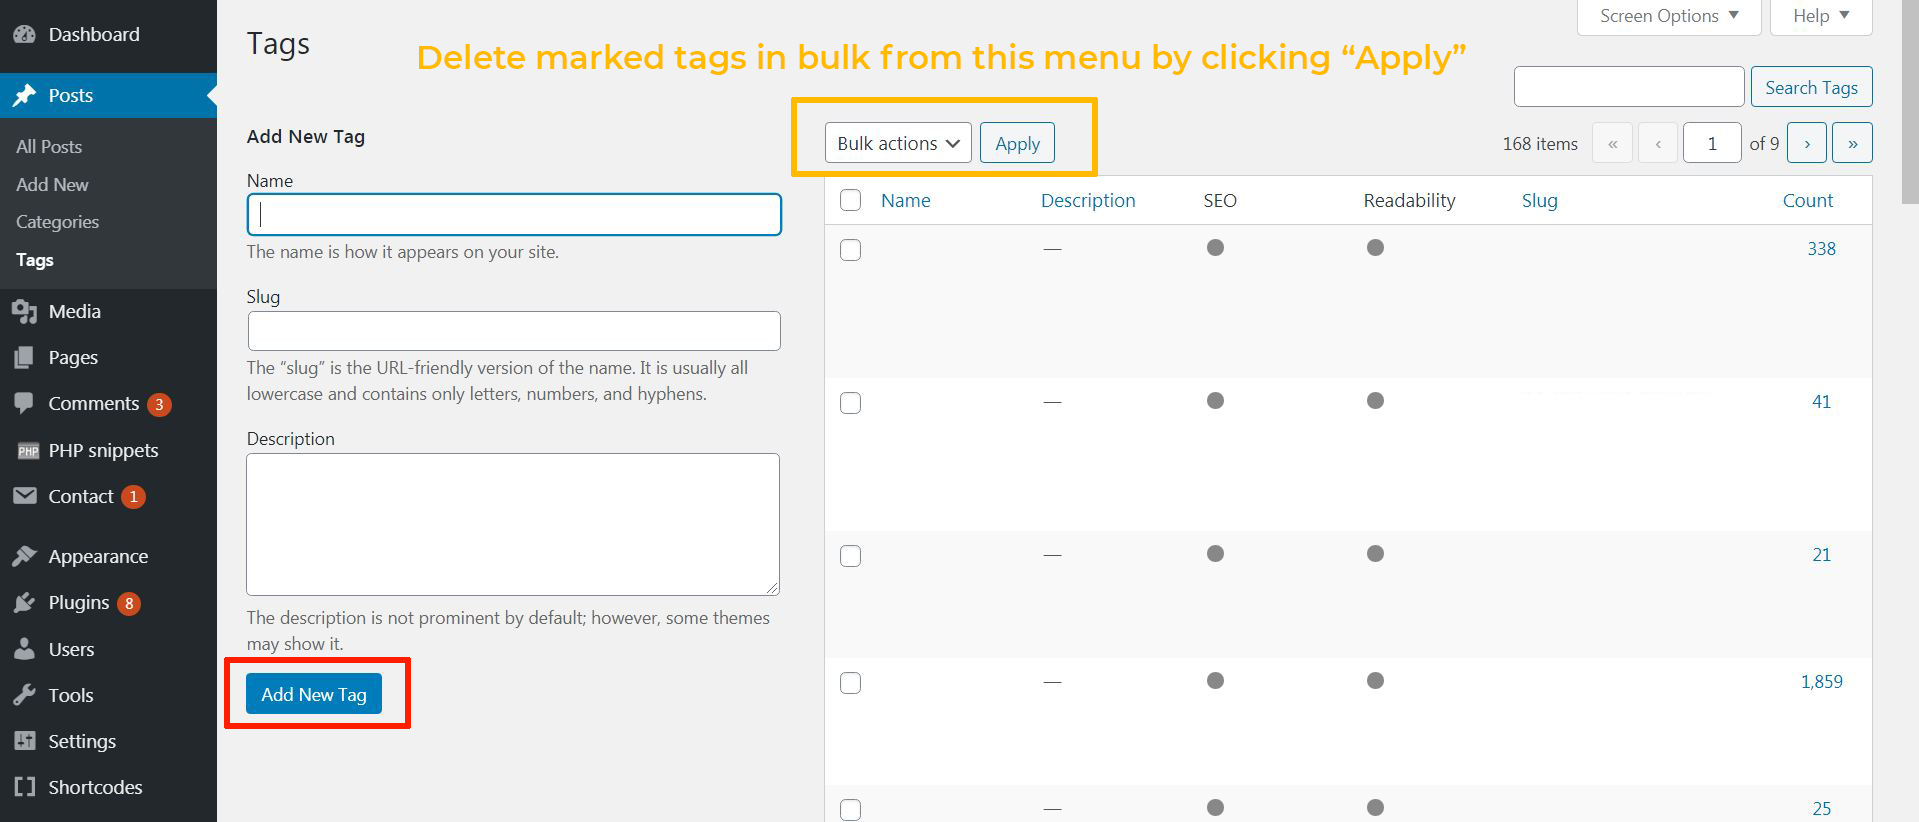
Be advised that it is the same with categories and posts, you can select the tags by ticking the boxes on the left from the list. By selecting Bulk Actions – Delete and clicking the Apply button, you will delete any unnecessary tags.
What Is Media in WordPress
Understanding the media you add in WordPress is not as complicated as it is with the posts and adding new ones. The easiest way to understand it is that it’s the Media Library of your whole database. It is responsible for adding new media or deleting such. When you click on media, the first thing you see is the general layout of your Media Library:
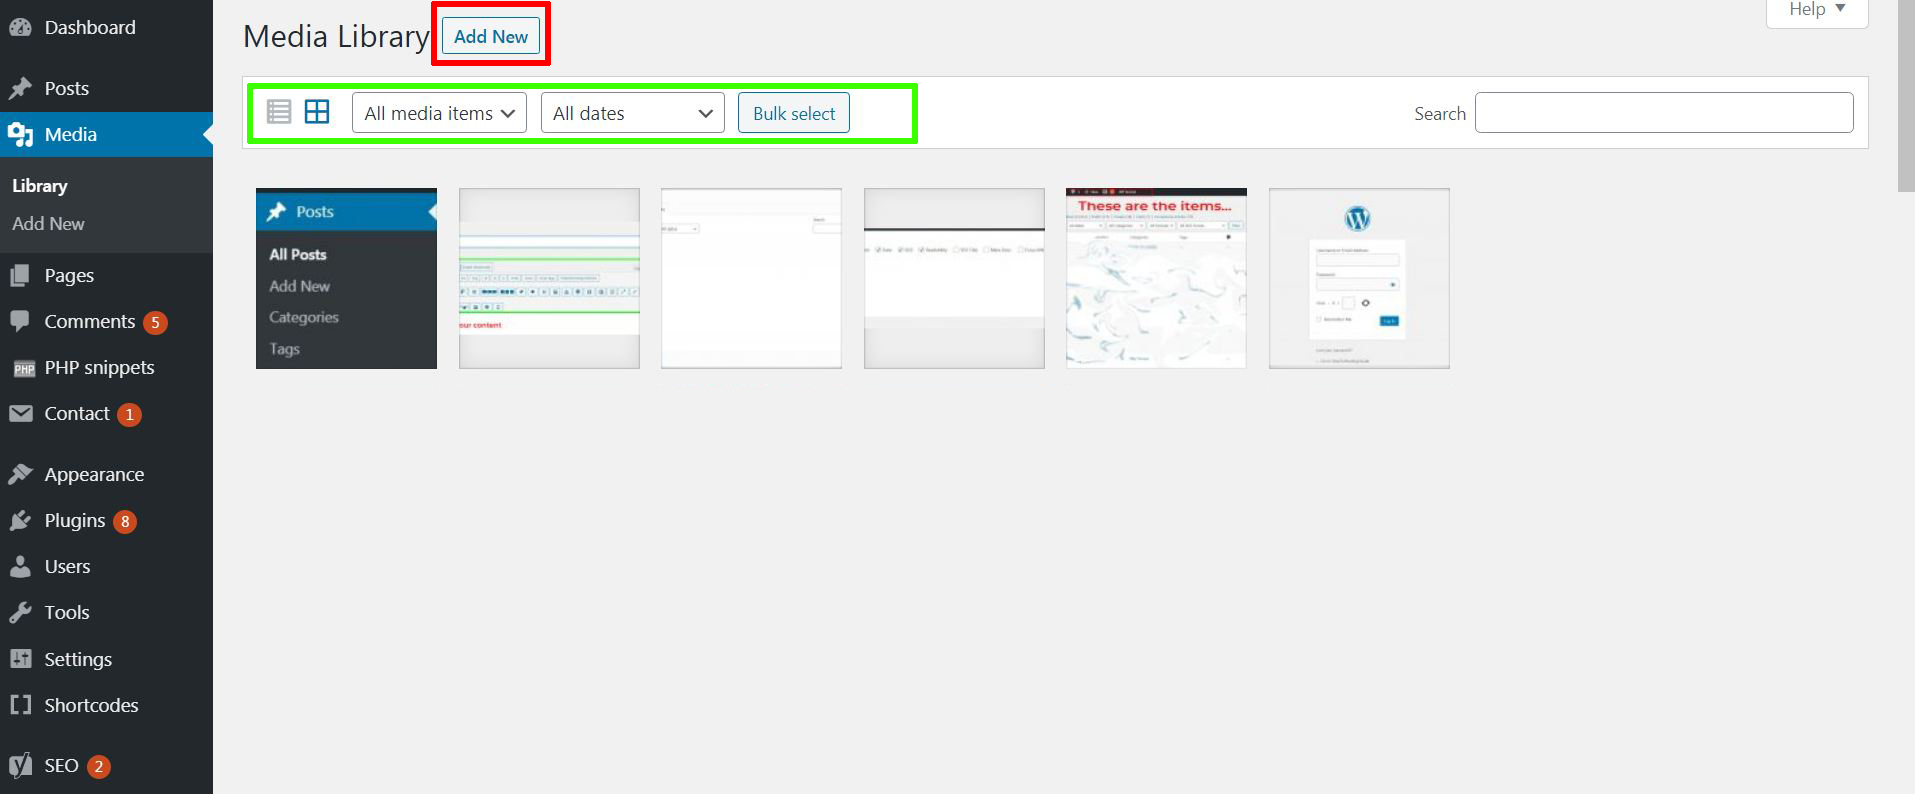
The layout has an Add New button, which will help you add more images to your pages, but you can also do this from “Add New”, as we explained earlier in the “Posts” section. What is more interesting in this category is the bulk actions seen in the green square. One of them is “all media items”, which is the option that allows you to select what you want to see. You can choose for the media to display only the videos you have uploaded or the images. Basically, it helps you easily delete and generally organize your media content:
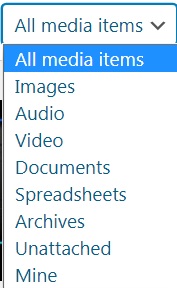
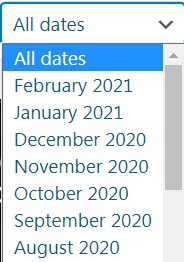
And the other drop-down menu helps you find older content, by showing only the specific files uploaded, based on the month they were uploaded in:
What Is Pages in WordPress?
The pages are extremely important. They are best used for navigation and other general activities. An easier way to think of pages is to consider them “the big brother of posts”, as they are just that.
 While your car blog post would be “Toyota Corolla 2021 Review”, a page would be something that you would look at from a more general perspective, for instance, a “Contact Us” or “About Us” page. These should contain important information about your domain. Another good example of a page would be “All Car Reviews Database” which will show links to all of your blogs that you can order by letter, date, etc.
All Pages
The “All Pages” sub-menu is like “All Posts”. It is even laid out the same way with the absolutely same functions to help you easily understand how to manage these pages in bulk:
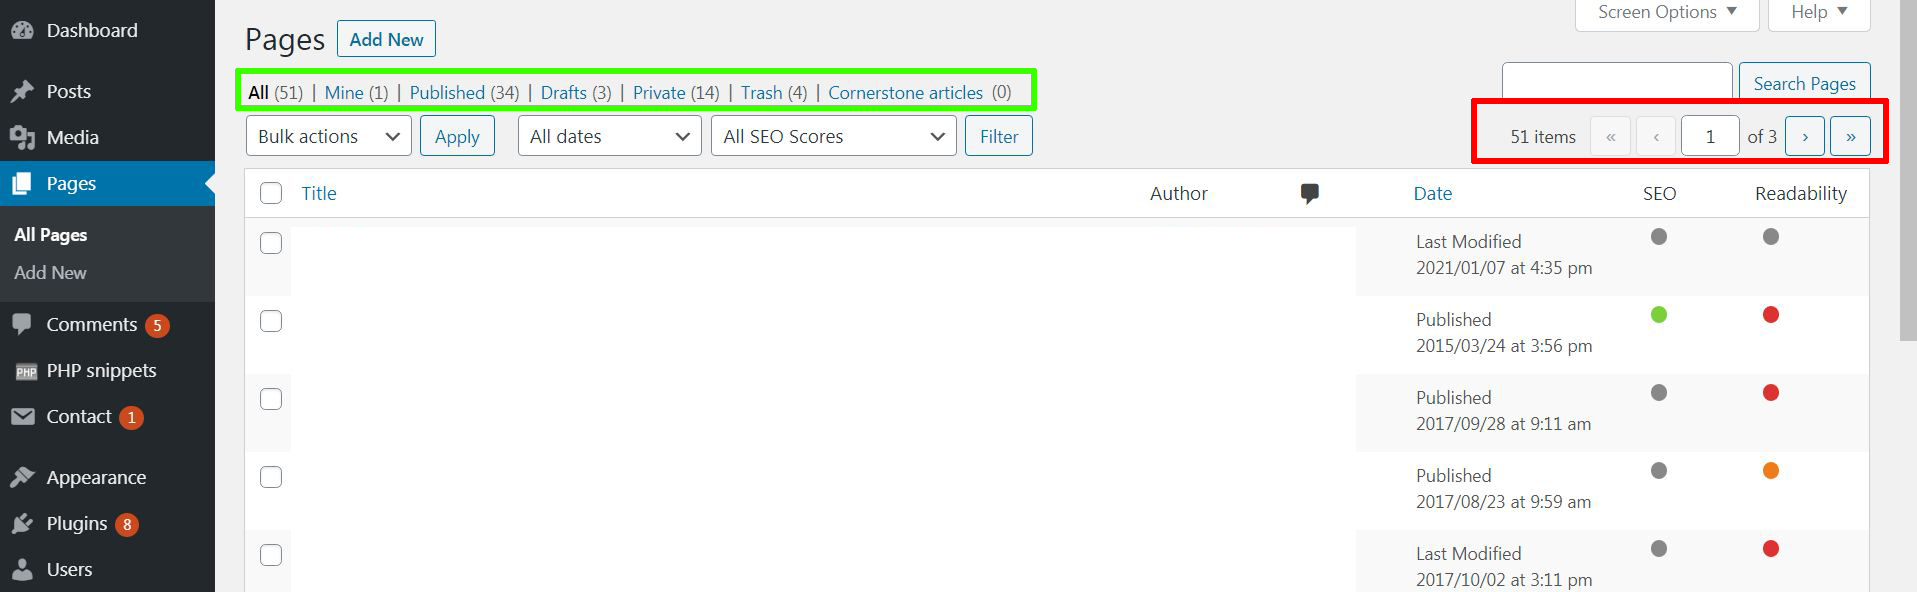
Just like with posts, you can also search for a page by a keyword and sort it by its categories (Trash, All, Mine, etc.). So, this is fairly easy to understand.
Add New
To add a new page, you can choose this option, which will take you to the “Add New Page” screen:
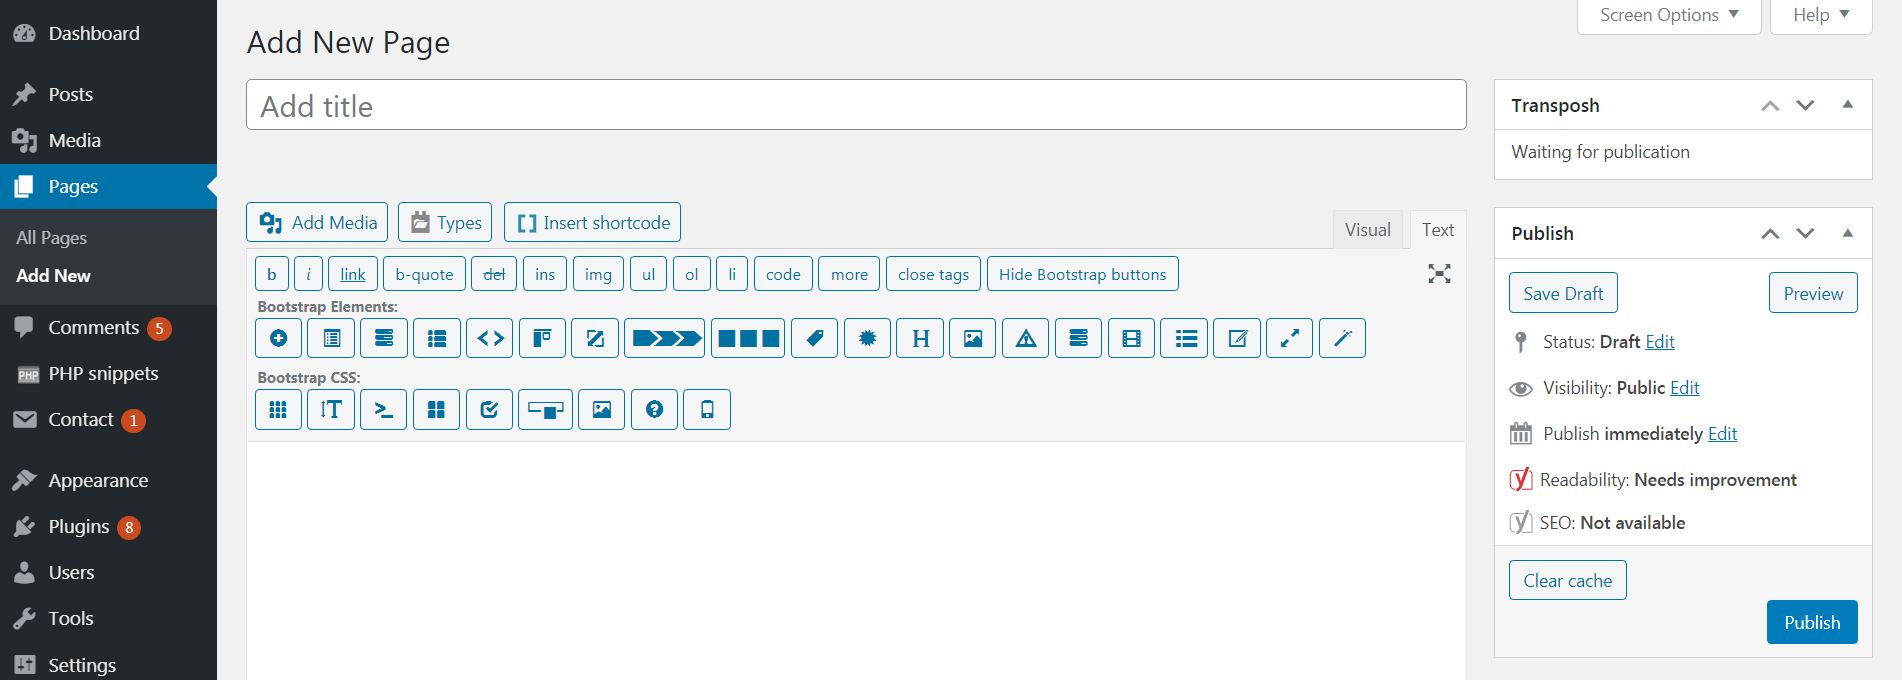
The only fundamental difference between the add new page and post is that with pages you can choose what are the attributes of your current page being created, which is also a very good organizational tool, as seen from the image underneath:
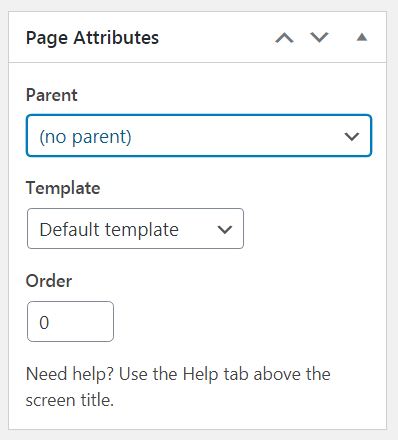
These attributes also have a “Template” drop-down menu allowing you to get the page layout from a template or select if you want the page with a left or right banner column, both, or if you don’t want any columns, to make the page in full width and hence make it more pleasant for readers.
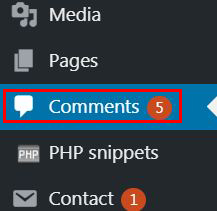
What Is Comments in WordPress?
The Comments section items of the dashboard is your all-in-one tool that is responsible for managing the users who comment on your domain.
It is a very easy tool that will help you decide what to do with a comment. It also a useful tool to manage spam comments that can be deleted in bulk. One thing you will find very annoying as a publisher is that as your business grows, you will meet a lot of spam comments. Thankfully, you have us at Howtohosting.guide to explain to you how to manage them, so you won’t have to get annoyed by nagging comments.
Once you click on this section, you will be welcomed to the following screen with all the comments laid out in a similar logic as Categories, Tags, Posts, and Pages, but with some differences, which we will now show you.
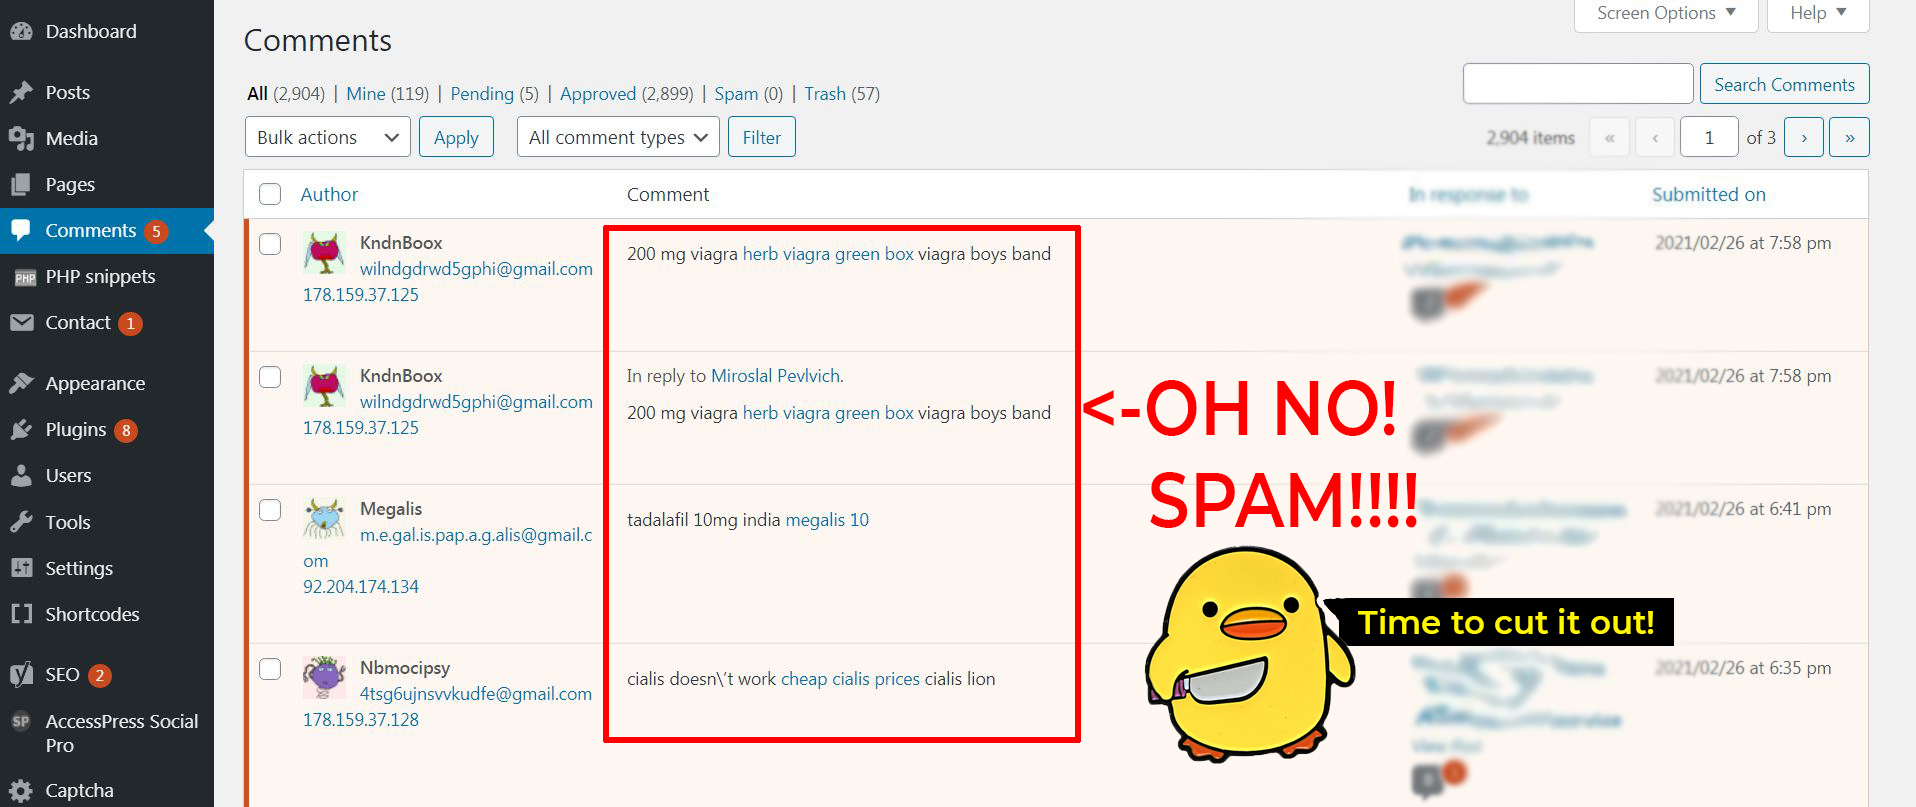
First, how to recognize spam? Spammers often use randomized and temporary e-mails that self- destroy after spamming. Your CMS detects these spammers and shows you their comments to advertise a drug or something similar to the image above – usually nonsense. To remove one spam comment, all you have to do is hover over it with your mouse and click on Trash; this will take care of the comment for good:

As you can see from the management buttons, besides Trash you also have the options to Edit, Approve, Reply, and Quick Edit a comment, which is a good quick access method for managing each one.
But what if you want to delete 50 comments?
Then what you want to do is go to the left side of comments and mark each comment you want to be gone, and then go to the top where it says bulk actions. Then, select “Move to Trash” and then click “Apply”, as shown in the image below:

If you decide to choose the “Mark as Spam” option, this will make sure all comments coming from this user’s IP address will be automatically trashed or flagged in the future.
What is Contact?
Contact is a specific part of this platform that is primarily responsible for various forms of contact on your blog. This is an important part of your blog, as you may want your readers to contact you in one way or another. It also helps keep your content legitimate and makes it a good look in front of Google.
The main layout of the contact form is again in your already familiar logic:
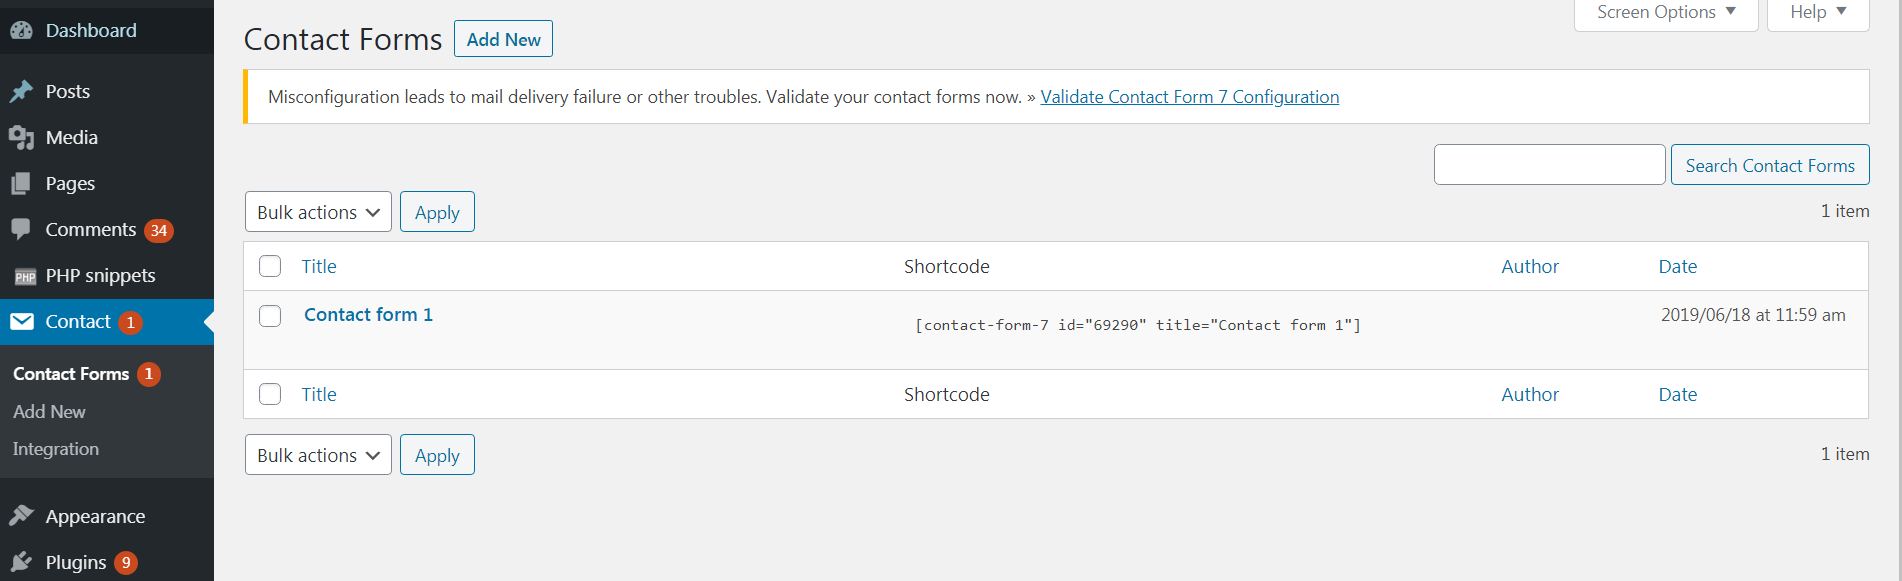
The Contact Forms section also has the ability to create a new contact using custom HTML. You can use this form to set any contact form you wish. You can choose among many different contact forms and all of them are good for you.
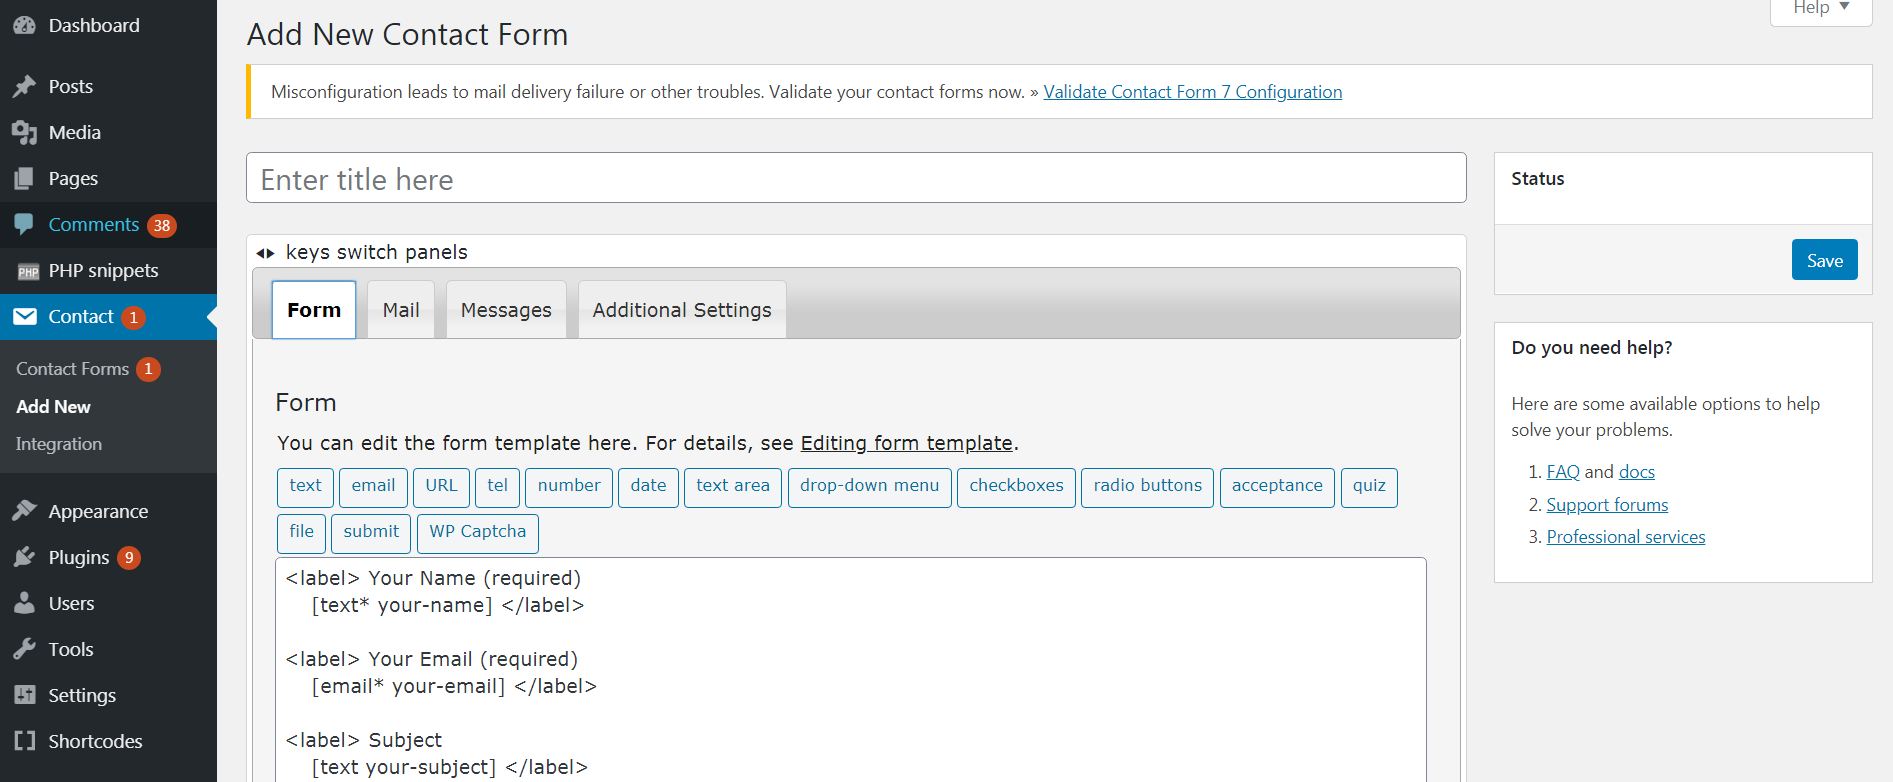
Add New
The Add New sub-menu allows you to add all forms of contact forms, based on HTML. You can also use the Mail tab to transfer the contact to a dedicated support e-mail, so you see it each time someone sends you a message. You can also use the Messages tab to edit and modify any auto-reply messages that will be responded to automatically by the system once someone writes you an e-mail. You also have the Additional Settings tab that allows you to perform other modifications based on adding custom HTML snippets.
Integration
Integration of the Contact forms is rather simple. You can embed service in your contact form, like ReCaptcha to avoid robot spam or other services and modules.
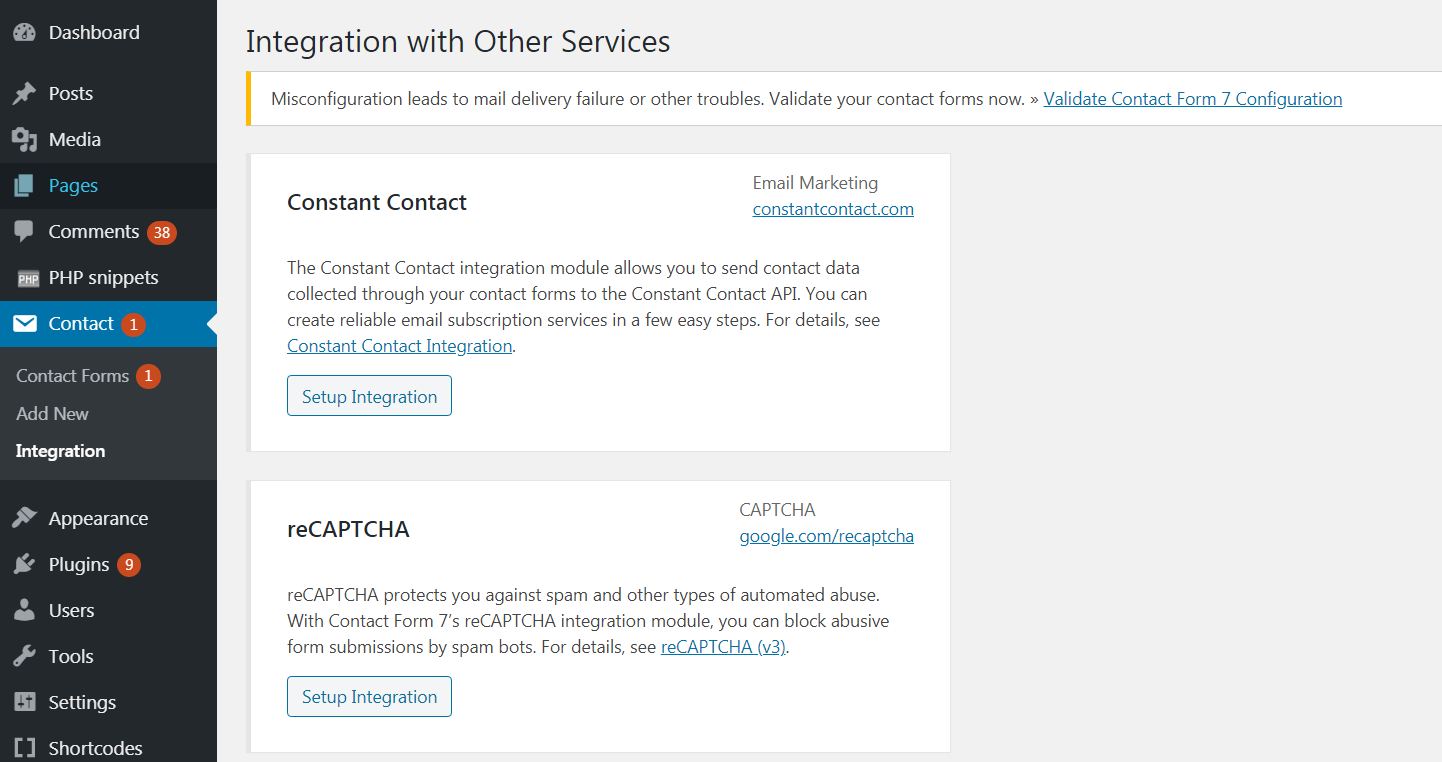
You can easily integrate a plugin by installing it to WordPress first and then going to Integration. If the plugin (like reCAPTCHA, shown below) is shown, be advised that you will see that it can be installed by clicking the Setup Integration button.
What Is Appearance Items in WordPress?
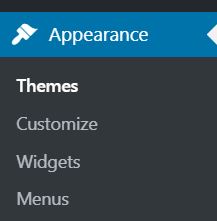
As you might already have figured out, the appearance allows a high level of customization. It is not difficult to learn how to change absolutely every aspect of your website in a matter of minutes. In this section of the article, we will take you through each of the options and sub-menus that the Appearance item has to offer to us.
Themes
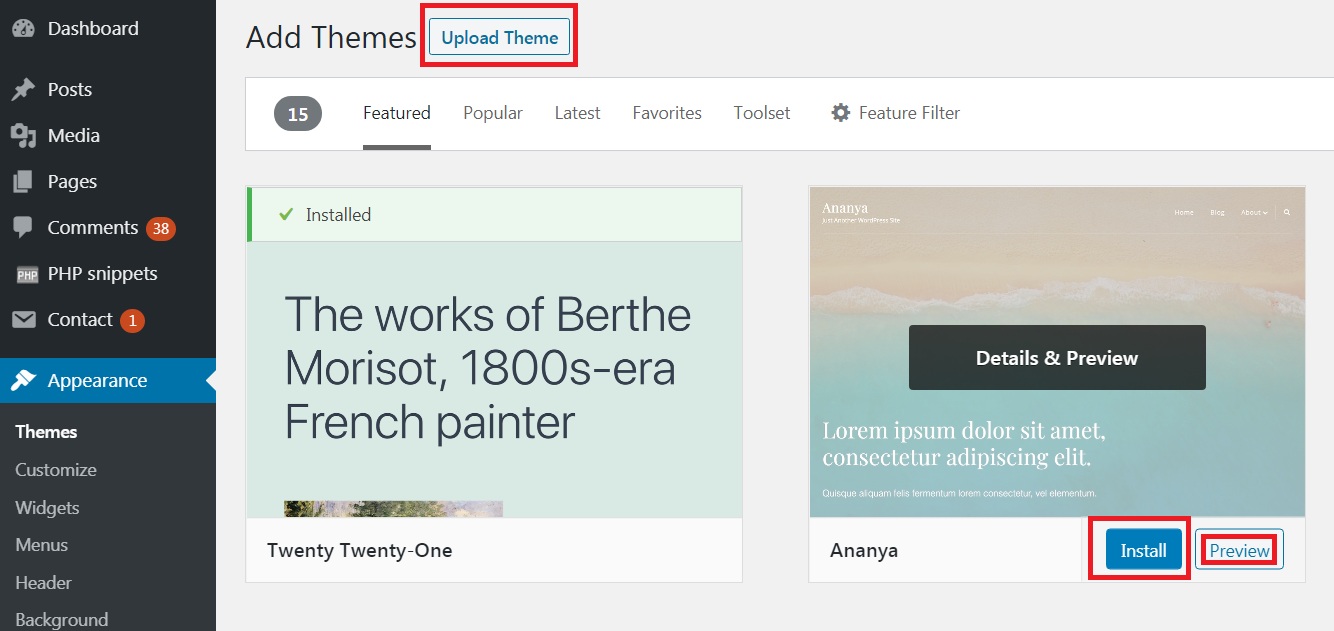
The Themes are the first thing you need to know how to Install. WordPress offers many themes that are completely free of cost, but you can also upload and install a theme that you have purchased and that contains all of the features you want in a theme. This can be done by using multiple big marketplaces for themes with more advanced features. Once you enter Themes, you will be greeted by the following menu:
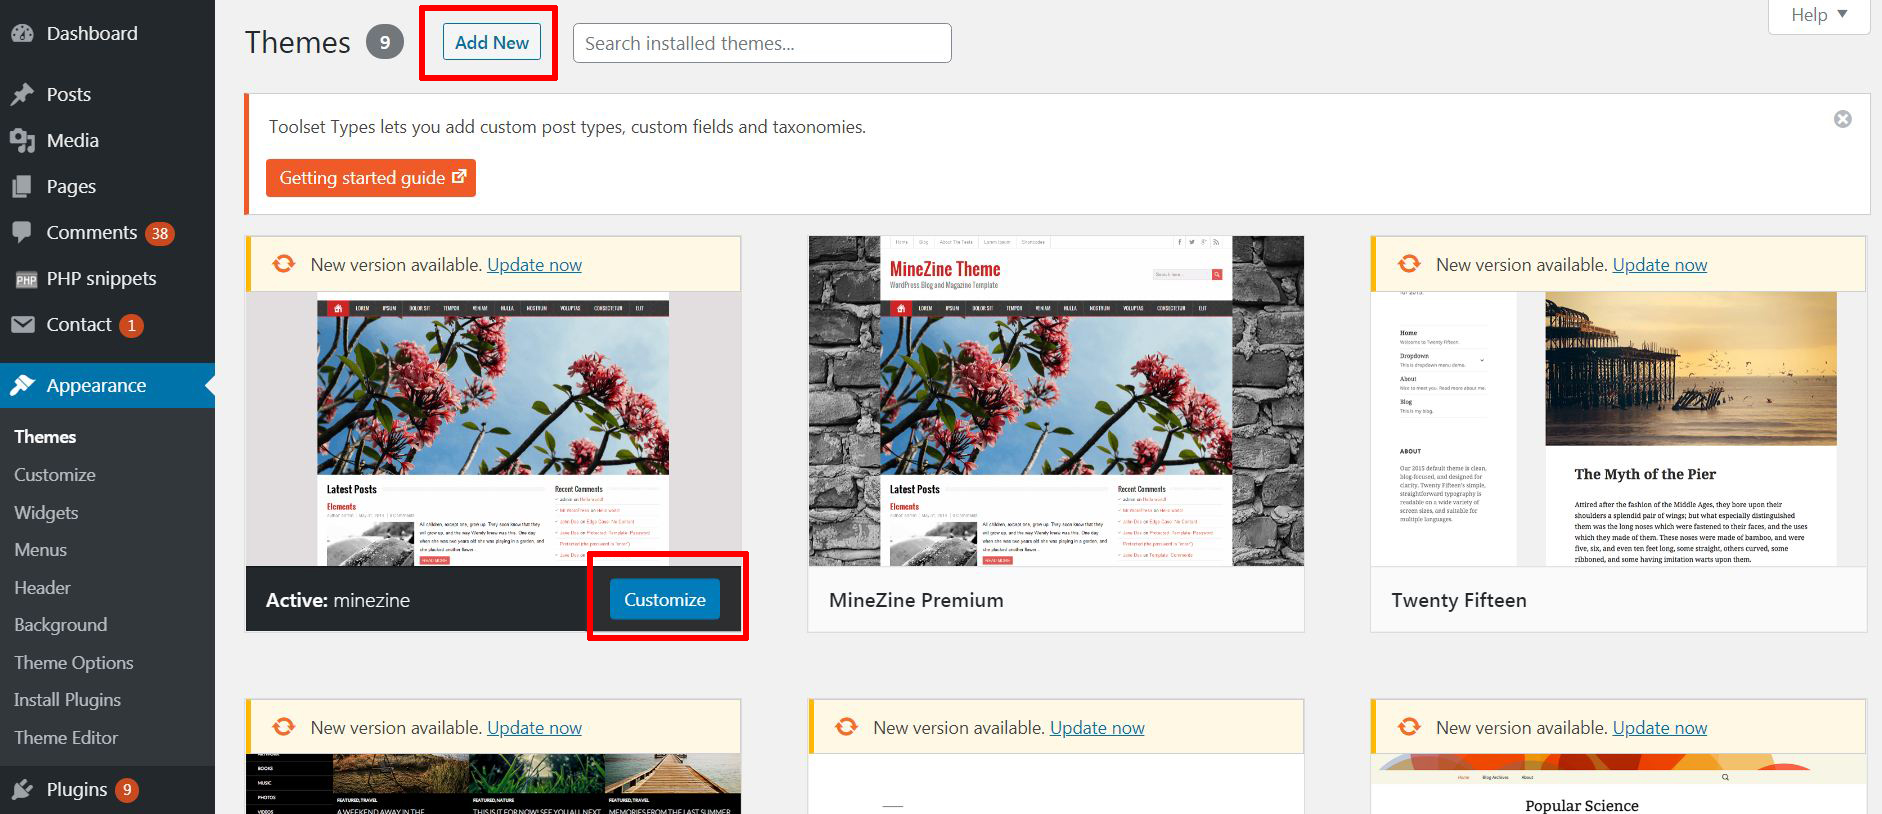
Be advised that besides modifying the themes, you can also add a new theme, by clicking the “Add New” button. This will take you to the “Add Themes” option, where you can Install, Preview, and customize themes. You also can upload a theme that you have purchased online or created yourself by clicking the Upload Themes button. The upload process is similar to uploading a picture. Note that once you buy or download a theme from another website, it will be in a .zip archive and you have to choose it from your computer to upload and install it.
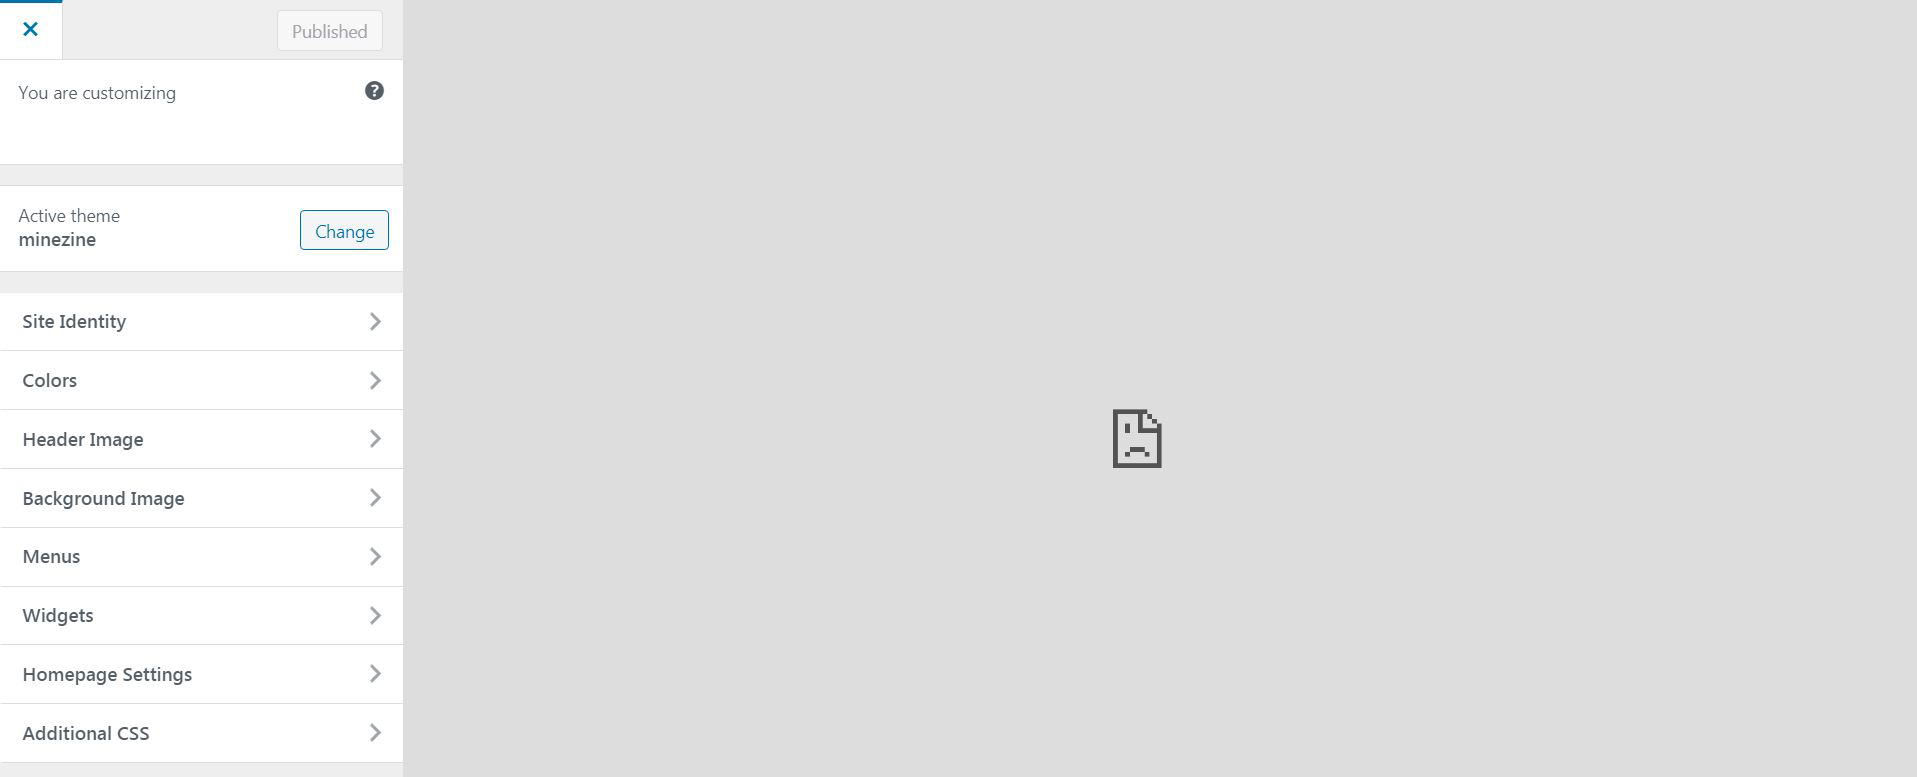
Customize
Customize is responsible for different aspects of your theme and website as a whole. It has different menus that allow you to change how your logo looks on a new tab, modify the colors, change the header and footer menus, and tons of other tweaks:
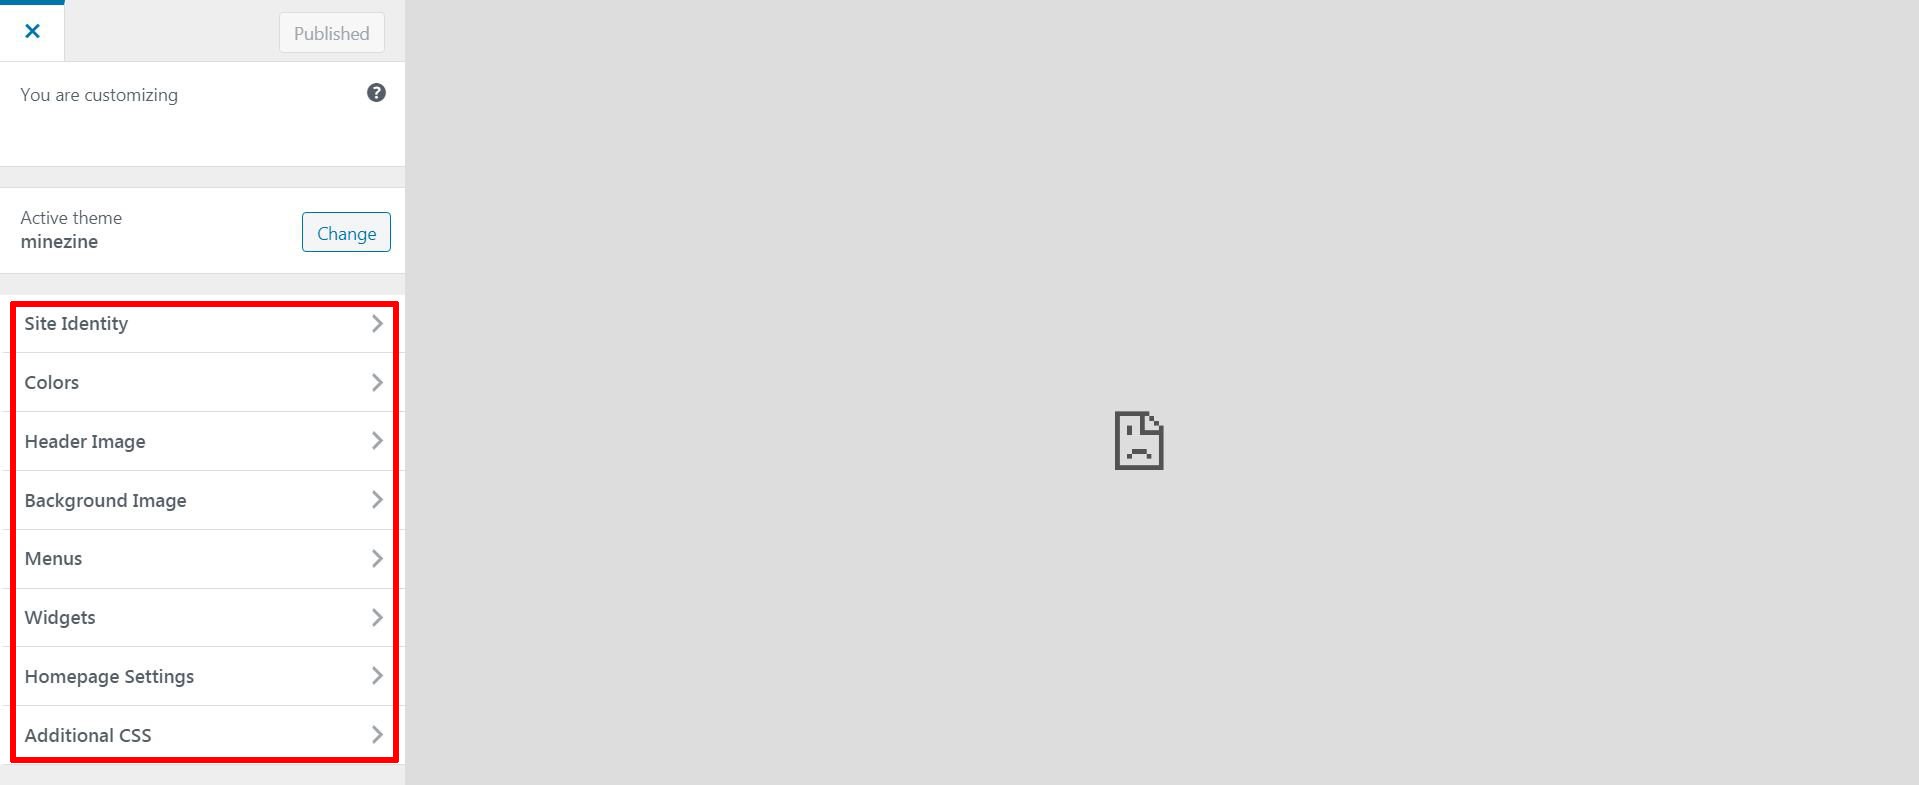
You can also use this to add a custom CSS website if you are into that kind of stuff. You can also add a background image and customize how your menus will look, adding and removing menus from the top bar. These menus may be automatically set to be the actual Categories we have discussed earlier. This is what the default practice is with Customizing menus, since it is simple and easy to navigate.
Widgets
Widgets are those small elements of your website that are added to it to make it more functional and a more pleasant place for your visitors. The Widgets are a very important element when it comes to modifying your content with, let’s say social buttons that will link to your Facebook, Twitter, YouTube, and other profiles. Here is how the Widgets panel looks like:

As visible from the panel above, we have added some Access Social Media Buttons as a widget to our test website, so that you can see that they are visible on the top-left screen. You can modify a Widget by clicking on it and then the system or widget plugin will allow you to choose where do you want to have the widget appear – something that is important just as it is convenient for you.
Menus
As we explain in the “Customize” section, the Menus can be modified, so that you can make it easier for users to navigate your website. These menus can also be created and changed from the Menus tab which look like this:
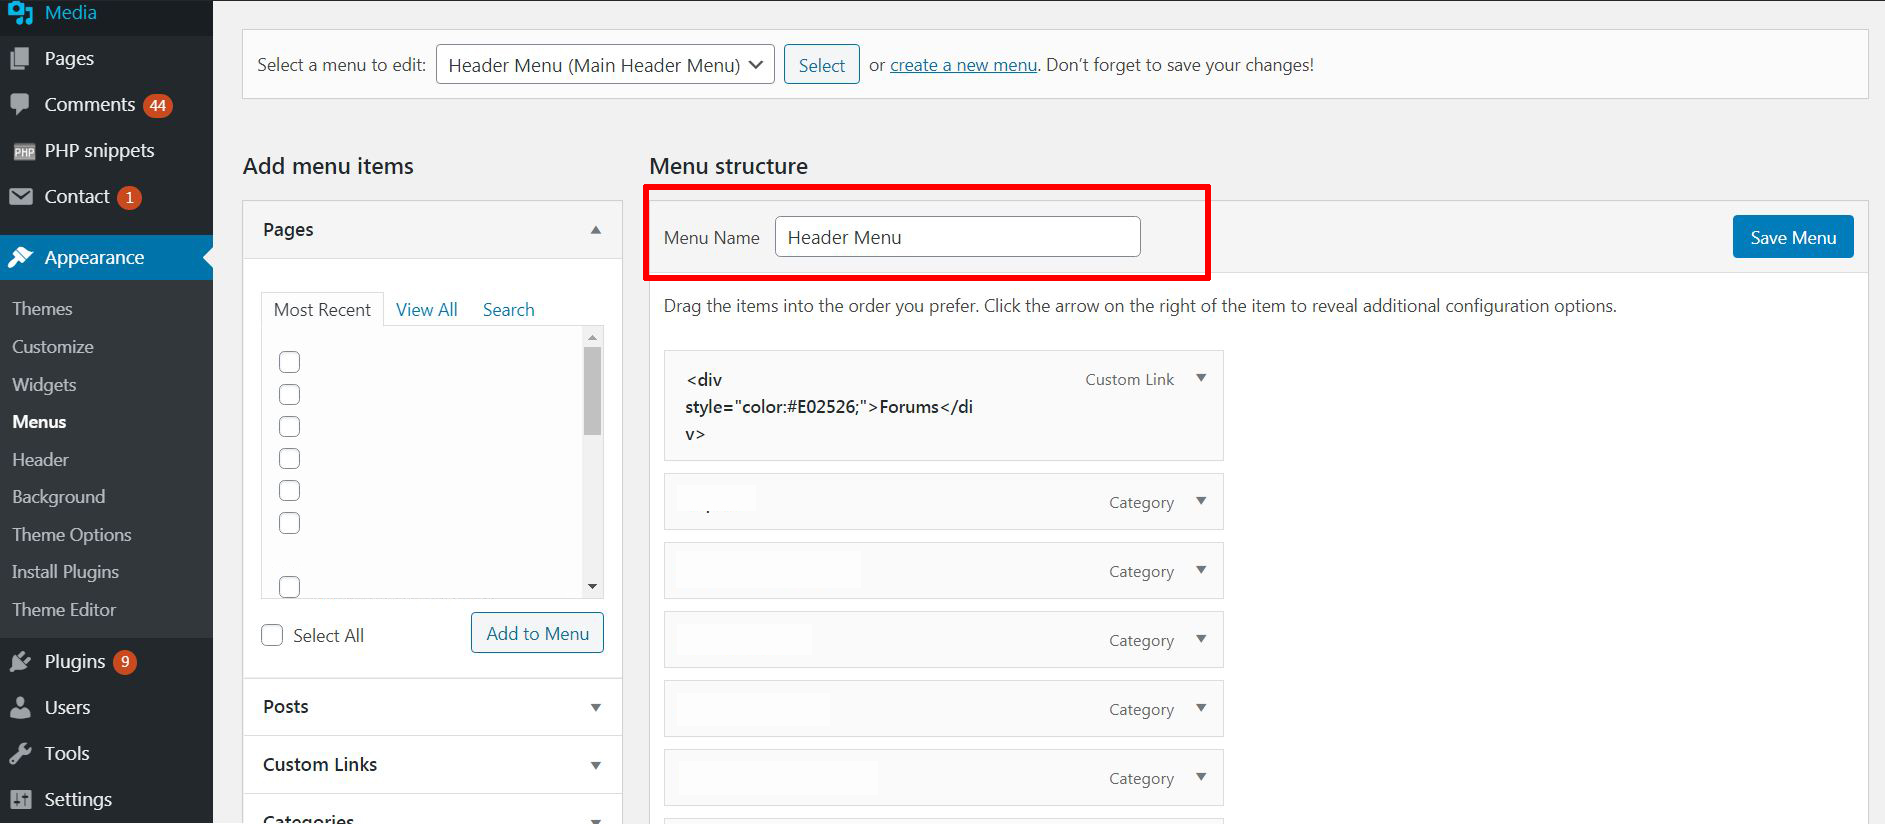
As you can see, we are currently at the Header menu, which allows us to save menus of the categories in the header itself. Once you click on the “Category” menus list underneath it, you will see what options you have for each menu. You can move a menu up and down in front of other menus and you can add menus in between others. You can also add currently detected menu items by ticking them on the left where it says “Add Menu items,” and then clicking on the “Add to Menu” button. You can also do the same interactions with the Footer Menu items by changing the header menu to the footer menu to see the menus at the bottom.
Header
The header sub-menu of this CMS is responsible for the top part of your website. It can be customized from the Customize sub-menu and it is in the same panel, only you can customize different aspects of it like shown below:
The same goes for the Background setting and this is the reason why we haven’t separately written about it, since it can also be found in Customize.
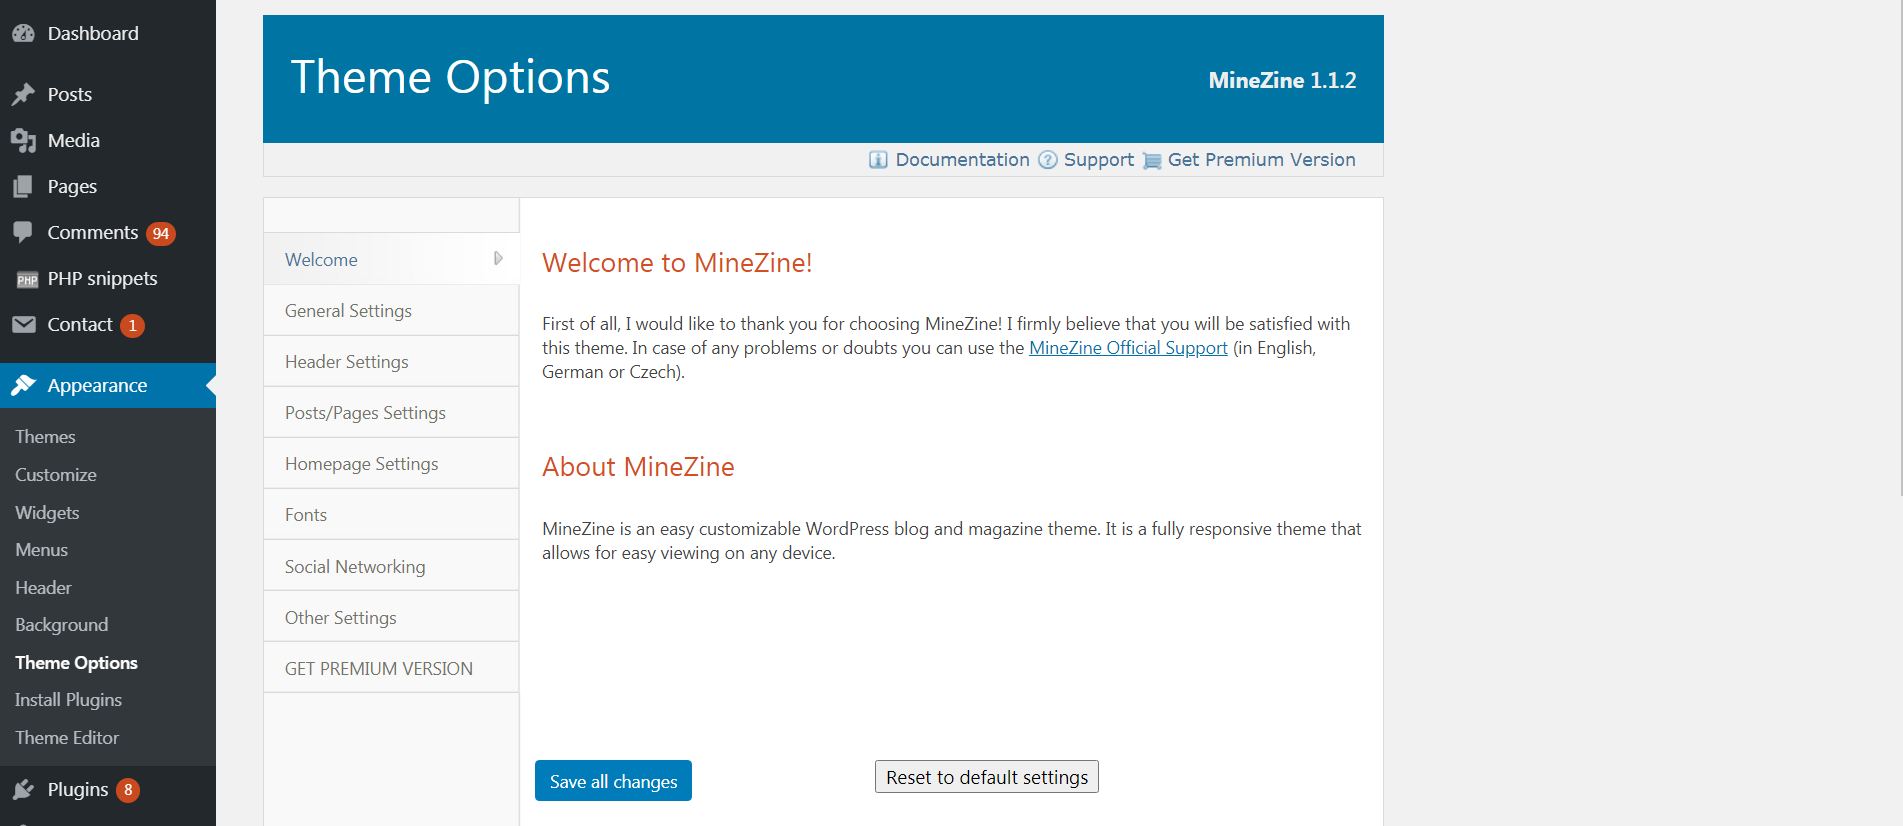
Theme Options
Once you have already set-up and installed a theme on your website, you can customize that theme. This can be accomplished by going in the Theme Options. There, you will see everything that your theme has to offer in terms of customizability. Of course, different themes offer different levels of customization.
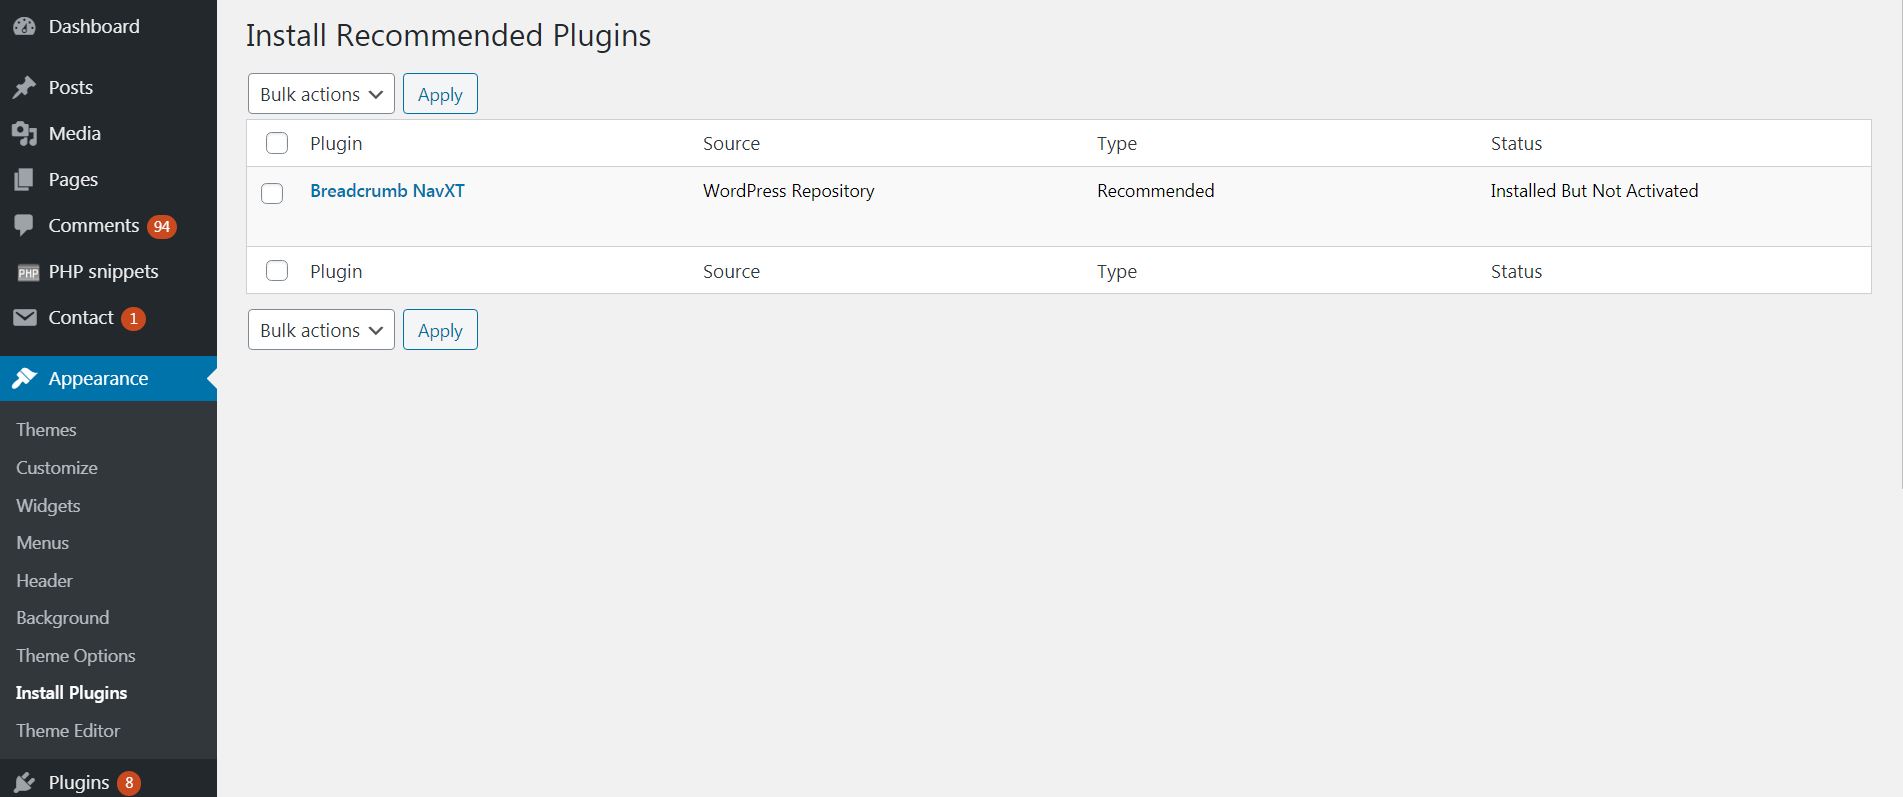
Install Plugins
The Install Plugins section allows you to expand the potential of your appearance by letting you install custom plugins that have different functions. One example is the breadcrumbs plugin we have added here for demonstration purposes:
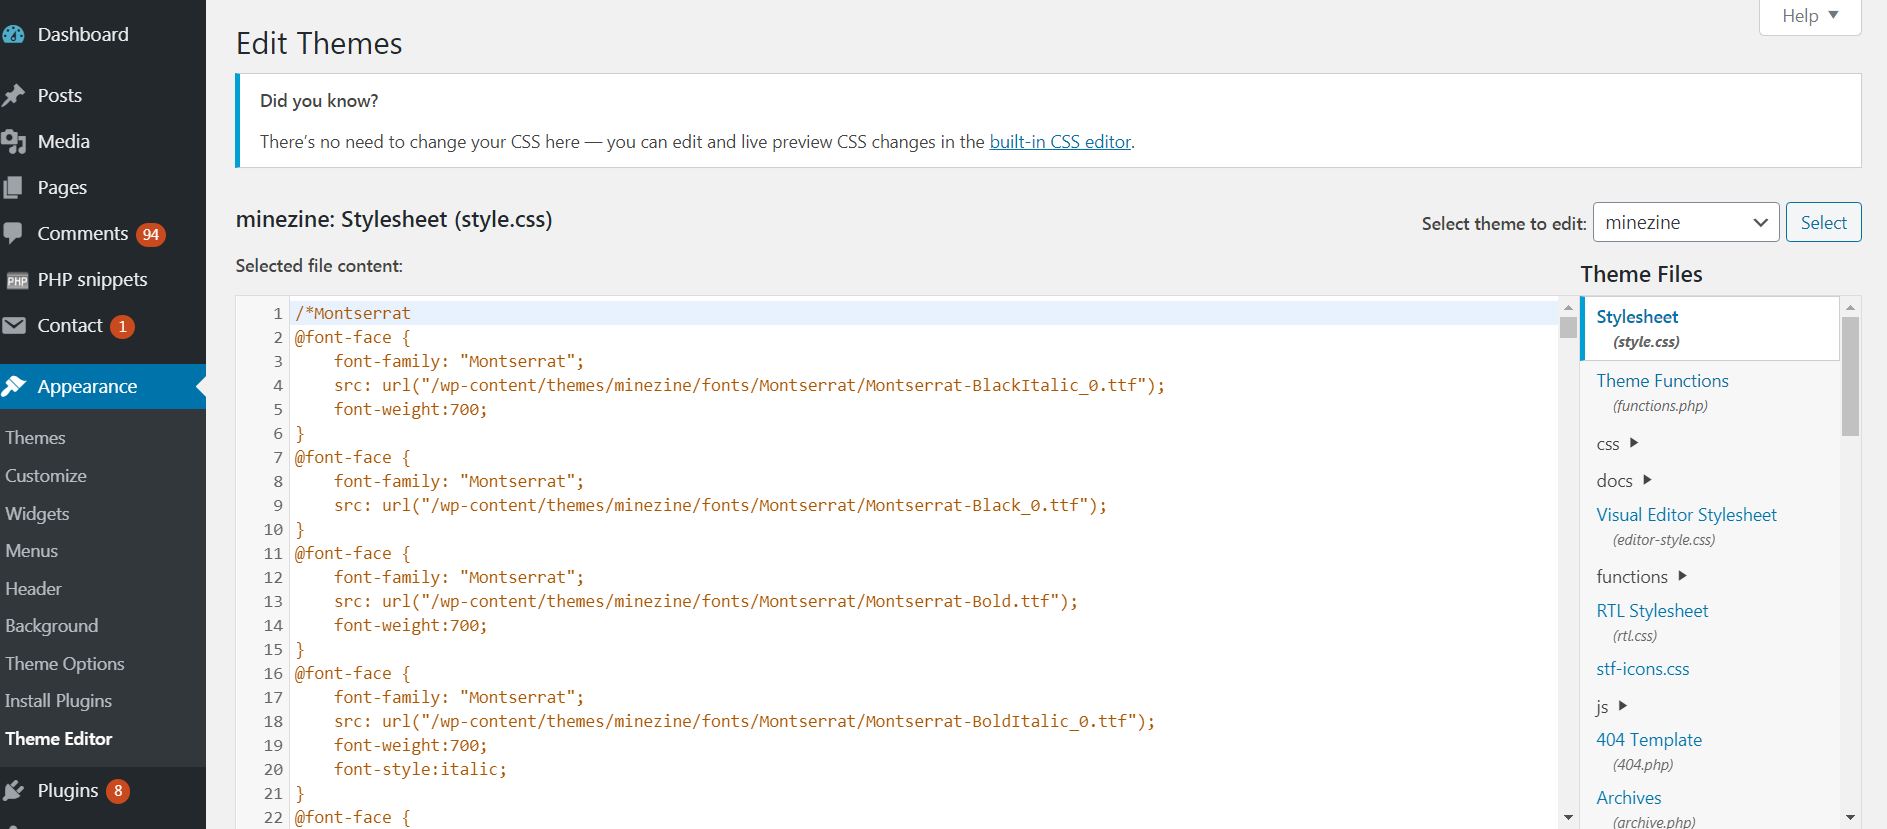
Theme Editor
The Theme Editor is the more modifiable part of the layout of your Theme. It allows you to add a custom code to your liking. As you can see from the image below, we have added some custom CSS that alters different aspects of the theme that are related to how the fonts are being used and set up.
What Is Plugins in WordPress?
The plugins section is the aspect which is responsible for the different plugins that can be added to it. One particularly good plus of using this platform is it allows you to add absolutely any plugin you want and it has one of the largest (if not the largest) choice of plugins in the world. From this section, you can manage your plugins, delete them, activate them, add a new one, and do everything that will improve them. You can also update and test each plugin from here.
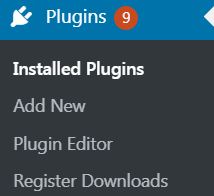
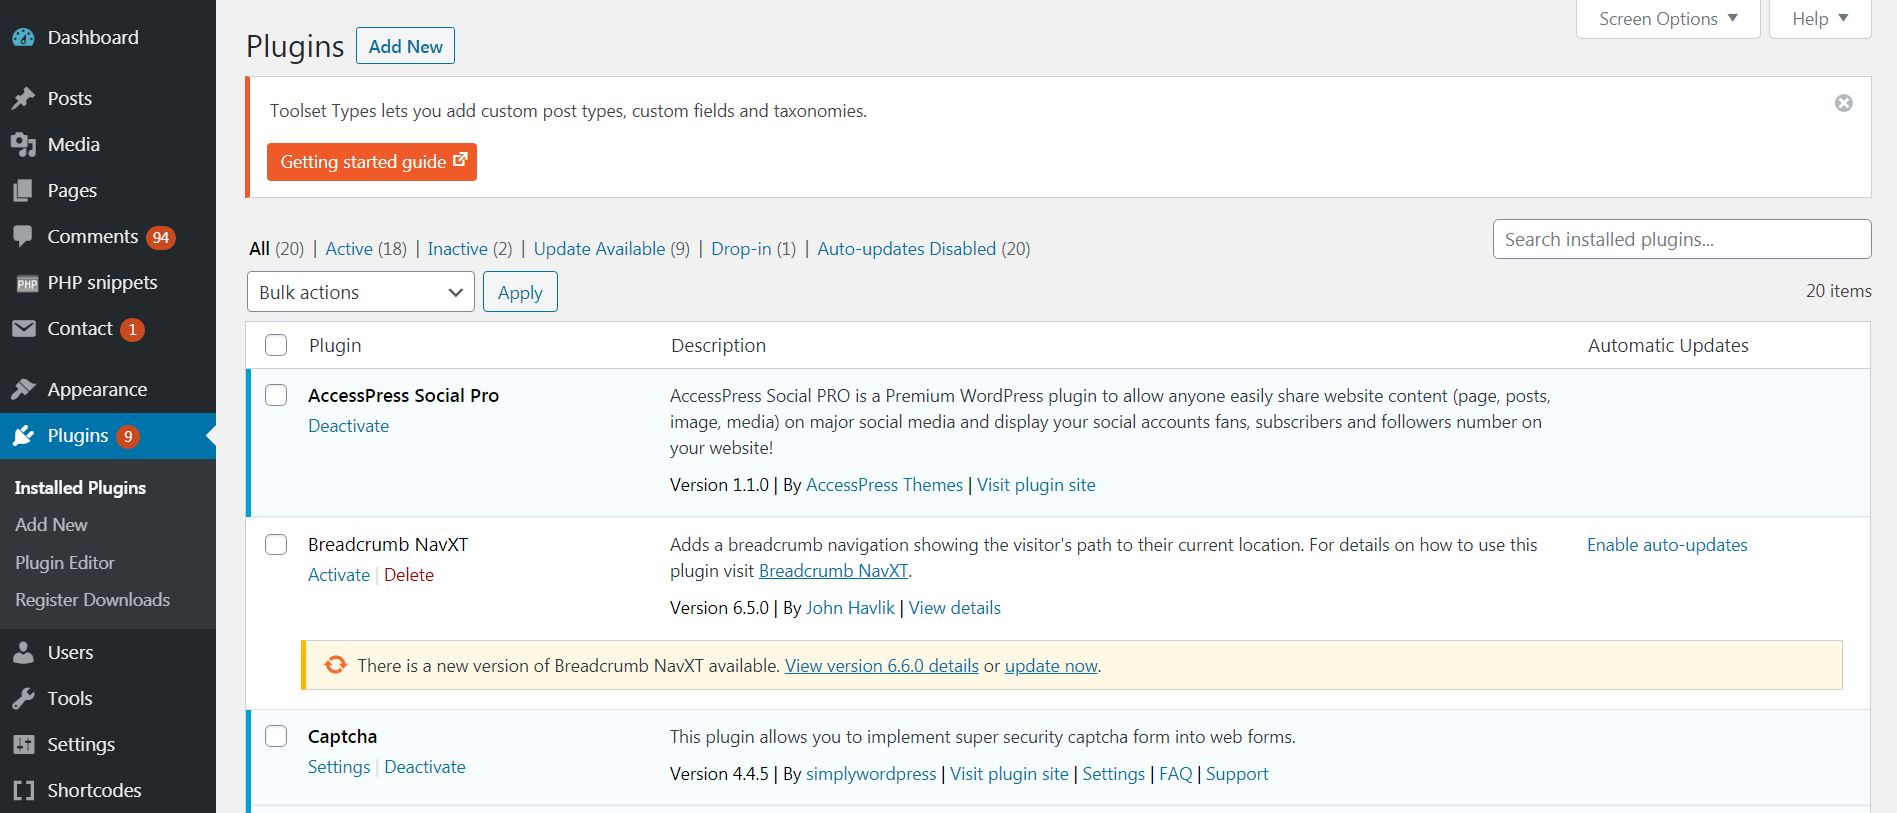
Installed Plugins
The “Installed Plugins” submenu is the one that is responsible for the complete overview and management of all of them. You can think of it as the “All Posts”, but only for the plugins. As you can see from the image below, on our test blog, we have added some good plugins that are important for most sites. These are Captcha, to prevent any spam and robot comments, AccessPress Social Media Pro, to make it easier for your visitors to share content, and several others.
Add New
Similar to the “Add New” in “Themes”, here you have presented a large database of plugins that are certified to work. From this section, you have the options to see more details on a certain plugin, install such by clicking on the “Install Now” button and see who created and contributed to it.
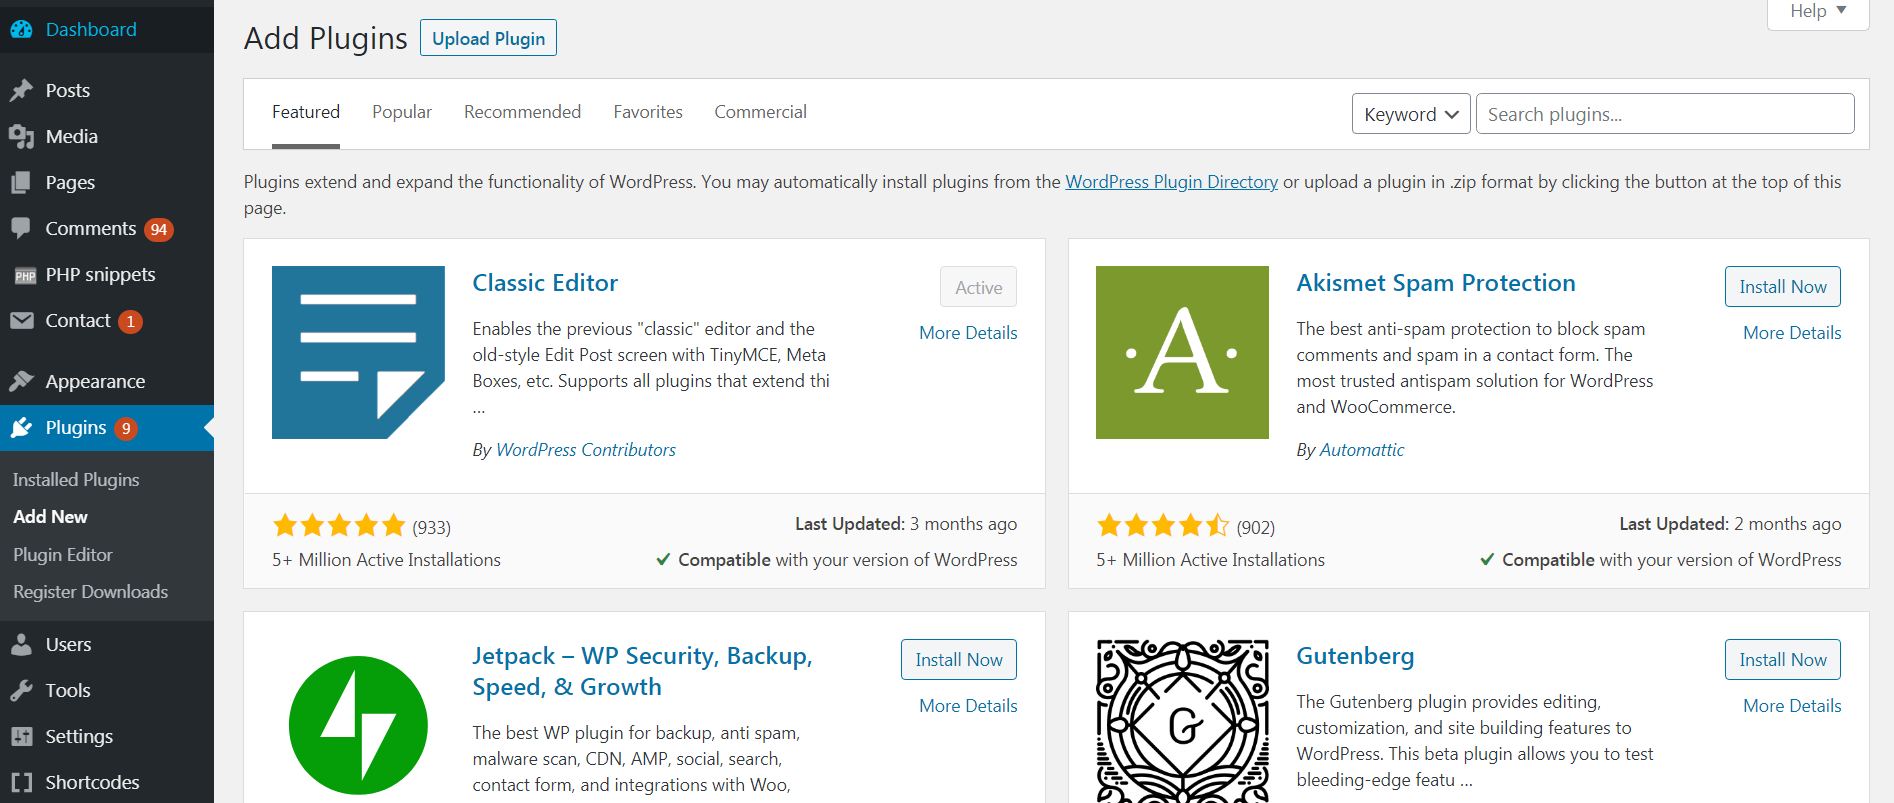
On the top, you can also sort the plugins based on several preferences: Featured, Popular, Recommended, Favorites, and Commercial. You can also use the search bar on the top-right to look for a specific plugin that will help you install the right plugin based on your requirements. The plugins also have ratings and user reviews to help you see what people think about each plugin, further inform you and hence contribute to your decision-making process.
Plugin Editor
Just like the “Theme Editor”, the Plugin Editor allows you to add that custom code where you need a more custom solution for your plugin. This can help you to make a certain plugin fit your specific needs and even make it way more powerful than how you installed it initially.
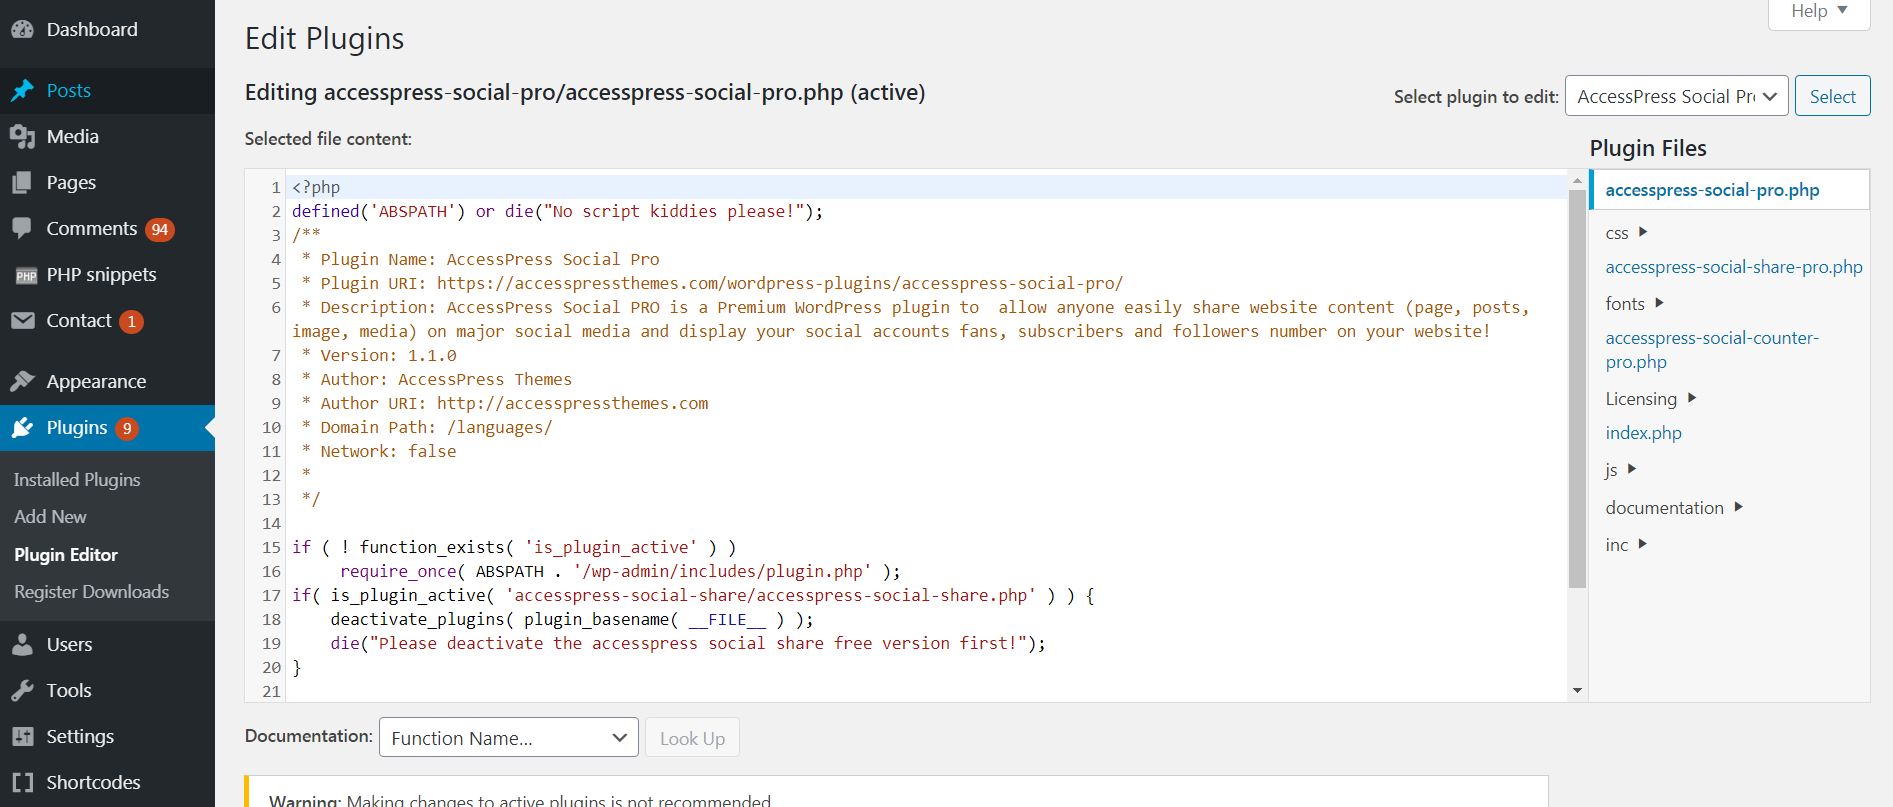
The Plugin Editor allows you to search through different aspects of the code and modify each of the functions and also helps you add code easily by having line enumeration – something that is very standard, but necessary if you are a programmer.
What Is Users in WordPress?
The users are the people who will be working on your content. Each of those users will have access to Dashboard, but what makes you the one in power is you can set what permissions each user can have over it. And how we will show you how to exercise that power.
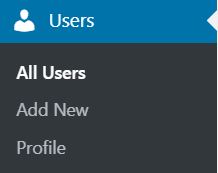
All Users
The first submenu of Users is All Users. It will help you see every user that has been registered on your website and is currently publishing blog posts in it (for blogs). This logic may change a lot if you have a bigger website and this is why managing users is crucial to your security and privacy. The users’ panel is very friendly and logical:
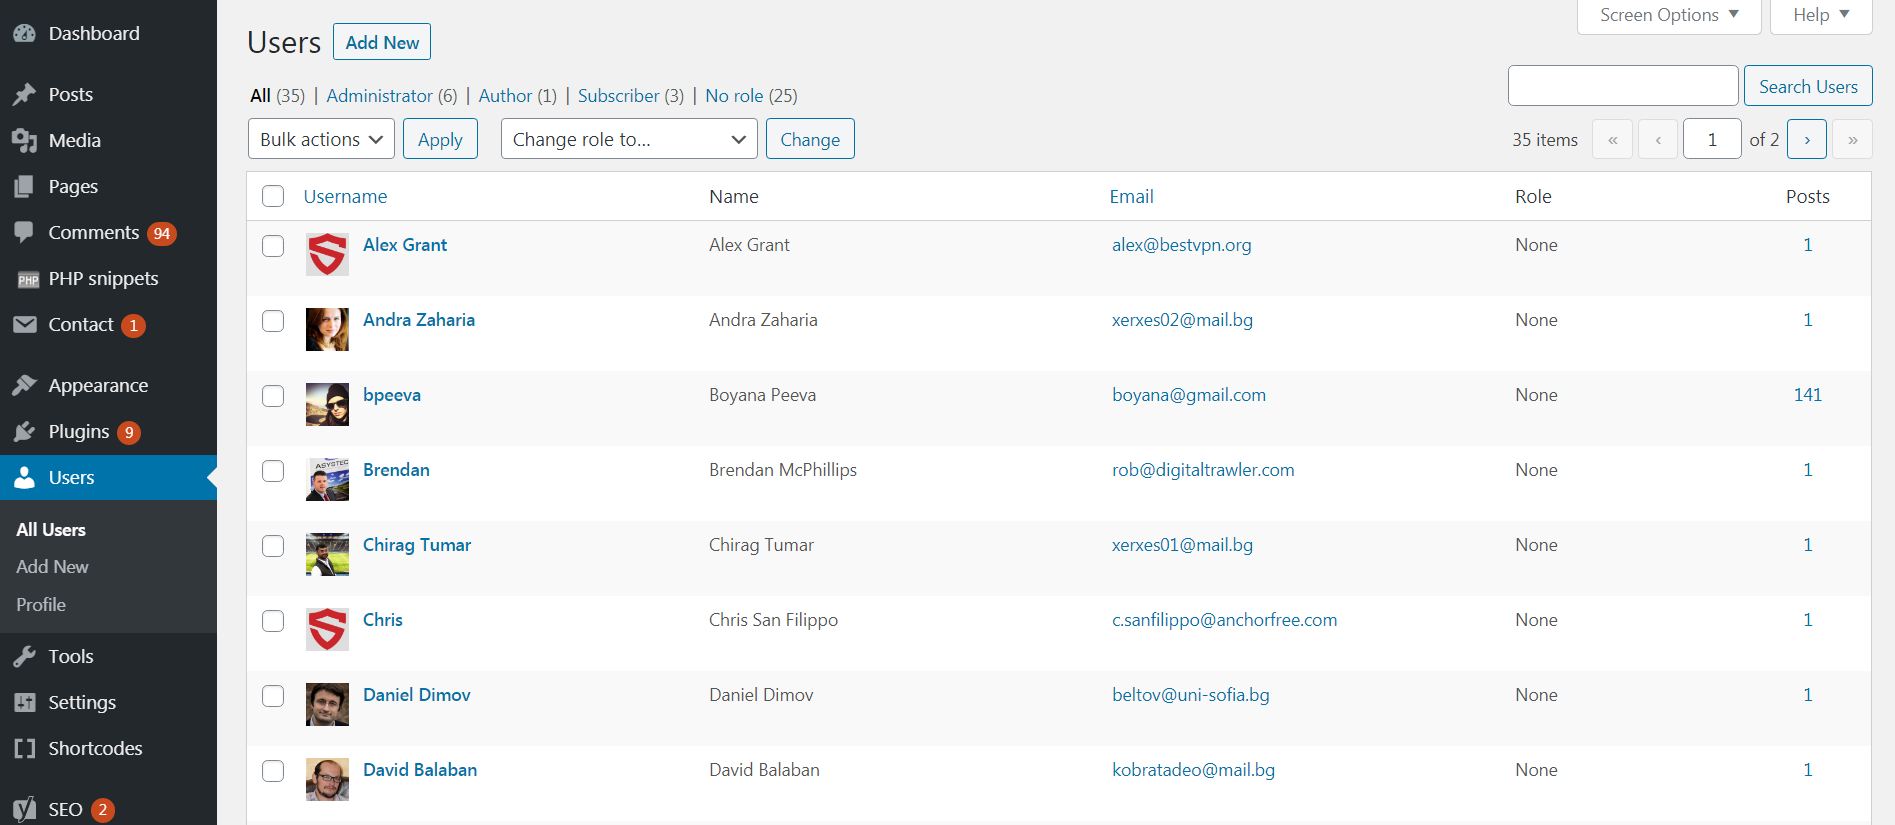
As you can see, this section gives us a lot of information, such as:
- How many posts each user has;
- The permissions level of each user (Administrator, Author, Subscriber, No Role);
- The name and the registered e-mail of each user;
- The option to edit, delete and view the user information in depth. (Seen by hovering over the user with your mouse);
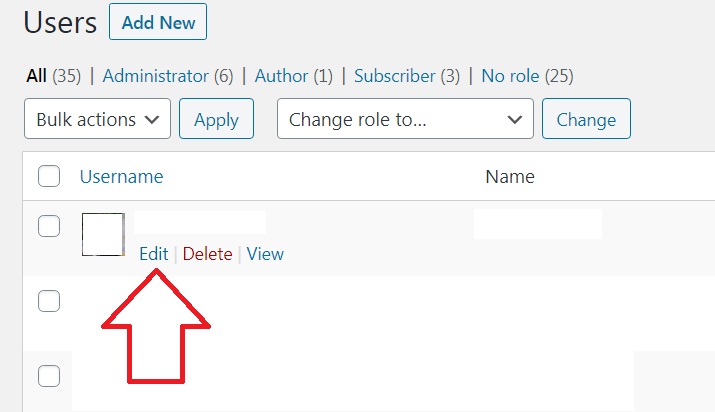
In order to “Edit” a certain user, you can hover over the name with your mouse and click on the Edit button:
Once in the Edit panel, you should see all of the information that you can edit for a given user. This includes:
Username (used only to log in and can’t be changed once it’s set).
Role (Admin, Subscriber, etc.)
First Name
Last Name
Nickname (What will be seen by the public).
Email (required)
Website
Twitter username (without @)
Facebook profile URL
Google+
Digg
Flickr
StumbleUpon
YouTube
Yelp
Delicious
Yahoo IM
AIM
Jabber / Google Talk
Biographical Info (A 3 or 4 sentence bio about the author).
Profile Picture Avatar (This will also be publicly seen).
New Password and Set a New Password.
Source: WordPress.com
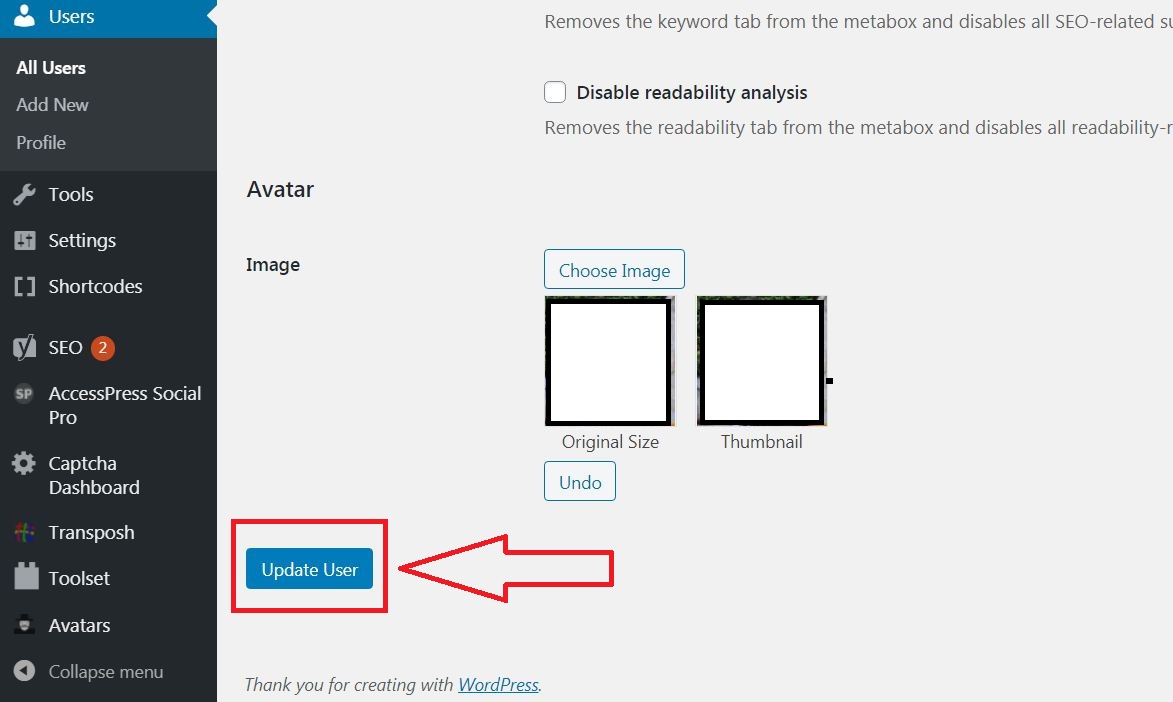
This is how the complete panel looks like:
After you are done changing the information from each user, always remember to scroll down and click on the “Update User” button, so that you can save all the changes you have made:
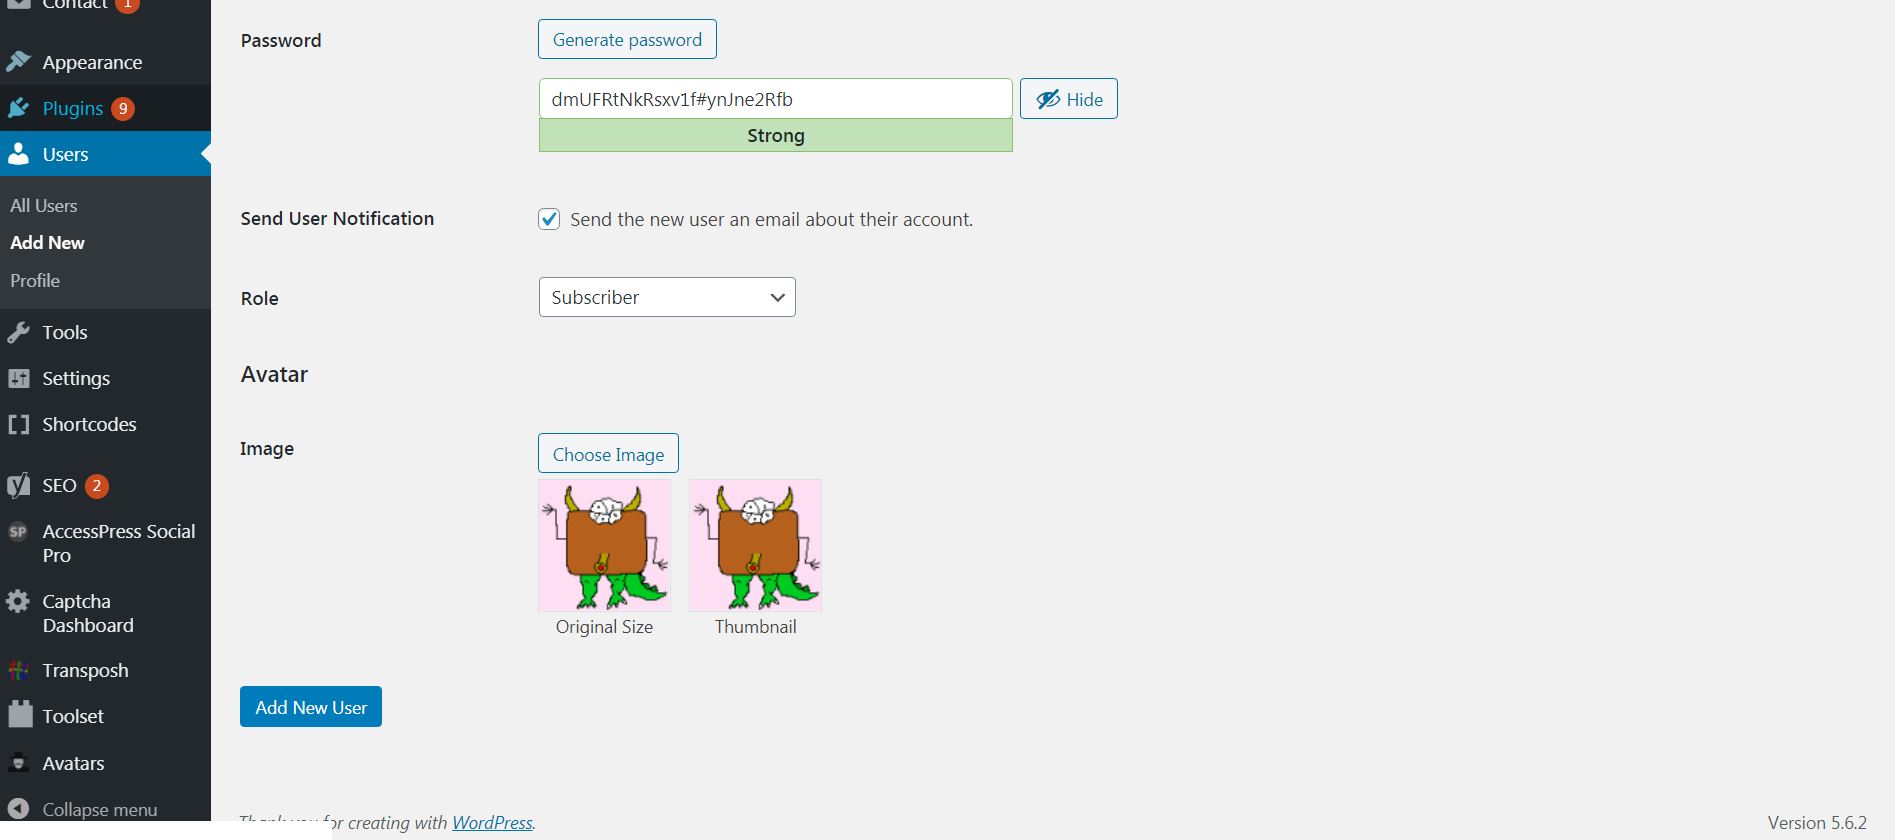
Add New
The section to add new users does not differ much from the Edit Users. The main thing here is to set everything for a new user and then scroll down, and click on the “Add New User” button to apply the changes.
Profile
The “Profile” submenu is just an easier way to edit your own information for your specific user that you have logged in with. It does not differ much from the other menus of users (add new and edit).
What Is Tools in WordPress
What would the most used CMS platform in the world be without its tools? These tools may seem insignificant, but if you are an owner, you will find yourself using these tools quite often, especially if you need information and means to improve your website. Also, be advised that the tools category is the one created specifically to show you ways in which you can manage data and see different information.
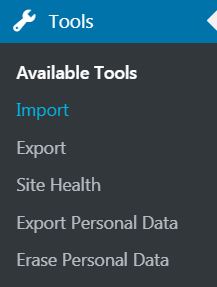
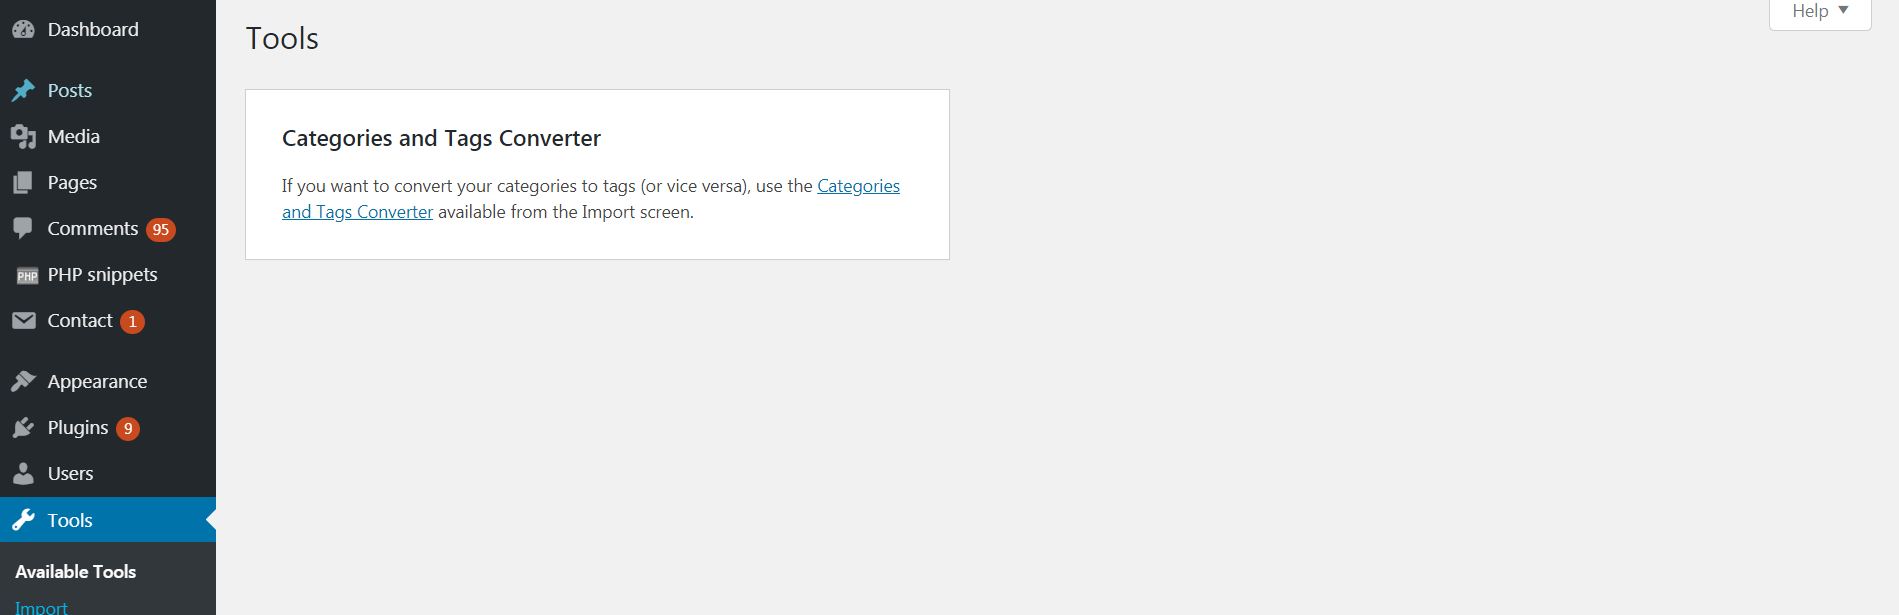
Available Tools
This aspect of the Tools section helps you see which tools you have currently added to your blog. To show you how an added tool appears, we have added the Categories and Tags Converter tool due to its high availability and importance:
Import & Export
These two menus of tools allow you to add a new tool and also export your current tools, so you won’t have to search, download and add them to another website you currently manage.
Import allows you to add a specific tool, plugin, or any other object for that matter to your current toolset. It is fairly simple to use tool with even some suggested tools that are often added:

Import also allows you to search through your “Plugin Directory,” so that you can add custom plugins and tools.
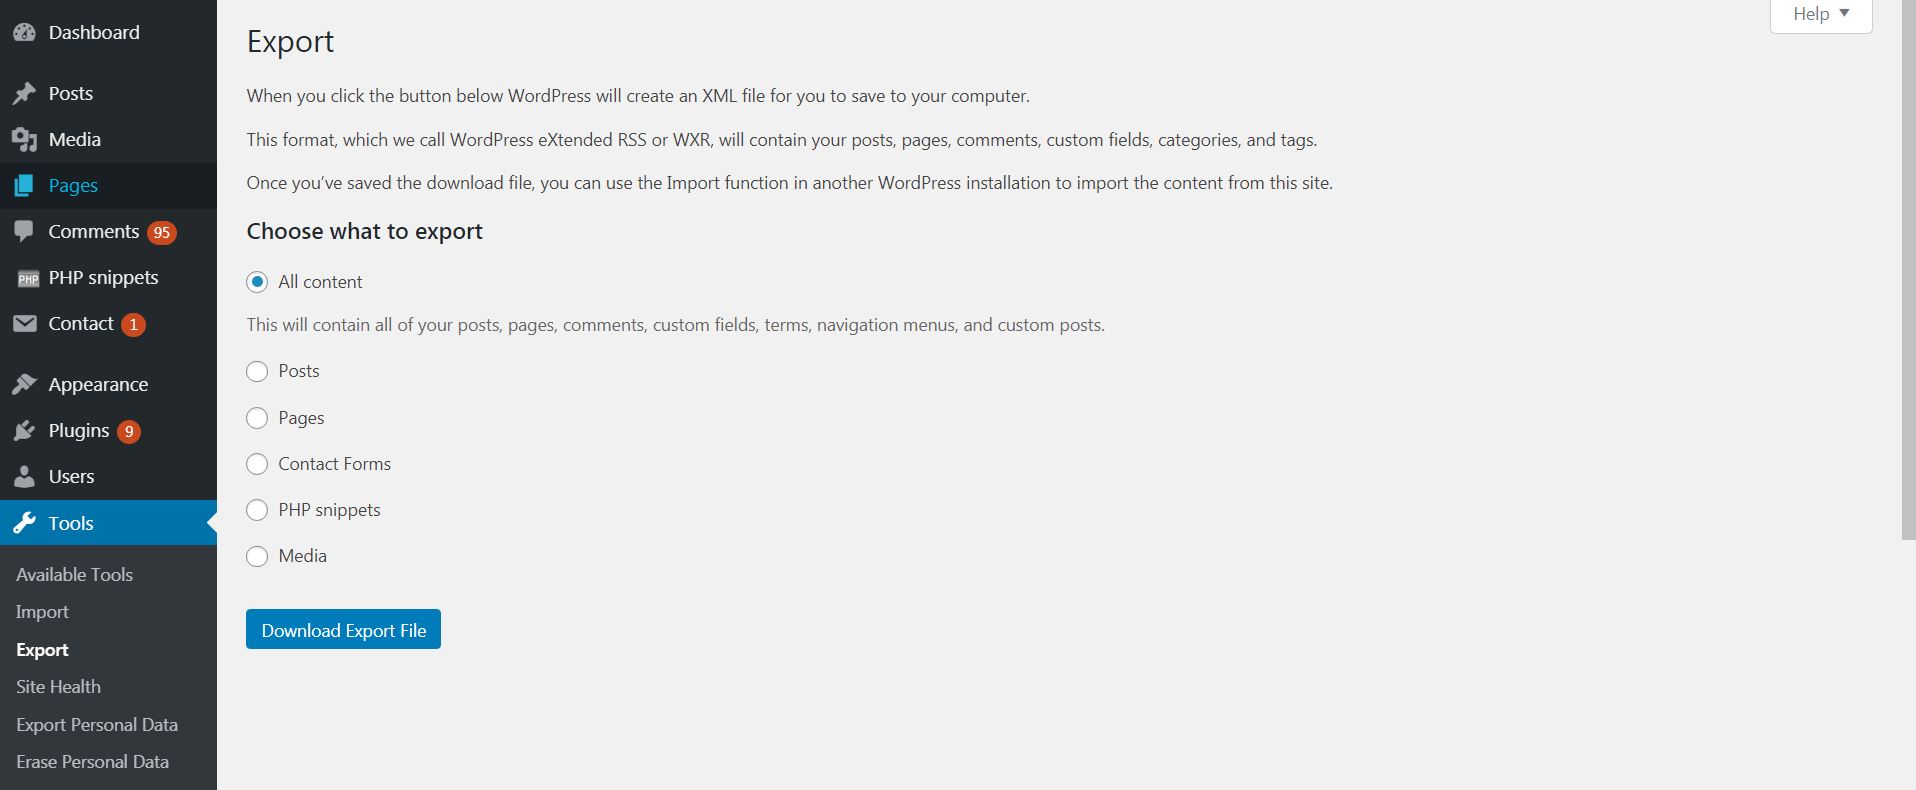
Export has a wider range of applications. You can use it to export absolutely anything from your website – posts, pages, comments, custom fields, terms, navigation, and custom posts. You can select absolutely everything and click on the “Download Export File” button, which will create a special file that can be used to re-add all this content automatically to another entity. This allows you to save a lot of time by skipping the time-consuming processes of editing and modifying themes, plugins, and others. Of course, for your new website, you also have to make some changes, but they will be significantly less.
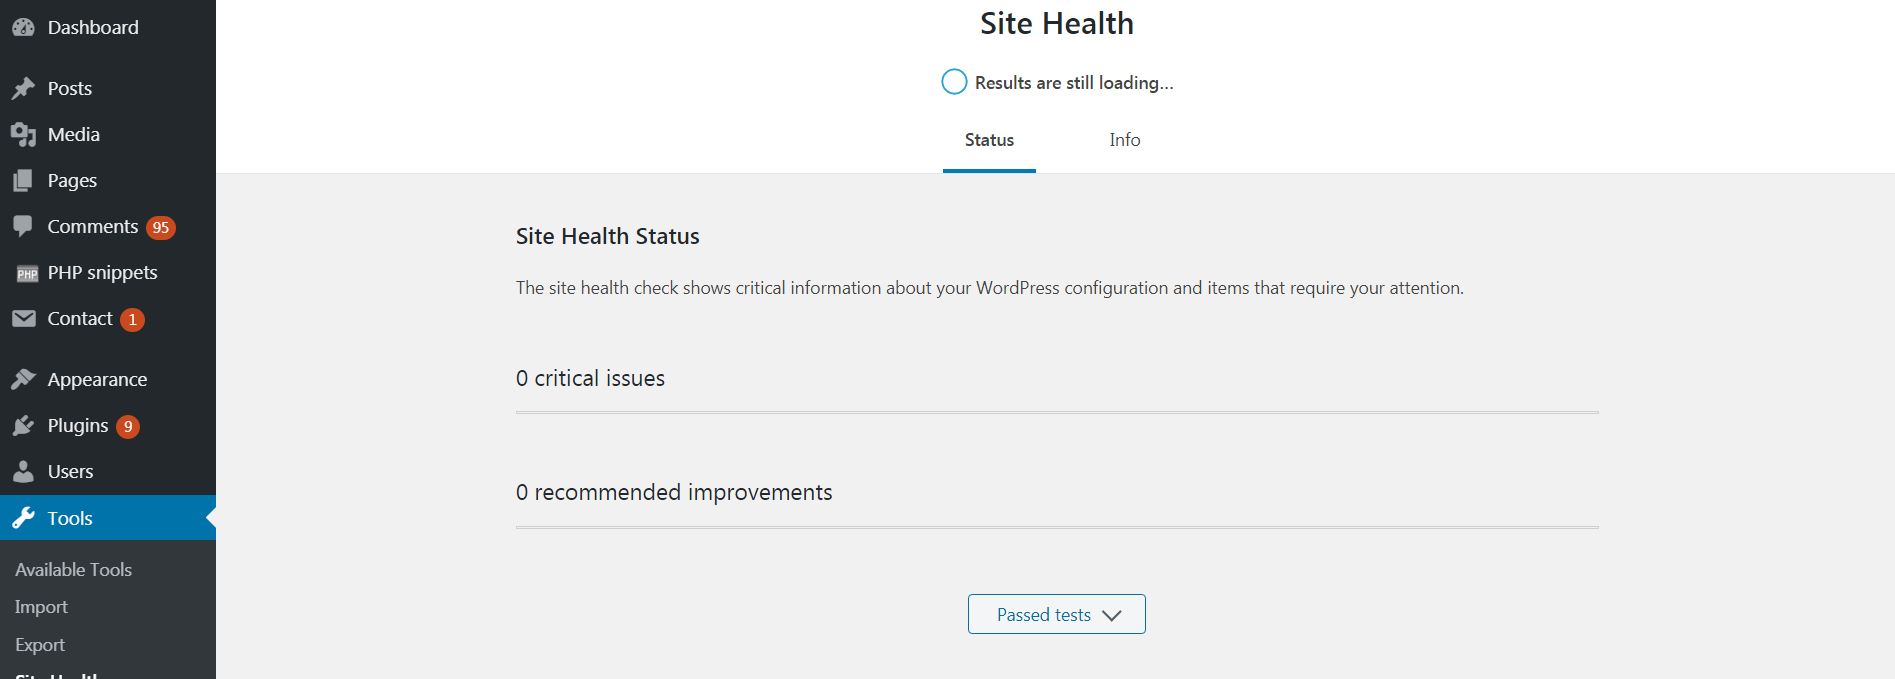
Site Health
The Site Health shows if there are any issues with your website that can be fixed through this CMS. These issues can often be reasons for your site becoming slow with time and even going down. Thus, it is very important to be able to constantly track and improve everything going on with your website.
Of course, the site health can also be improved by using other services that can determine even more issues with your domain than WordPress can. The web is full of advanced tools that can show you a lot of unexpected information regarding your website. Hence, it is always good to think in terms of constant improvement, as it will also improve the quality of your blog. This constant improvement logic is known in Japan as Kaizen and is one of the best management strategies that can be applied everywhere, especially with your website.
What Is Settings Menu in WordPress
The Settings are very advanced with a lot of customization preferences among which you can spend a lot of time to set your website to be running correctly and be with high-quality pages. These options are conveniently spread between the following areas:
- General
- Writing
- Reading
- Discussion
- Media
- Permalinks
- Privacy
- Duplicate Post
- Restrict Widgets
- Thumbs Excerpts
- WP About Author
- Post Formats
- WP Rocket
In this segment of the article, we will review these options in-depth and explain everything that you can do with them.
General
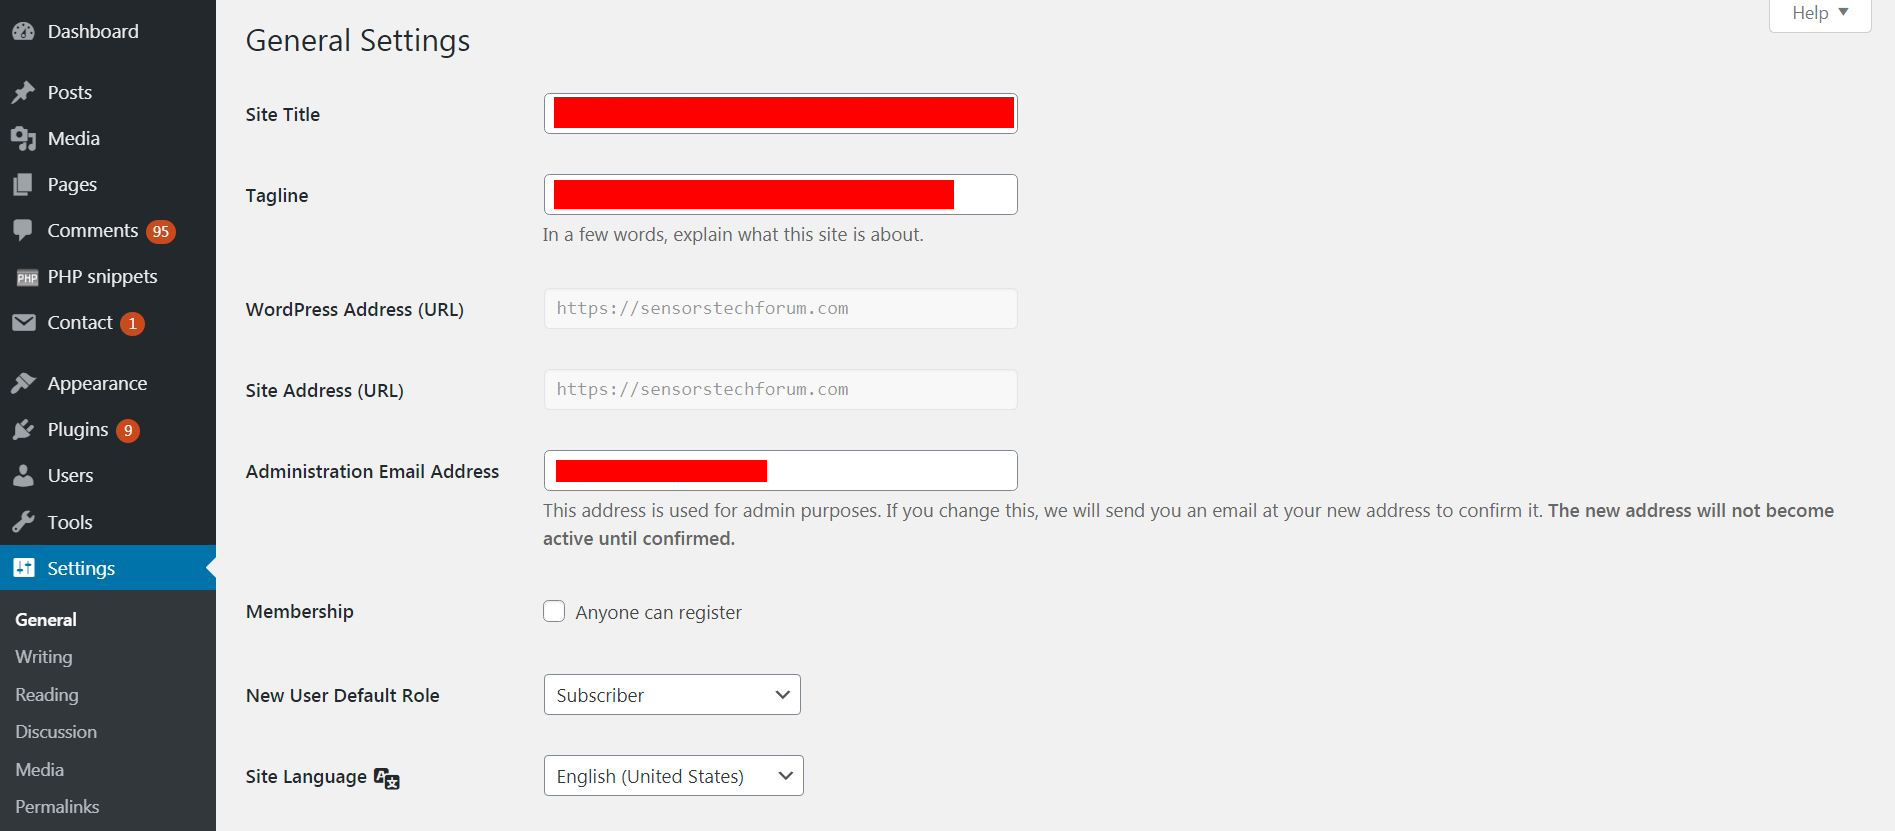
The General preferences of your site allow you to customize the main aspects of the website and the most general and important ones. They are laid out in a fill-out form logic that represents the following preferences:
Site Title (the words you want to see in google and new tab)
Tagline
WordPress Address (URL)
Site Address (URL)
Administration Email Address
Membership
New User Default Role
Site Language
Timezone
Date Format
Time Format
Documentation on date and time formatting.
Week Starts On (usually its Monday)
Usually, the WordPress and Site addresses are auto-filled for your specific site and the other preferences can be changed based on your specific preference. Each aspect of these general options includes a brief description that recommends what to fill in the specific setting.
Writing
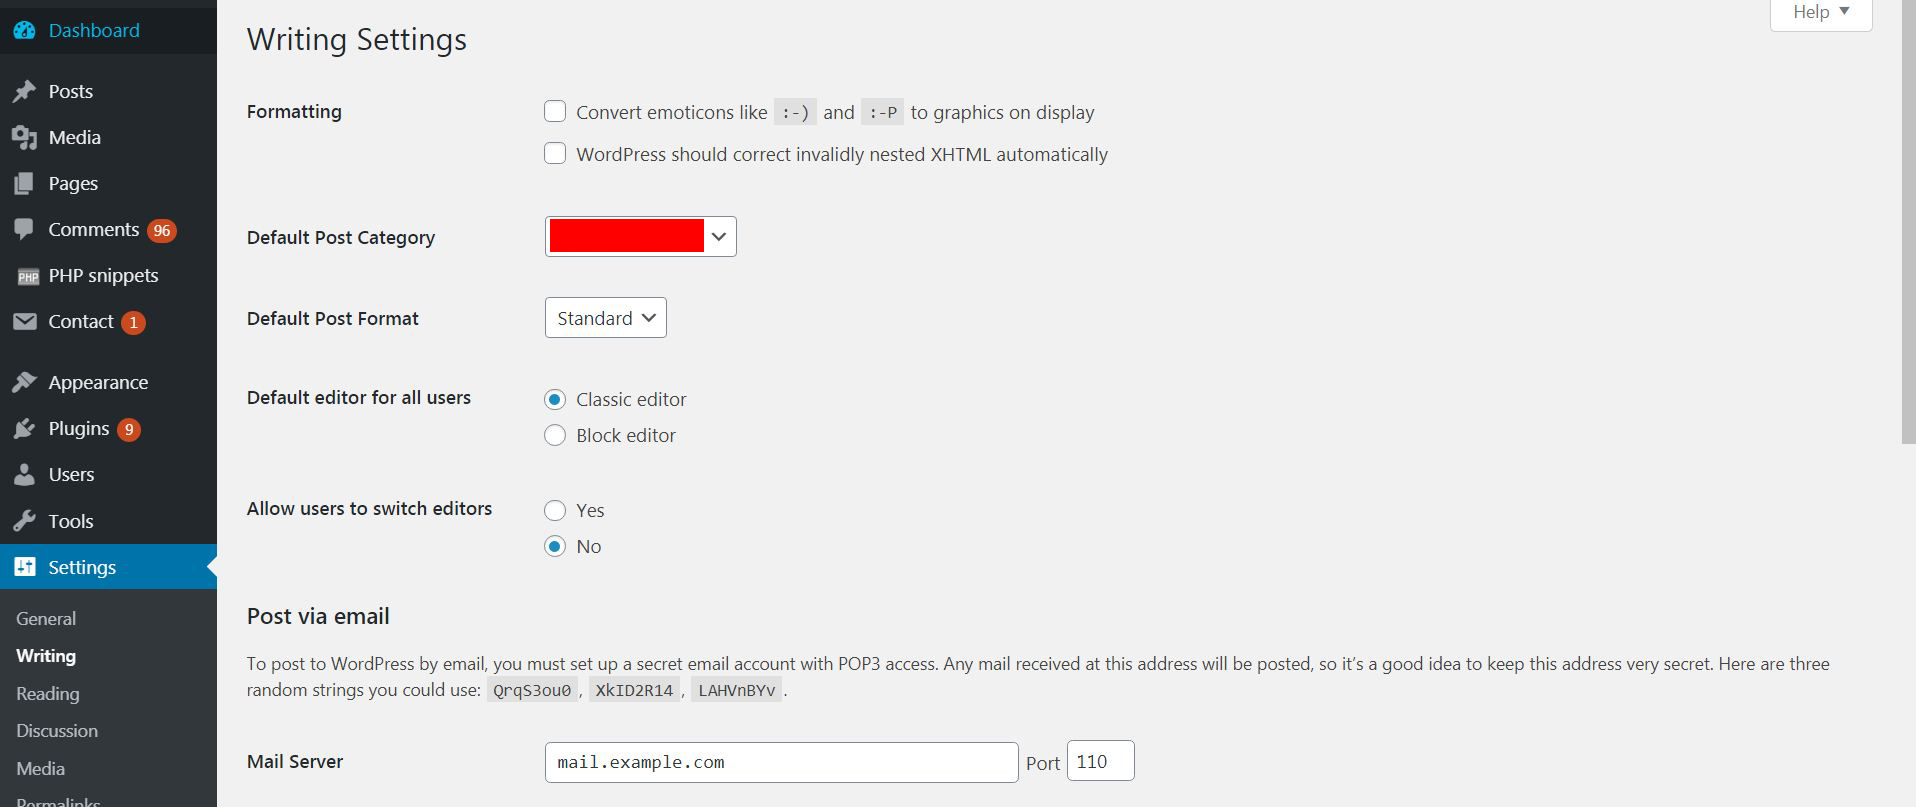
The writing preferences are everything that will be related to the new pages or posts you create on your website. They are the main link to modifying how the posting on your site will happen. you can modify them to the extent of setting up a mail server through which the new posted items will be added without the authors being logged in your site’s dashboard. You can also change the post editor to the classic one and the block one, depending on which one you will find more suitable for you. You also can set the format of which the newly added items will be made – a gallery, a chat, a link, audio, video, an image, or other, depending on the purpose your site will serve.
Reading
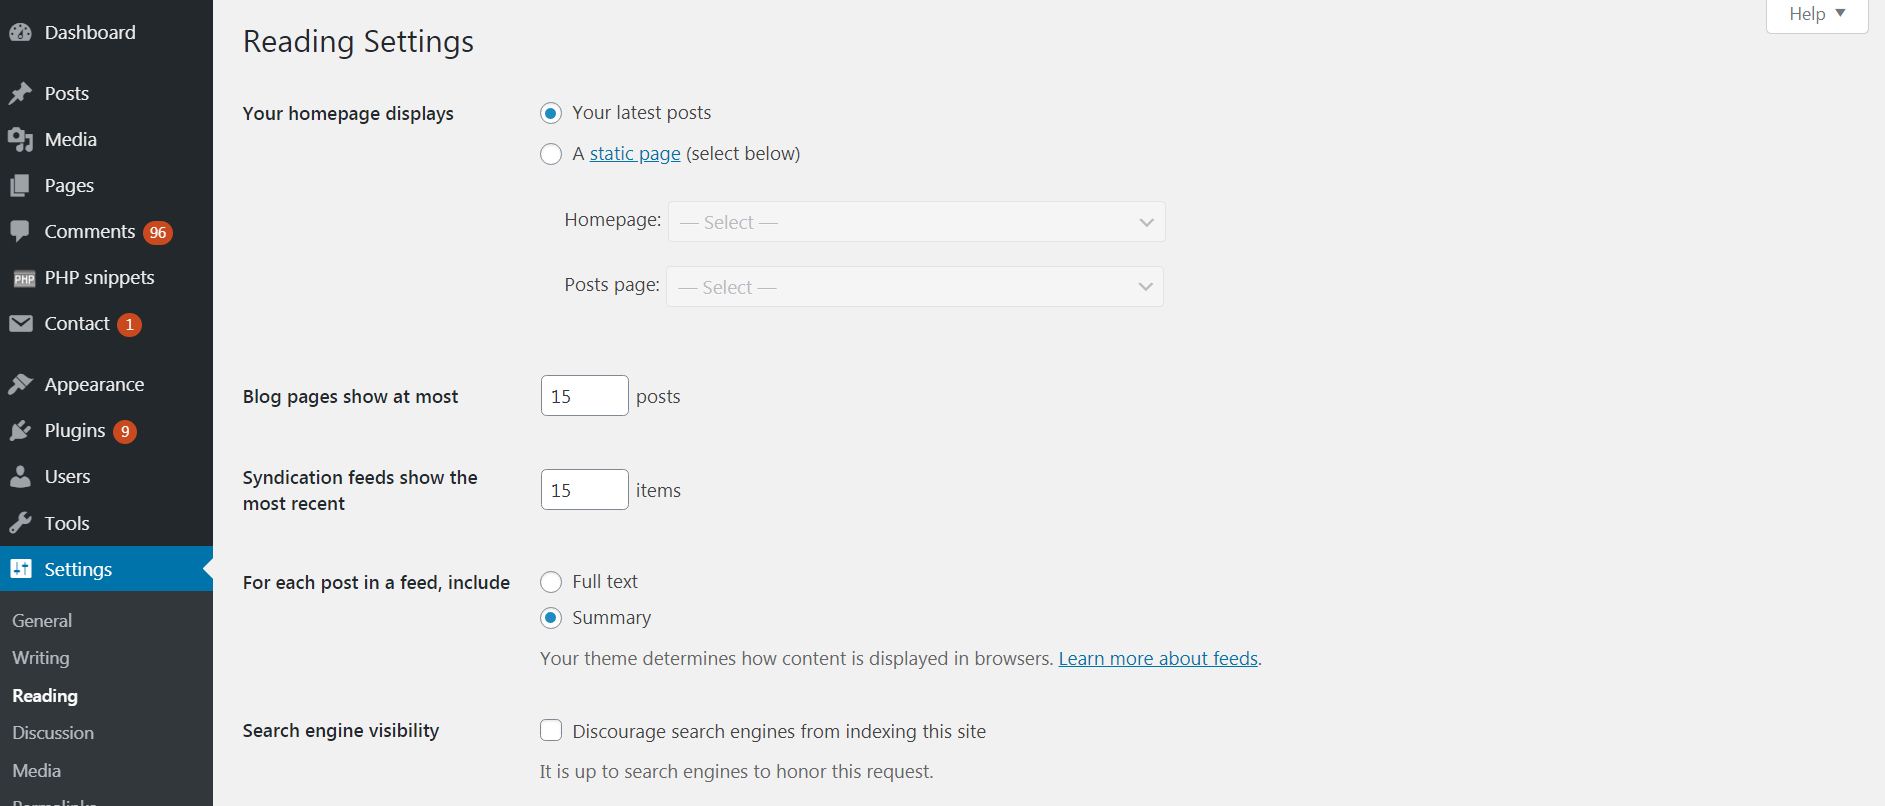
Besides writing settings, you also get to modify how the reading of your site is done. You can change different settings here, like how many posted items per page you want the user to see, which will also affect your site speed, especially if each post has a thumbnail, so choose wisely. You can also select each post to be displayed either in full or if you only want to see a summary of each post, depending on how you want the readers to interact. And you can also choose to display a static page on your home page, instead of a post-feed which has to be changed often to keep your users’ interest up.
Discussion
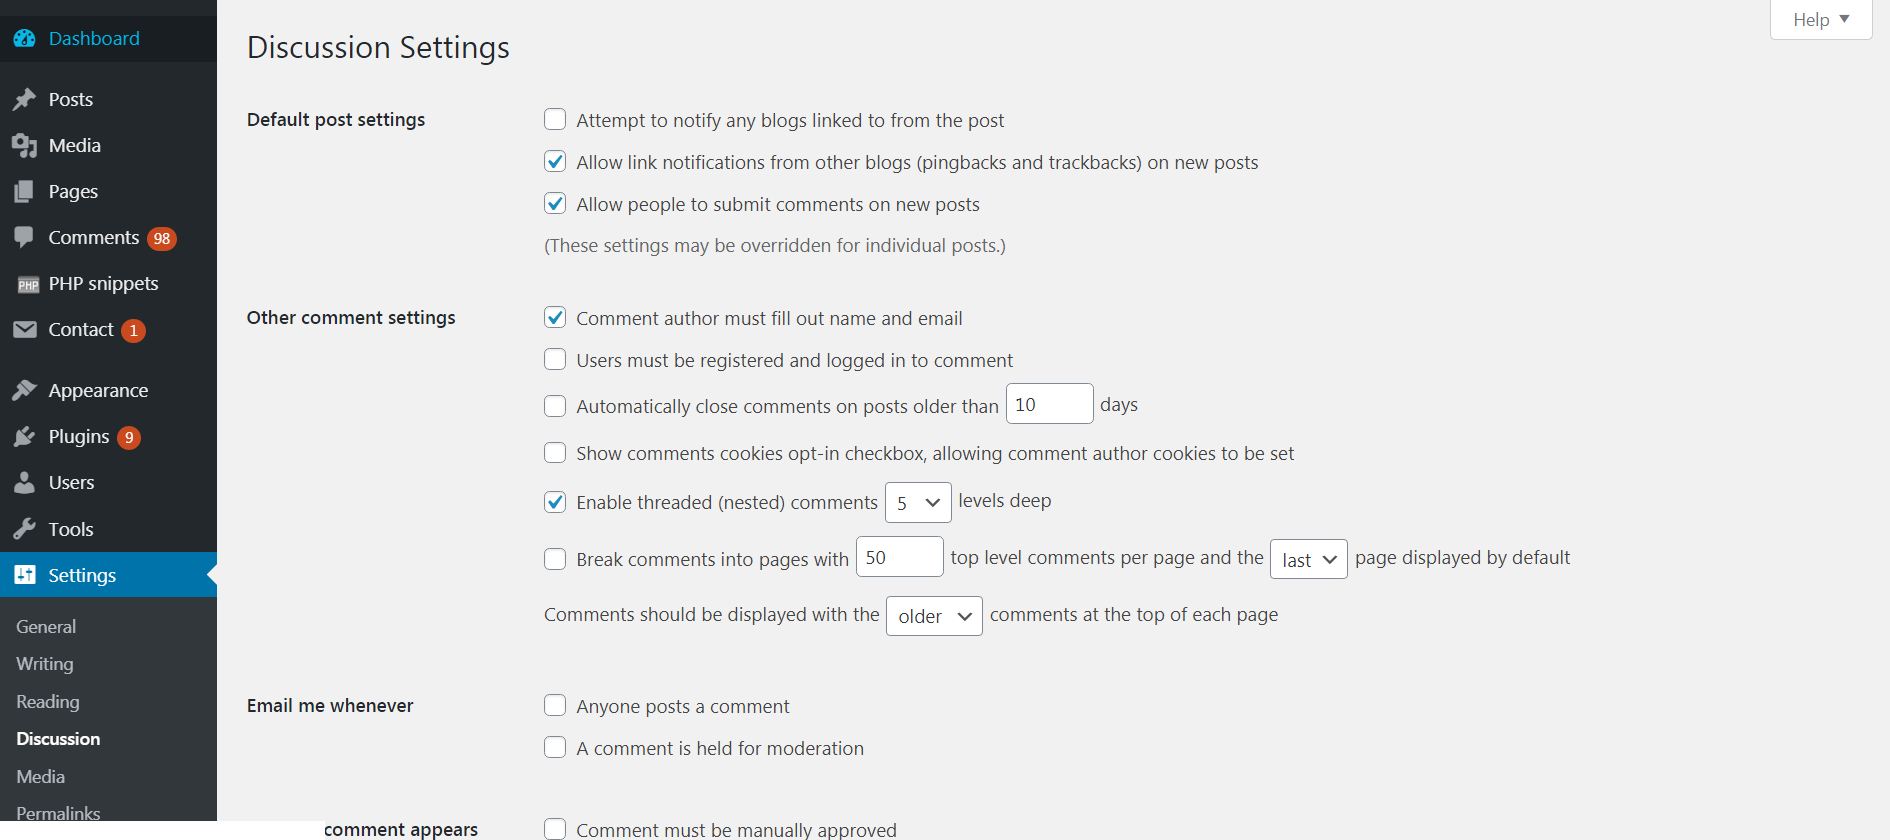
The discussion segment of Settings is responsible for everything related to user interaction in terms of comments made on your site. You can go as far as modifying your posted items in a Wikipedia fashion, allowing everyone to participate in adding content. You can also enable or disable when a given comment is shown and disable any links in the comments. You also can receive an e-mail each time you get a comment. Another interesting thing you can do is enable a needed registration by anyone who leaves a comment on your site, which is good if registered users are your goal.
Media
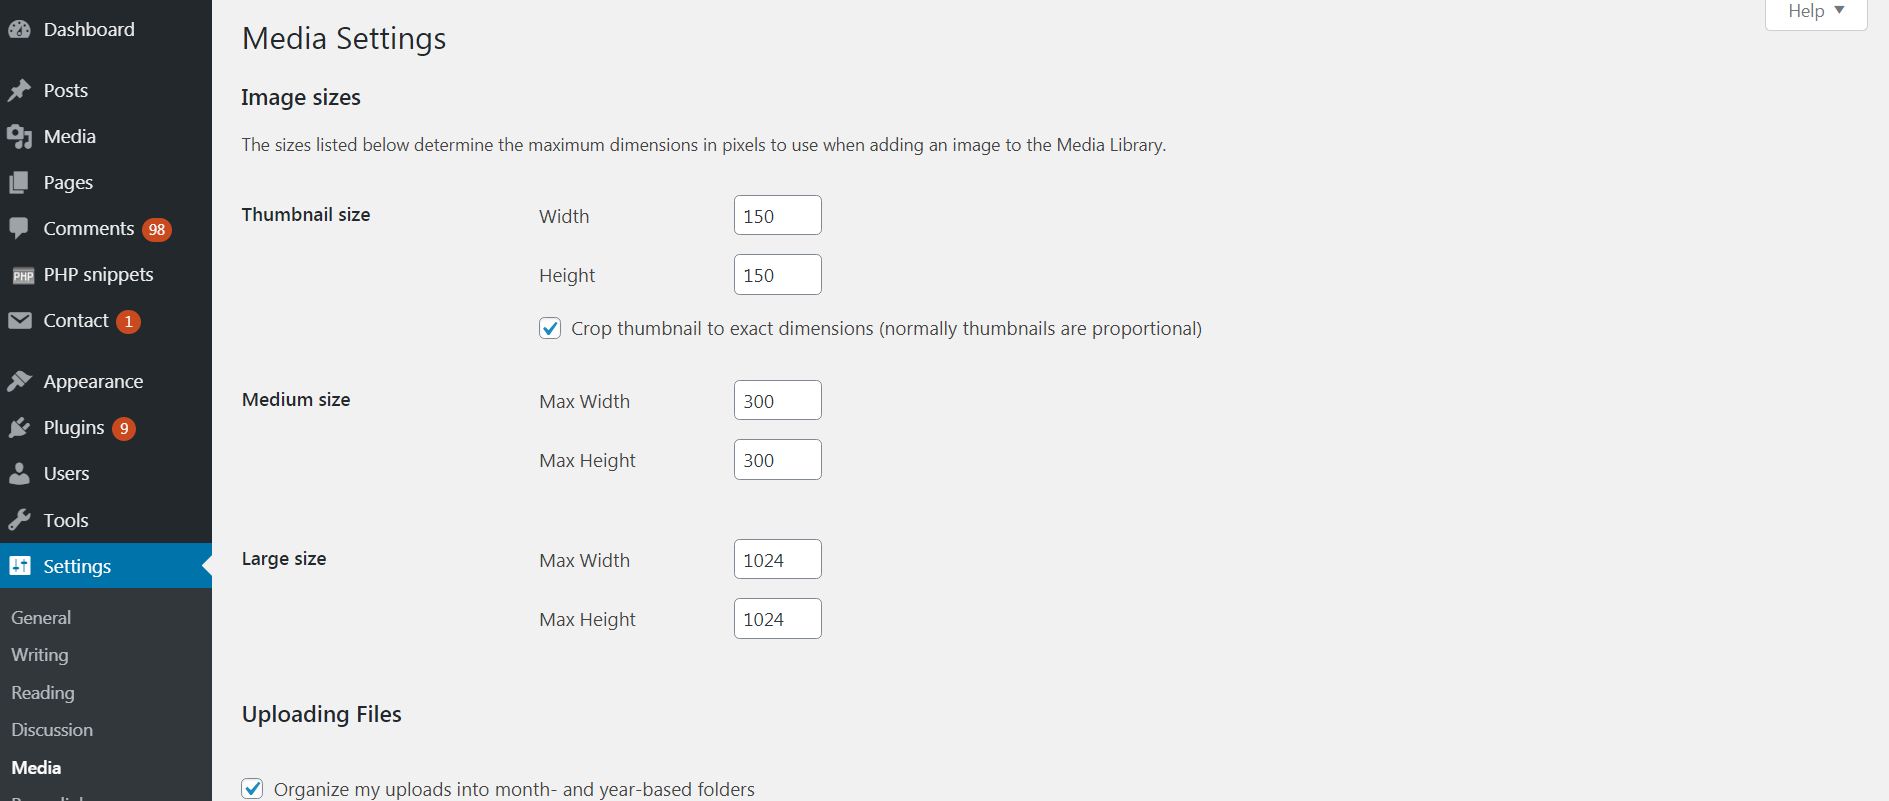
The media settings are responsible mainly for setting how the uploads on the “Add Media” will be organized and how the standard sizes will appear when you choose them. This aspect of WordPress may further be enhanced, just like with anything else with new updates coming in.
Permalinks
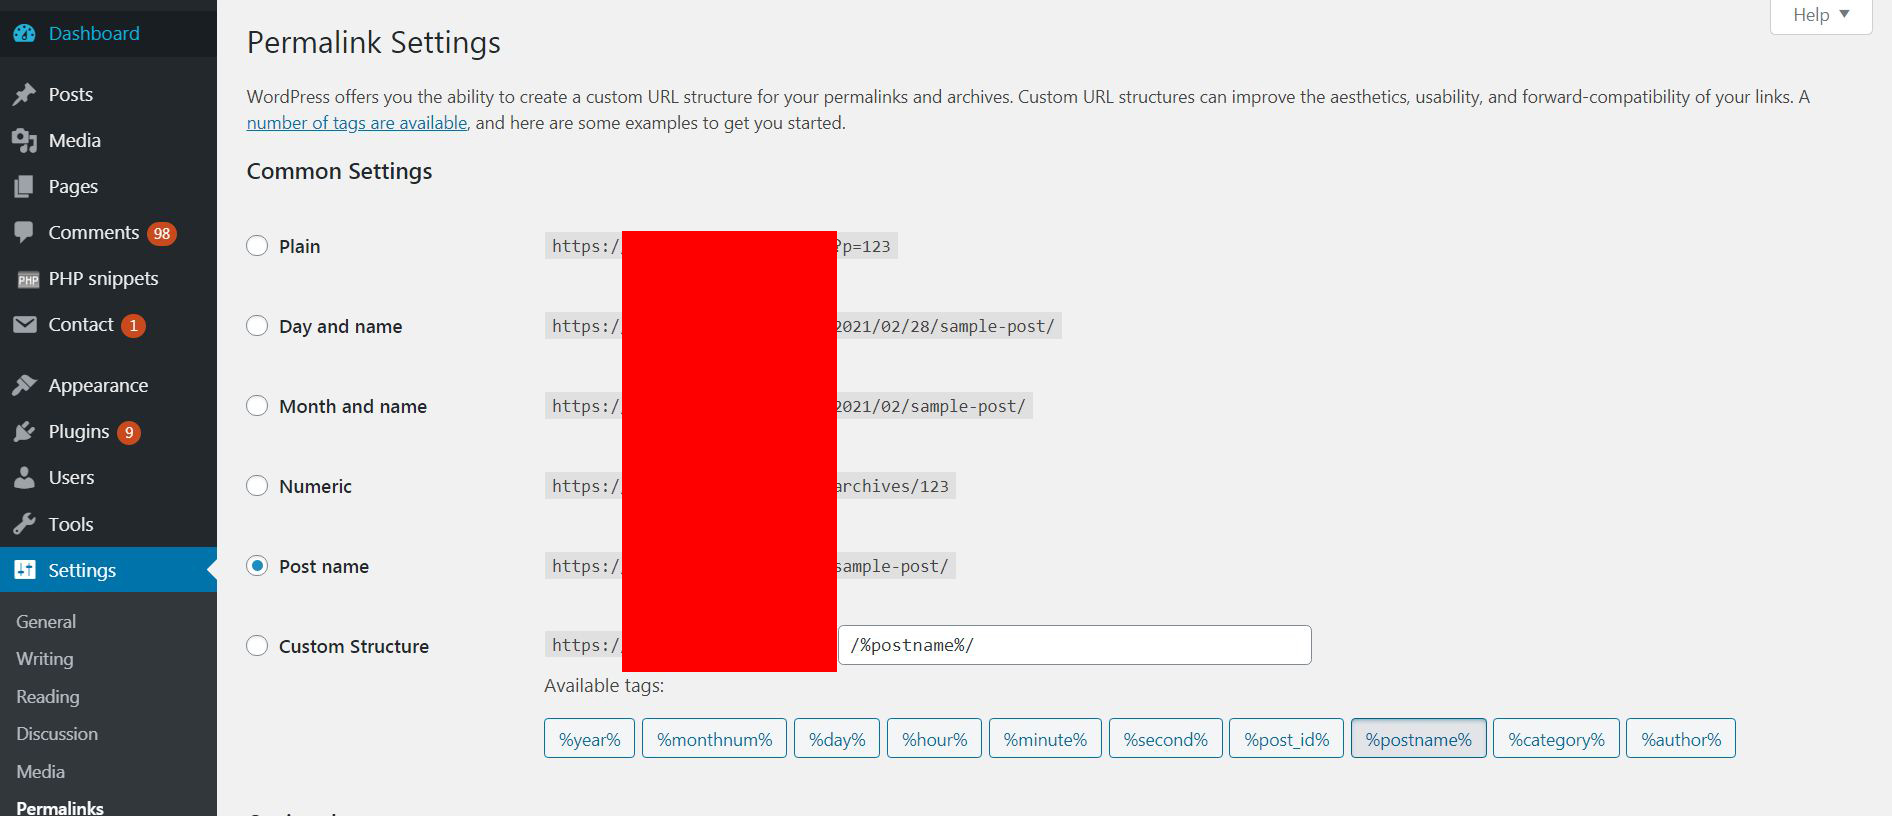
The permalink settings are an important aspect of your website because they are the main method via which your links will appear. They are like the structure of your linking and each time you create content you will be able to see how the new posted items will appear as links, and you can also modify this. You can set the words to be divided by a dash (-) or be written as one word. For the most recommended permalinks logic, we advise following the latest Google Guidelines on permalinks.
Privacy
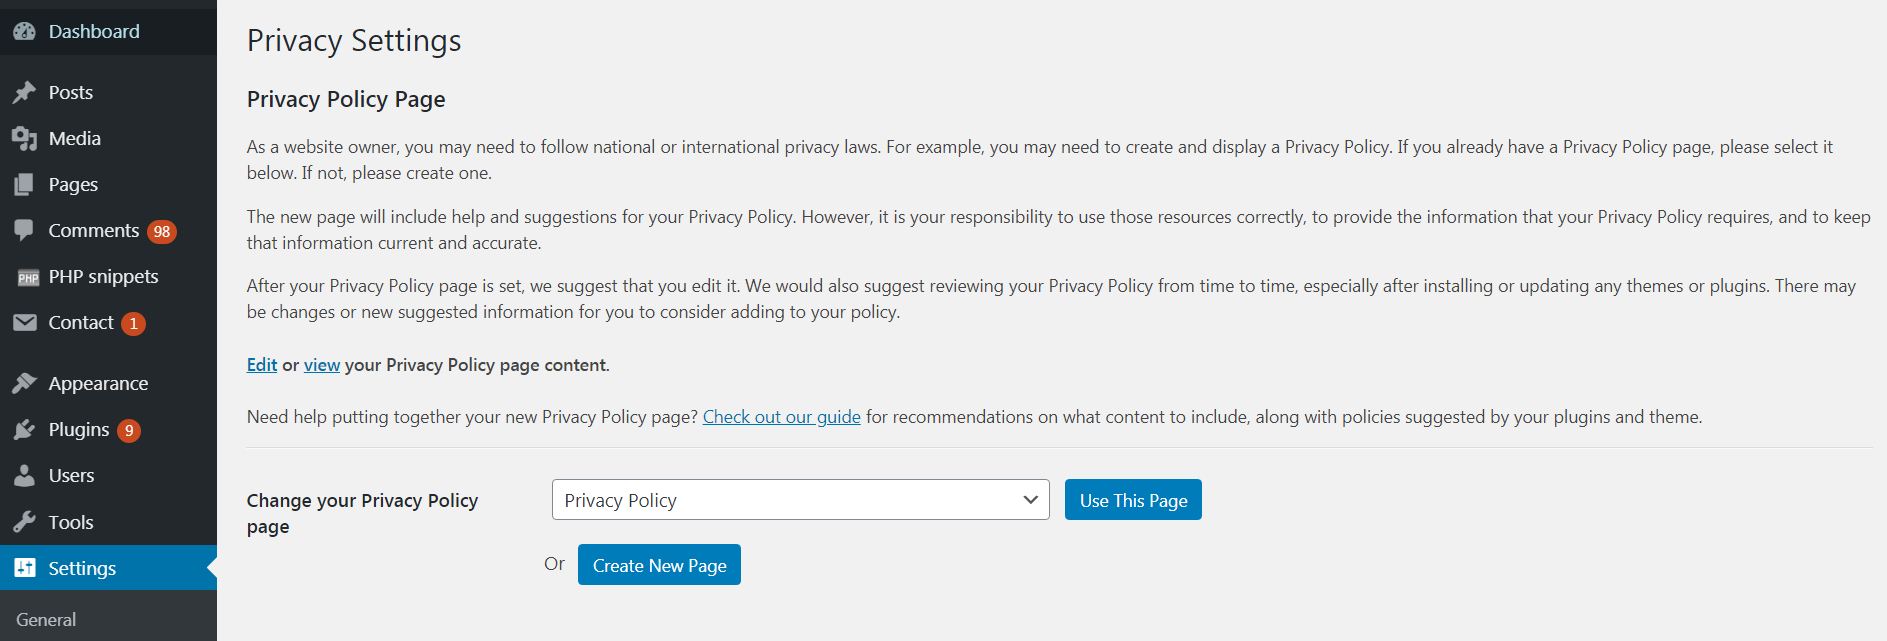
The Privacy preferences of your WordPress site are mainly related to GDPR and how you want your Privacy Policies and end agreements to be set. You can set them to link to a specific page, which helps Google better recognize that your website follows the law and is legitimate. It also helps your users a great deal, because it increases the trust in your content.
Duplicate Post
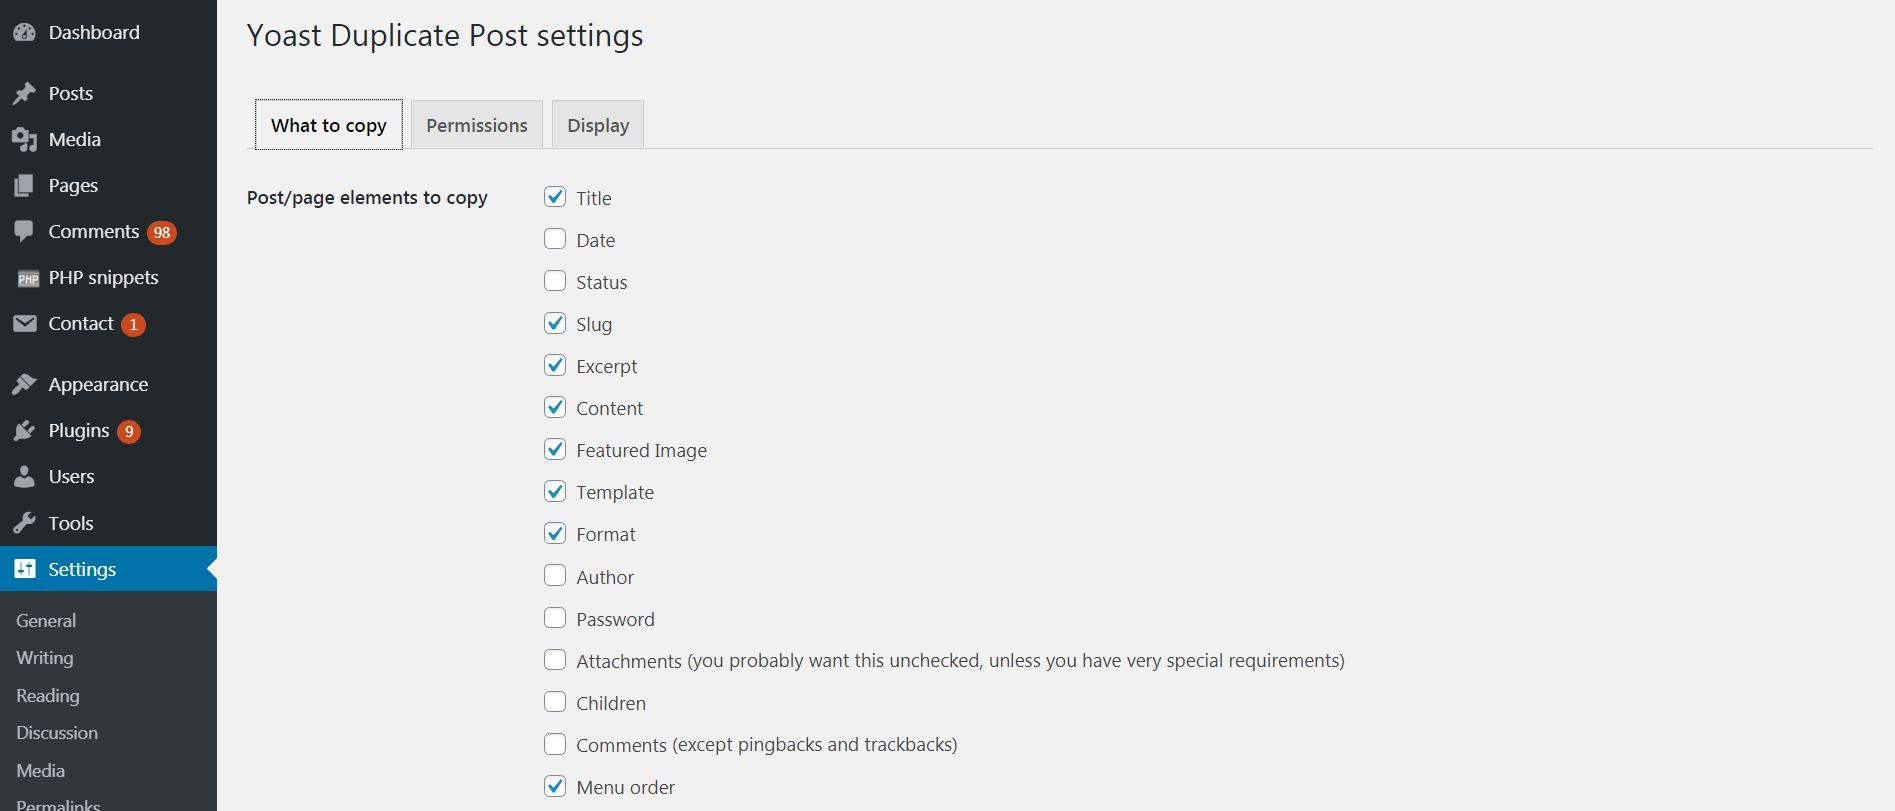
The Duplicate Post settings are the ones that can avoid duplicate links and other issues that can help you detect two of the same posts. But they also contain the ability to choose which elements in a given post you want to be the same and appear everywhere, so you won’t have to add them each time you make a new post. We advise setting the Permissions to modify this content only to the Administrator since they are highly administrative.
Restrict Widgets
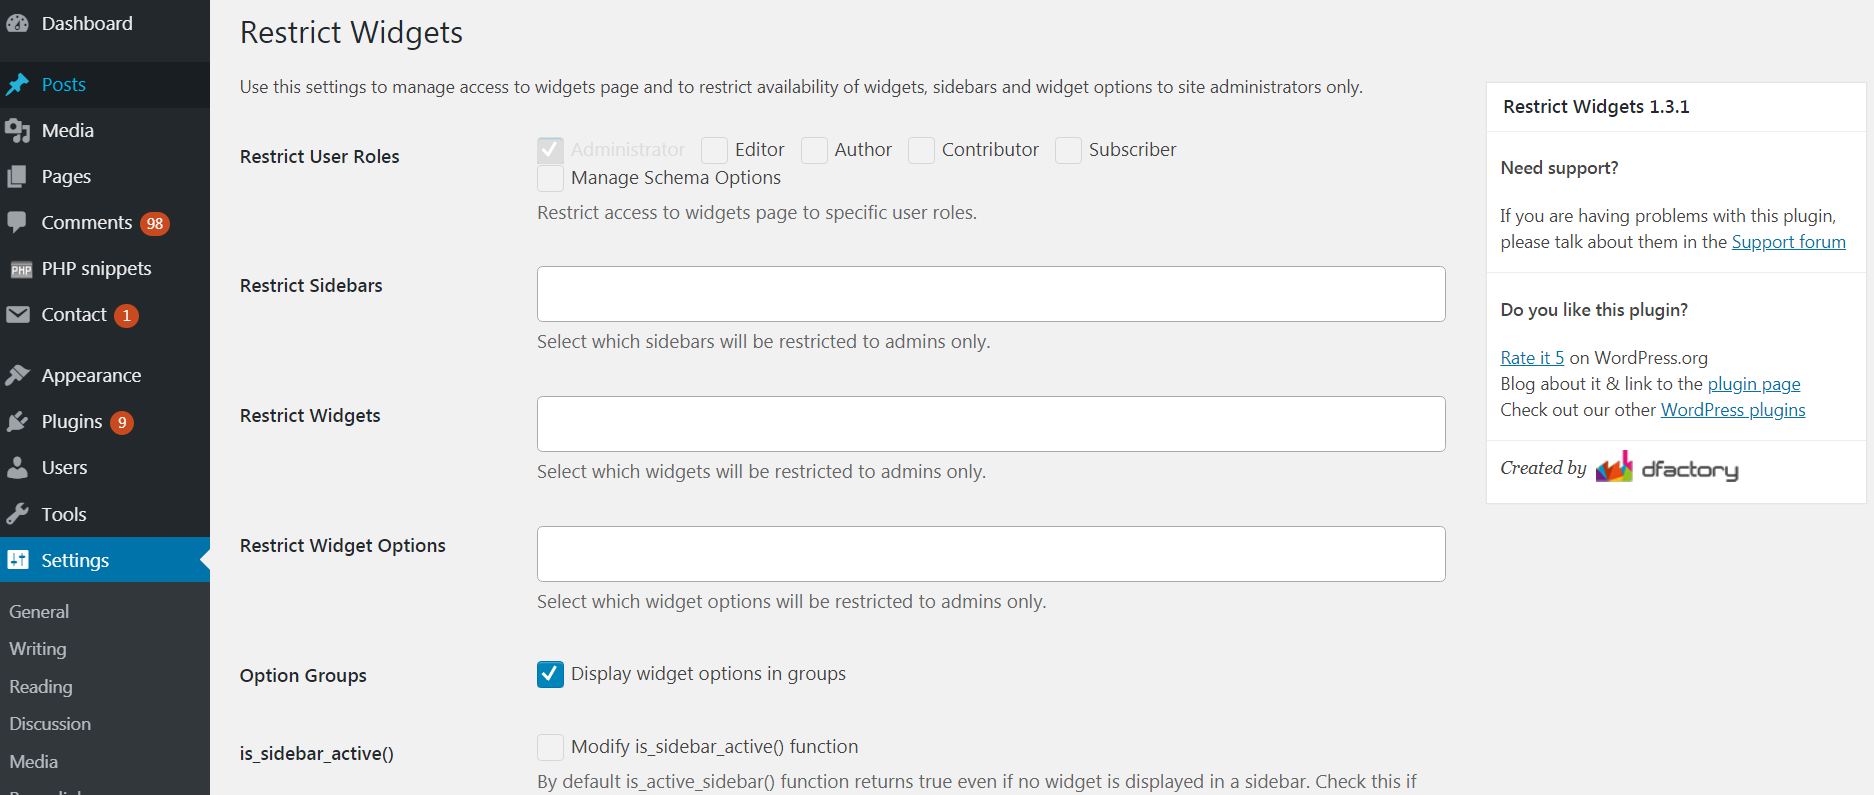
This particular item is very important when you have a lot of widgets on your site or blog and you want to properly manage them. It is also a good tool to use if a lot of people manage the site. You can restrict some specific tools from being added to your site, thus blocking any attempts to add those tools. You can also restrict some specific options of the widget to only be modified by admins, just like the widgets themselves.
WP About Author
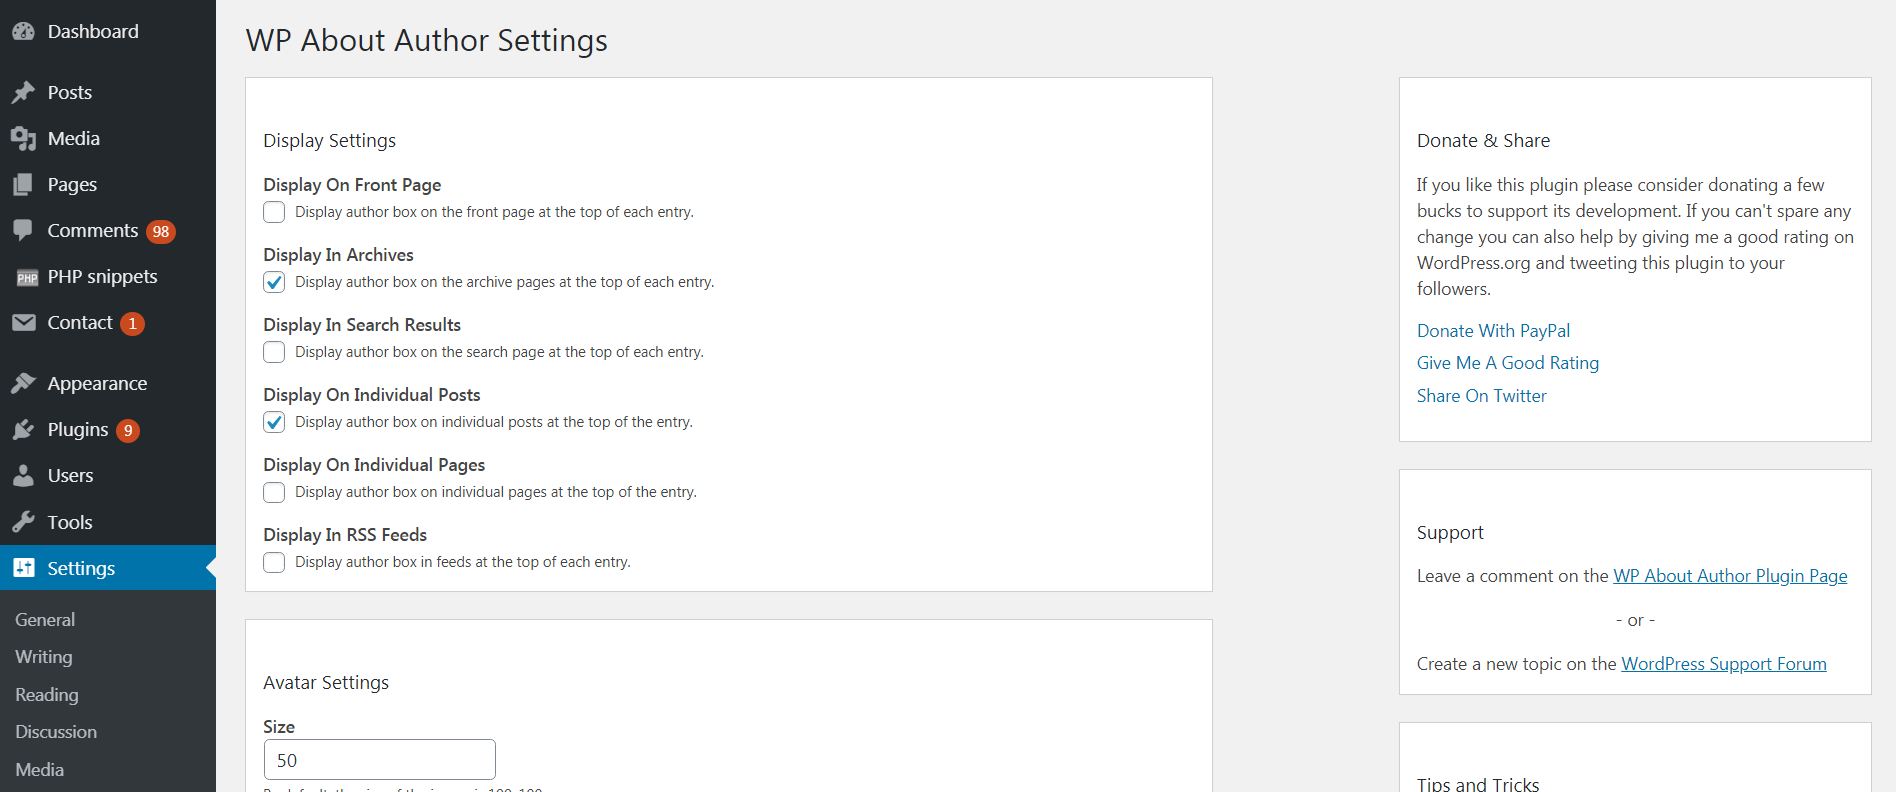
This section is specifically responsible for how you want the users to see the “About me” page of every author or user of your site. It allows you to set and modify what you want to be seen in terms of the avatar size, form, content for the description of the bio, and other deeper details of the user. You can also select the user to appear on your search results when someone searches through your site.
Post Formats
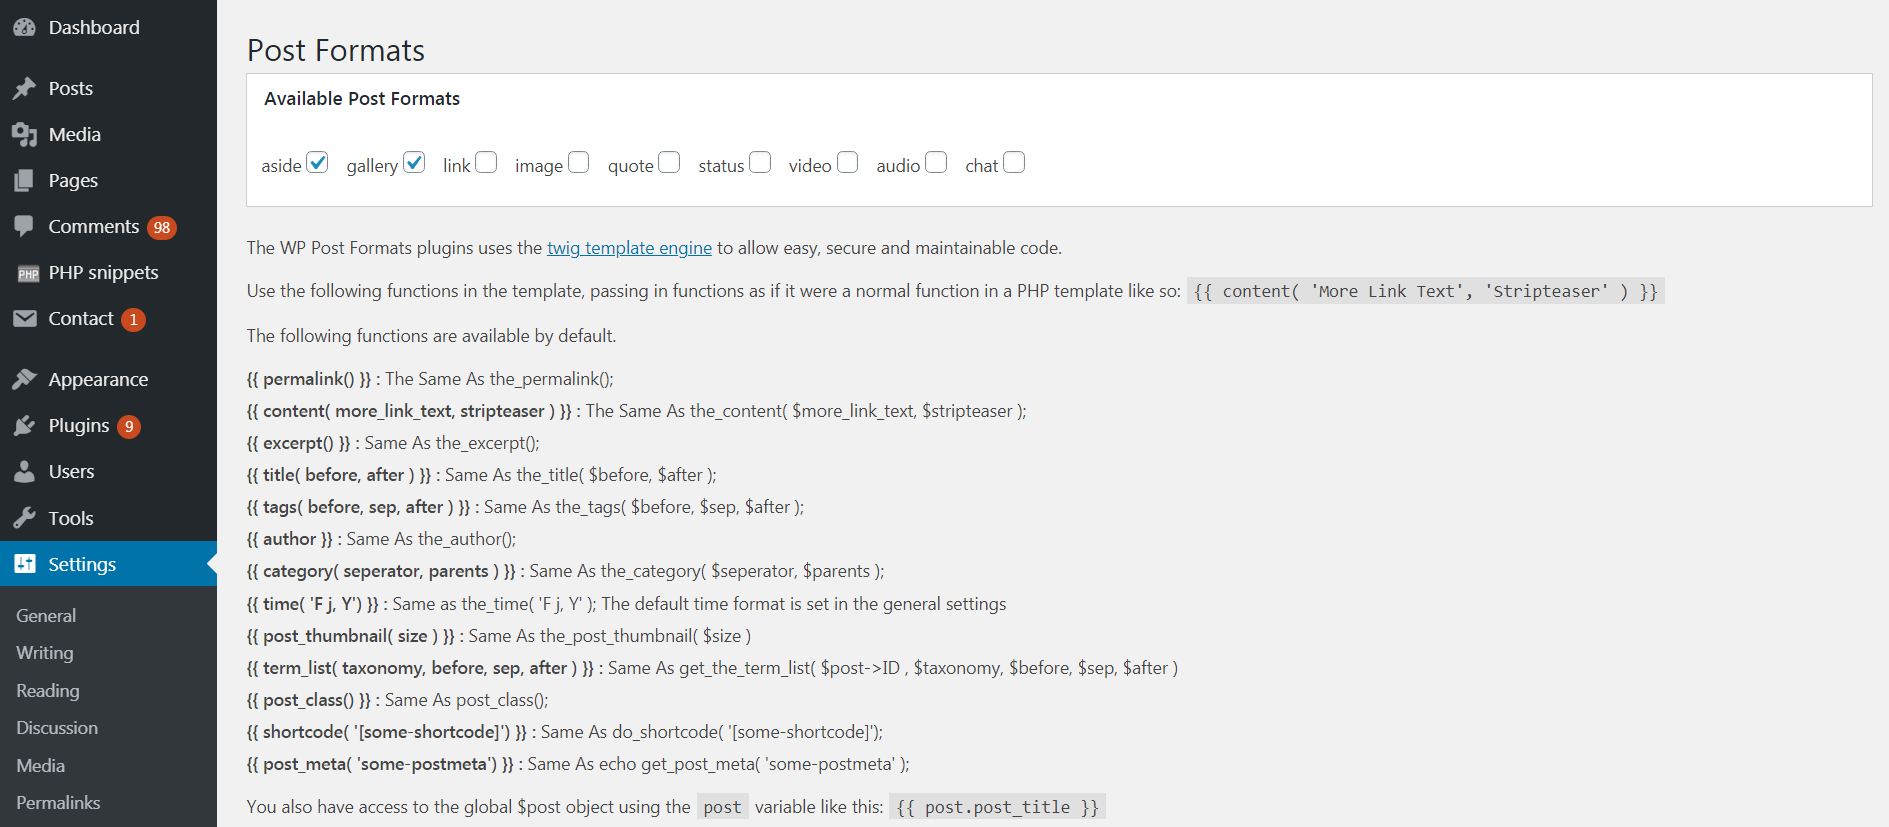
This aspect of Settings is responsible for your content management in terms of code. It allows you to set a custom layout in terms of the code structure of your posted items. For example, if HTML uses head and body as a simple structure, you can modify many different heads, bodies and other structure aspects in terms of code. This is a very good tool if you are a programmer and value a high-level of customization.
WP Rocket
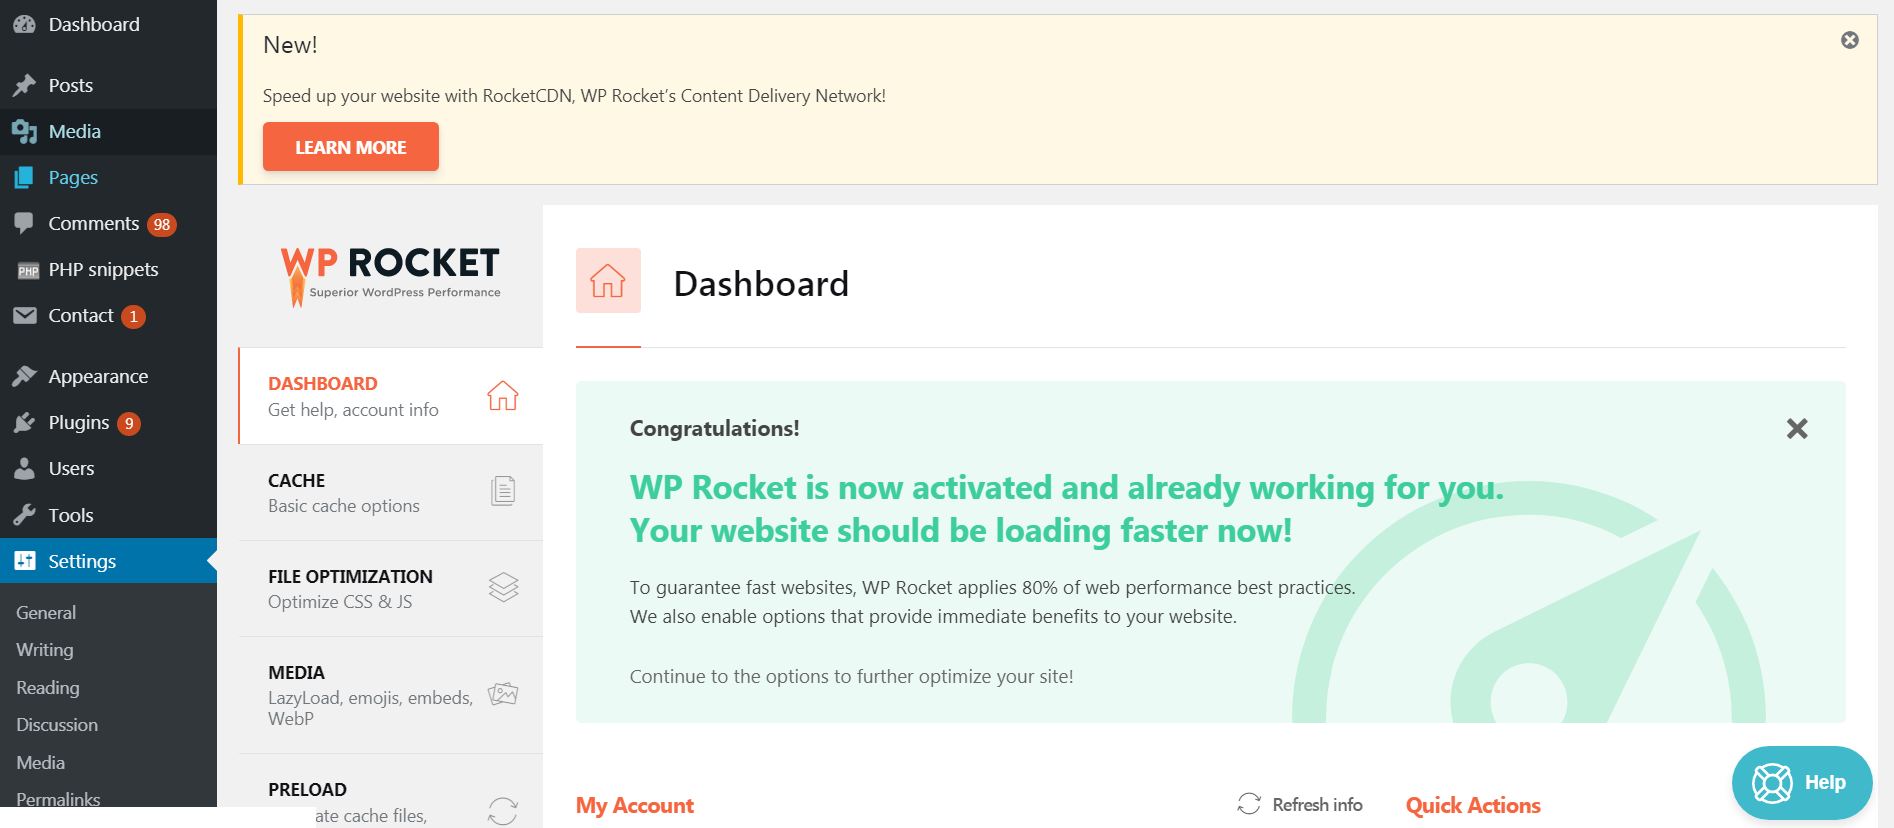
WP Rocket is probably the best and most effective plugin for caching in the world. We strongly recommend adding it, since changing some of its settings can make your website extremely fast. And speed is very important for Google and could result in your site ranking significantly higher than others.
Bonus Guide: How To Add Content to Menu Items in WordPress?
From the dropdown menu, select “Primary Mega Menu (Mega Menu)”. Then, click the “Select” button. To add a page, either check the box to the left of the page in the “Most Recent” tab, or click the “View All” tab to search for it. Finally, click the “Add to Menu” button.
WordPress Menu Items List – The Conclusion
Being one of the best and the most used CMS platform in the world, WordPress is not going anywhere, at least in the near future. And with new updates constantly rolling out, this highly modifiable platform will become even more stable and even easier to use. That is why we have created this guide and we sincerely hope that it is of some help to you.
If you have any particular inquiries or just want to share your opinion on our guide or WordPress in general, please leave us a comment below. Our Howtohosting.guide team of experts will make sure to answer fast and help with whatever we can.