On This Page: [hide]
WordPress is the most popular CMS (content management system) in the world and it is used for the creation of over 30% of all websites in the world. There are different ways that you can install WordPress, but the following article is going to show you how to install WordPress on Nginx, which is an alternative to the more famous Apache server, but it consumes fewer resources. Have in mind that this is a bit more advanced way of installation and non-geeks might experience difficulties in the process.
Also, Read Best Fixes for “ECONNREFUSED – Connection refused by server” Error in FileZilla
Why Choose Nginx and CentOS 7 for Your WordPress Installation?
WordPress as one of the most popular content management systems has been developed to work on a large variety of systems, as long as they meet the minimum system requirements. As of the latest version of WordPress they are the following:
- PHP Version 7.4 or higher
- MySQL 5.6 or MariaDB version 10.1 or higher
- Apache or Nginx web servers are recommended
Right there in the system requirements, there is the recommendation to use Nginx. This is the main contender to the Apache webserver project which is being used by a substantial part of all Internet sites hosted worldwide. The advantages of Nginx are that it’s proven software that has been used to power some of the largest and most visited sites and services. Furthermore, it includes advanced functionality that is built-in in it, as opposed to Apache’s modular design. CentOS 7 is one of the most popular server Linux distributions as it is an open-source and free software repack of Red Hat. Most of web hosting companies use it to power a wide range of hosting services as it is a reliable and well-tested software.
How To Install WordPress on Nginx CentOS 7
To Install WordPress on Nginx you should start with the creation of your virtual host, which is going to be used for your WordPress installation. The configuration for that host can be found in /etc/nginx/conf.d directory. What you will see in this file is the domain name, port, document root, log location, and some additional information. If you assume that the domain name is: wordpress.isgeek.local,
port number: 80. The document root: /usr/share/nginx/wordpress.isgeek.local
and logs: /user/share/nginx/wordpress.isgeek.local/logs you should first create your virtual post, which is achievable with the following code:
vi /etc/nginx/conf.d/wordpress.conf, then, place the content as it follows:
server {
listen 80;
server_name wordpress.itzgeek.local;
access_log /usr/share/nginx/wordpress.isgeek.local/logs/access.log;
error_log /usr/share/nginx/wordpress.isgeek.local/logs/error.log;
location / {
root /usr/share/nginx/wordpress.isgeek.local;
index index.php index.html index.htm;
if (-f $request_filename) {
expires 30d;
break;
}
if (!-e $request_filename) {
rewrite ^(.+)$ /index.php?q=$1 last;
}
}
location ~ .php$ {
fastcgi_pass localhost:9000; # port where FastCGI processes were spawned
fastcgi_index index.php;
fastcgi_param SCRIPT_FILENAME /usr/share/nginx/wordpress.isgeek.local$fastcgi_script_name; # same path as above
fastcgi_param PATH_INFO $fastcgi_script_name;
include /etc/nginx/fastcgi_params;
}
}
Then, you should create your root document directory and the directory for the logs.
To do that, write the following lines of code:
mkdir /usr/share/nginx/wordpress.isgeek.local
mkdir /usr/share/nginx/wordpress.isgeek.local/log
Then you should verify your configuration. To do that write the following line of code: nginex -t and you should see a message saying “syntax is OK, test is successful.”
This means that everything is running smoothly and then you should restart the services. What you have to do next is to type in:
systemctl restart nginx
systemctl restart php-fpm
setenforce 0
Database Creation
The next step is to create the database for your WordPress website. To do that, log into your database, and create your database with the:
CREATE DATABASE WordPress; line of code, then, create your User, which can be done by typing:
CREATE USER ‘wpuser’@’localhost’ IDENTIFIED BY ‘wppassword’;
Change WPuser and WPpassword with your username and password
Grant Permissions
Next, you have to add permissions to your newly created user, to do that write GRANT ALL PRIVILEGES ON wordpress.* TO ‘wpuser’@’localhost’; and then type exit to leave the shell.
WordPress Configuration
After you’ve successfully completed the creation process of your database it’s time to configure your WordPress. To do that download the latest WordPress release, by typing:
wget http://wordpress.org/latest.tar.gz, then you should move the downloaded file to your document root. Use this command: mv wordpress/* /usr/share/nginx/wordpress.isgeek.local
Then, copy the sample-config.php file and make it as wp-config.php with this line of code:
cp /usr/share/nginx/wordpress.itzgeek.local/wp-config-sample.php /usr/share/nginx/wordpress.isgeek.local/wp-config.php
The next step is to edit your config file and add the database information, to do that type in vi /usr/share/nginx/wordpress.itzgeek.local/wp-config.php. When the file is opened, it should look as it follows:
// ** MySQL settings – You can get this info from your web host ** //
/** The name of the database for WordPress */
define(‘DB_NAME’, ‘database_name_here‘);
/** MySQL database username */
define(‘DB_USER’, ‘username_here‘);
/** MySQL database password */
define(‘DB_PASSWORD’, ‘password_here‘);
/** MySQL hostname */
define(‘DB_HOST’, ‘localhost’);
What you should change are the values that we put in bold.
Then, make the Nginx user the admin or owner of the directory where WordPress will be installed. Use the following command:
chown -R nginx:nginx /usr/share/nginx/wordpress.itzgeek.local/
Installation Process
Now you have to open a browser tab and type in wordpress.isgeek.local to log into your website.
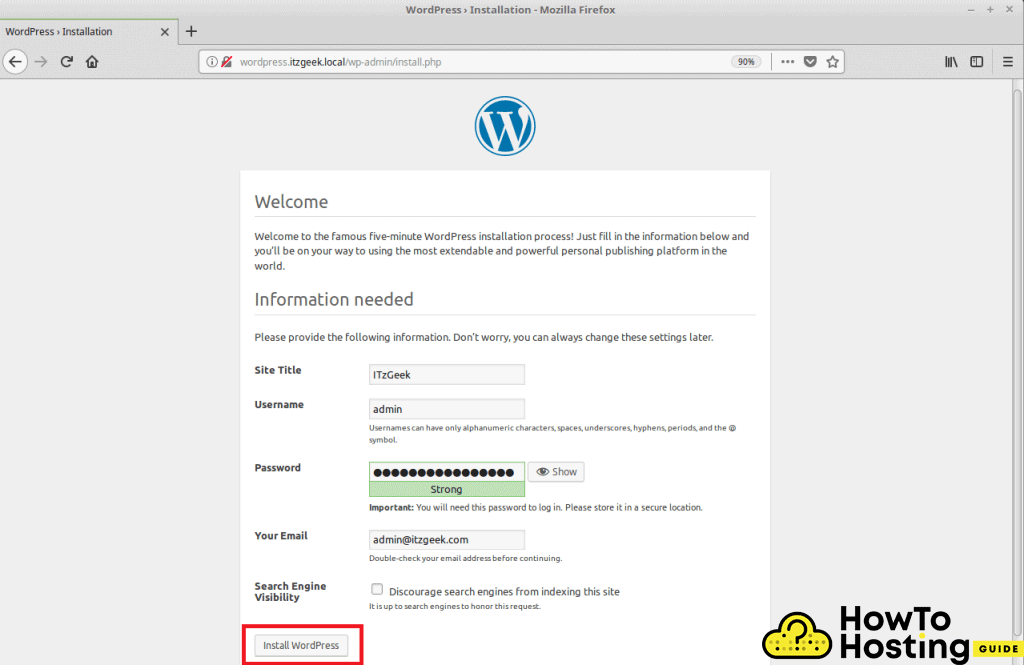
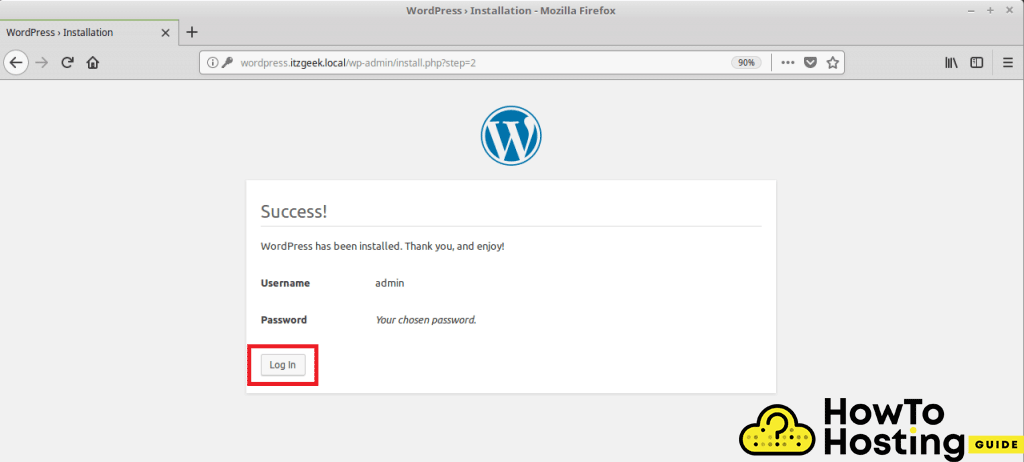
Here you will have to write down your site title, username, password, and your email. These are the details that you are going to use to log into your admin dashboard of WordPress. When you are ready click on the Install WordPress button, and then you will see a success message.
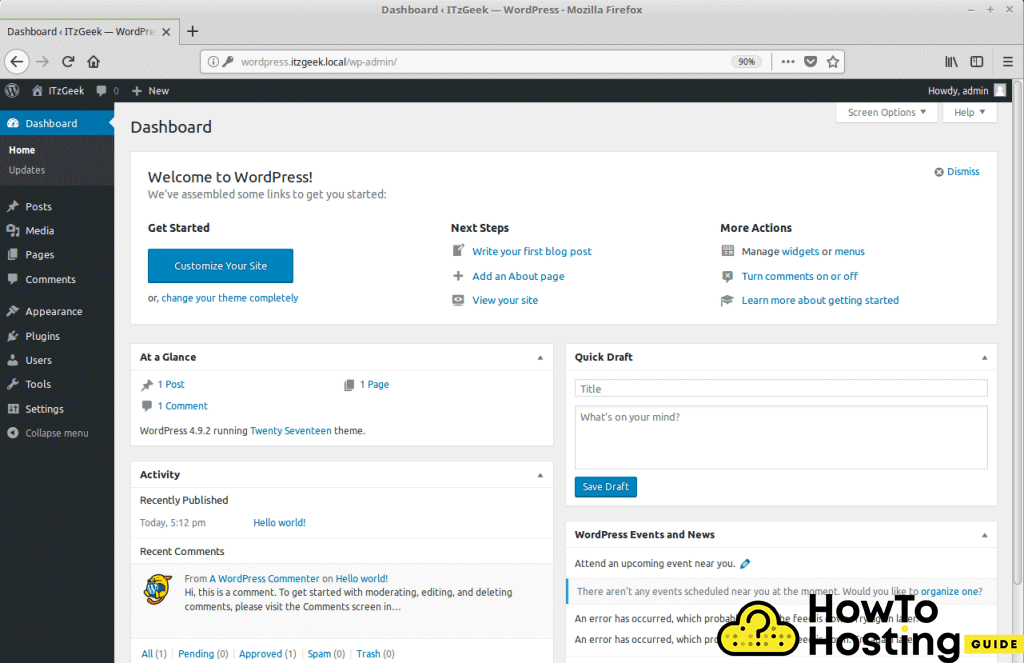
If you click on the login button you will be redirected to the admin login panel where you can log into your WordPress website. And you are done with the whole process.